- 39 -
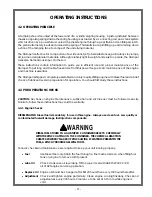
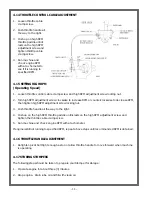
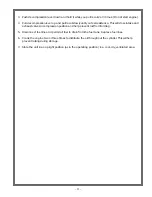
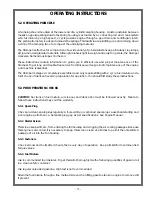
5.4 TO START MACHINE
1.
Check fuel tank, air cleaner, and Stomper lubrication as previously instructed.
2.
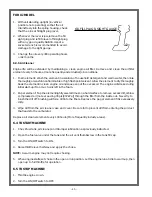
Open the fuel valve under the tank and the air vent thumbscrew in the tank fill cap.
3.
Raise throttle lever halfway and apply the choke.
NOTE:
A warm engine may not require choking.
4.
Pull the starter briskly once or twice to prime the engine, then open choke slightly to prevent flooding
and continue cranking as necessary to start.
5.
When engine starts, set choke in the open or run position. Let the engine run at idle to warm up, then
open up to full throttle for operation.
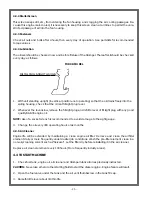
5.5 TO STOP MACHINE
1.
Throttle engine down.
2.
Close the fuel valve shut-off switch.
5.6 OPERATION OF MACHINE
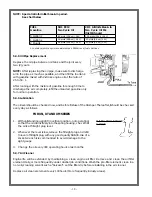
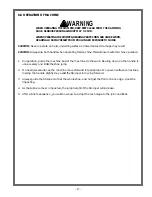
WHEN OPERATING THE STOMPER, KEEP FEET CLEAR FROM THE RAMMING
SHOE. SERIOUS PERSONAL INJURY MAY OCCUR.
WHEN OPERATING THE STOMPER, HEARING PROTECTION SHOULD BE WORN.
HEARING LOSS MAY RESULT FROM PROLONGED EXPOSURE TO NOISE.
CAUTION:
Never operate on hard, unyielding surfaces. Unwarranteed damage may result.
CAUTION
:
Always use both hands when operating this machine. This will ensure safe machine operation.
1.
In operation, guide the machine but let the machine do the work. Bearing down on the handle is
unnecessary and limits the shoe jump.
2.
On nearly level surfaces, the machine moves forward in rapid jumps. On uneven surfaces or inclines,
rocking the handle slightly may assist the Stomper in moving forward.
3.
Always guide the Stomper so that the whole shoe, and not just the front or back edge, does the
impacting.
4.
As the soil becomes compacted, the jump height of the Stomper will increase.
5.
After a brief experience, you will know how to adapt the technique to the job conditions.
WARNING
Summary of Contents for XD836Y
Page 2: ......
Page 8: ......
Page 9: ... 9 1 TECHNICAL DATA ...
Page 11: ... 11 2 HEALTH SAFETY ...
Page 15: ... 15 3 OPERATIONS 2 CYCLE OIL INJECTED ...
Page 22: ......
Page 23: ... 23 4 OPERATIONS DIESEL ...
Page 34: ......
Page 35: ... 35 5 OPERATIONS 2 CYCLE PRE MIX ...
Page 42: ......
Page 43: ... 43 6 OPERATIONS 4 CYCLE GASOLINE ...
Page 50: ......
Page 51: ... 51 7 MAINTENANCE ...
Page 55: ... 55 8 EXPLODED VIEWS WITH PARTS ...
Page 56: ......
Page 60: ... 60 8 3 Gearcase for XN Oil Injected and Pre Mix ...
Page 62: ... 62 8 4 Gearcase for XT Oil Injected and Pre Mix ...
Page 64: ... 64 8 5 Gearcase XM Oil Injected and Pre Mix ...
Page 66: ... 66 8 6 Gearcase XD Diesel ...
Page 68: ... 68 8 7 Gearcase XJ 4 Cycle ...
Page 70: ... 70 8 8 Lower Unit XN Oil Injected and Pre Mix ...
Page 72: ... 72 8 9 Lower Unit XT Oil Injected and Pre Mix ...
Page 74: ... 74 8 10 Lower Unit for XM Oil Injected and Pre Mix ...
Page 76: ... 76 8 11 Lower Unit XD Diesel XJ 4 Cycle ...
Page 78: ... 78 8 12 Engine XN XT XM Oil Injected and Pre Mix ...
Page 80: ... 80 8 13 Engine XD Diesel ...
Page 82: ... 82 8 14 Engine XJ 4 Cycle ...
Page 84: ... 84 8 15 Handle and Fuel Tank XN Oil Injected and Pre Mix ...
Page 86: ... 86 8 16 Handle and Fuel Tank XT XM Oil Injected and Pre Mix ...
Page 88: ... 88 8 17 Handle and Fuel Tank XD Diesel ...
Page 90: ... 90 8 18 Handle and Fuel Tank XJ 4 Cycle ...
Page 92: ... 92 8 19 Shoes for XT XN Oil Injected and Pre Mix ...
Page 94: ... 94 8 20 Decal Identification 55379 Robin 55322 55378 Diesel ...
Page 95: ... 95 8 20 Decal Identification PN 55325 Diesel PN55324 Diesel PN 55053 55156 55377 ...
Page 96: ......

