- 49 -
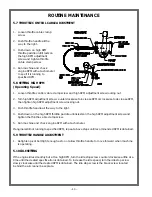
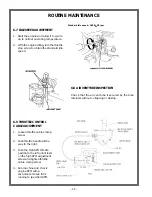
6.10 SETTING HIGH RPM
(Operating Speed)
1.
Loosen throttle control cable clamp screw.
2.
Turn high RPM adjustment screw clockwise to increase RPM or counterclockwise to decrease RPM.
3.
Push throttle handle all the way to the right.
4.
Push the high RPM throttle paddle to the left until is rests on the high RPM adjustment screw and
tighten the throttle cable clamp screw.
5.
Run machine and check engine RPM with a tachometer.
If engine is still not running to specified RPM, repeat above steps until recommended RPM is obtained.
6.11 THROTTLE HANDLE ADJUSTMENT
1.
Retighten pivot bolt tight enough as to not allow throttle handle to move forward when machine
is operating
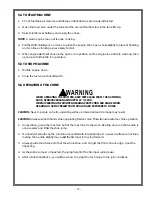
6.12 STORING STOMPERS
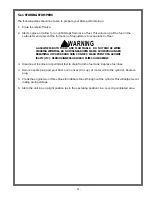
The following steps should be taken to prepare your Stomper for storage:
1.
Close fuel shut-off valve.
2.
Start engine and allow to run until it stops from lack of fuel. This will use up all the fuel in the
carburetor and prevent the formation of deposits due to evaporation of fuel.
GASOLINE IS BOTH TOXIC AND FLAMMABLE. DO NOT SMOKE WHILE
WORKING WITH FUEL. DO NOT USE NEAR OPEN FLAME. AVOID PROLONGED
BREATHING OF VAPORS AND SKIN CONTACT. FLASH POINT OF GASOLINE
IS 40°F (4°C). SERIOUS ILLNESS OR LOSS OF LIFE COULD RESULT.
3.
Disconnect fuel line and permit all fuel to drain from the fuel tank. Replace fuel lines.
4.
Remove spark plug and pour 60cc or 2 ounces (1/4 cup) of motor oil into the cylinder. Replace
plug.
5.
Crank the engine two or three times to distribute the oil throughout the cylinder. This will help prevent
rusting during storage.
6.
Store the unit in an upright position (as in the operating position) in a cool, dry, ventilated area.
WARNING
Summary of Contents for XD836Y
Page 2: ......
Page 8: ......
Page 9: ... 9 1 TECHNICAL DATA ...
Page 11: ... 11 2 HEALTH SAFETY ...
Page 15: ... 15 3 OPERATIONS 2 CYCLE OIL INJECTED ...
Page 22: ......
Page 23: ... 23 4 OPERATIONS DIESEL ...
Page 34: ......
Page 35: ... 35 5 OPERATIONS 2 CYCLE PRE MIX ...
Page 42: ......
Page 43: ... 43 6 OPERATIONS 4 CYCLE GASOLINE ...
Page 50: ......
Page 51: ... 51 7 MAINTENANCE ...
Page 55: ... 55 8 EXPLODED VIEWS WITH PARTS ...
Page 56: ......
Page 60: ... 60 8 3 Gearcase for XN Oil Injected and Pre Mix ...
Page 62: ... 62 8 4 Gearcase for XT Oil Injected and Pre Mix ...
Page 64: ... 64 8 5 Gearcase XM Oil Injected and Pre Mix ...
Page 66: ... 66 8 6 Gearcase XD Diesel ...
Page 68: ... 68 8 7 Gearcase XJ 4 Cycle ...
Page 70: ... 70 8 8 Lower Unit XN Oil Injected and Pre Mix ...
Page 72: ... 72 8 9 Lower Unit XT Oil Injected and Pre Mix ...
Page 74: ... 74 8 10 Lower Unit for XM Oil Injected and Pre Mix ...
Page 76: ... 76 8 11 Lower Unit XD Diesel XJ 4 Cycle ...
Page 78: ... 78 8 12 Engine XN XT XM Oil Injected and Pre Mix ...
Page 80: ... 80 8 13 Engine XD Diesel ...
Page 82: ... 82 8 14 Engine XJ 4 Cycle ...
Page 84: ... 84 8 15 Handle and Fuel Tank XN Oil Injected and Pre Mix ...
Page 86: ... 86 8 16 Handle and Fuel Tank XT XM Oil Injected and Pre Mix ...
Page 88: ... 88 8 17 Handle and Fuel Tank XD Diesel ...
Page 90: ... 90 8 18 Handle and Fuel Tank XJ 4 Cycle ...
Page 92: ... 92 8 19 Shoes for XT XN Oil Injected and Pre Mix ...
Page 94: ... 94 8 20 Decal Identification 55379 Robin 55322 55378 Diesel ...
Page 95: ... 95 8 20 Decal Identification PN 55325 Diesel PN55324 Diesel PN 55053 55156 55377 ...
Page 96: ......

