Getting Started
Procedure 7: Connect Power
Getting Started with Spirent TestCenter
|
39
DC Power Button Operation for the SPT-C50
The power button on the SPT-C50 is implemented as a momentary switch. It does not
physically change to a different position in the on and off states. The switch on the SPT-
C50 requires only a momentary activation to switch it on or off.
•
To turn the DC power on to the appliance, press the POWER button. The button itself
will be illuminated blue when the appliance is receiving DC power.
•
To turn the DC power off to the appliance, press the POWER button. The button will
no longer illuminate blue when the appliance is not receiving DC power.
DC Power Button Operation for the SPT-N4U, SPT-N11U, and SPT-N12U
The power button on the SPT-N4U, SPT-N11U, and SPT-N12U is implemented as a
membrane switch. It does not physically change to a different position in the on and off
states. The membrane switch requires only a momentary activation to switch it on or off.
•
To turn the DC power on to the chassis, press the POWER button inward. The
POWER LED will be green when the chassis is receiving DC power.
•
To turn the DC power off to the chassis, press the POWER button inward. This
initiates a graceful shutdown of chassis and all modules. The POWER LED will be
off when the chassis is not receiving DC power.
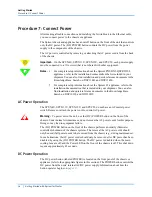
The POWER LED located on the front panel displays the DC power setting of the chassis.
This LED is green when the chassis is receiving DC power. The LED is off when the
chassis is not receiving DC power.
Warning:
The status of the POWER LED does not necessarily mean that AC power to
the chassis is on or off. For this reason, be sure to check the status of AC and DC power
before performing maintenance on the chassis. Remove or attach the power cord to control
AC power. Refer to the warning on
under
Refer to
Hot Swap
in the
Spirent Hardware Reference
for information about hot swapping
test modules with the chassis AC and DC power turned on. See
Reference (DOC10031)” on page 7
.


