5-46
2. Recording System Check
Note:
Perform “Playback System Check” before this check.
1)
Playback the BIST check tape.
2)
Input the following data in order.
Note:
Press the PAUSE button each time set the data.
3)
While keep the HOLD switch of the adjustment remote
commander at ON (SERVICE) position, eject the BIST check
tape and insert a tape for recording in place of the tape.
4)
Select page: 0, address: 01, and set data: 01.
5)
Only for AEP and UK model, select page: D, address: 14, after
memorizing the data, set the bit value of bit 0 to “1”, and then
press the PAUSE button. (Refer to “4-3, 3. Bit value
discrimination” of “5-4. Service Mode”).
6)
Select page: D, address: 15, after memorizing the data, set data:
07 and then press the PAUSE button.
7)
While keep the HOLD switch of the adjustment remote
commander at ON (SERVICE) position, set to the VTR
recording mode. (Use the wireless remote commander.)
8)
Select page: 4, address: 11, and set data: 02, then press the
PAUSE button.
9)
Select page: 4, address: 13, and set data: 02, then press the
PAUSE button.
10) Select page: 4, address: 11, and set data: 00, then press the
PAUSE button.
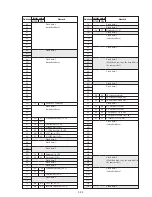
IC1701 (D1) Recording System Check
11) Select page: 3, address: 01, and set data: 0D, then press the
PAUSE button.
12) Select page: 4, address: 1C, and set data: FF, then press the
PAUSE button.
13) Select page: 4, address: 11, and set data: 04, then press the
PAUSE button.
14) Select page: 4, address: 11, and set data: 00, then press the
PAUSE button.
15) Select page: 4, address: 13, and set data: 03, then press the
PAUSE button.
(The data will be automatically return to “00”.)
16) When the IC1601 (U1)
→
IC1701 (D1) recording system is
normal, following data will be displayed in page: 4, address:
14 and 15.
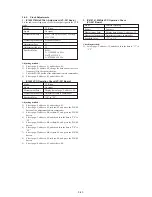
Page
4
4
4
4
4
4
4
4
4
4
4
4
Address
41
0F
0E
40
0F
40
40
0F
40
40
0F
40
Data
01
02
01
01
0A
00
01
0E
00
01
8E
00
Page
4
4
Address
15
14
Data
C6 (NTSC), F8 (PAL)
90 (NTSC), 3E (PAL)
3-5-4.
BIST Check
1. Playback System Check
1)
Set the POWER switch to VTR (or PLAYER) position.
2)
Connect the adjustment remote commander and set the HOLD
switch to HOLD (SERVICE) position.
3)
Playback the BIST check tape. (XH5-6 (NTSC), XH5-6P
(PAL))
IC1701 (D1) Playback System Check
4)
Select page: 4, address: 11, and set data: 04, then press the
PAUSE button.
5)
Select page: 4, address: 11, and set data: 00, then press the
PAUSE button.
6)
Select page: 4, address: 13, and set data: 03, then press the
PAUSE button.
(The data will be automatically return to “00”.)
7)
When the IC1701 (D1)
→
IC1601 (U1) playback system is
normal, following data will be displayed in page: 4, address:
14 and 15.
8)
When the IC1701 (D1)
→
IC3501 (INDI) playback system is
normal, following data will be displayed in page: 4, address:
16 and 17.
9)
When the IC1701 (D1)
→
IC1901 (A1) playback system is
normal, following data will be displayed in page: 4, address:
18 and 19.
IC1901 (A1) Playback System Check
10) Select page: 4, address: 11, and set data: 10, then press the
PAUSE button.
11) Select page: 4, address: 11, and set data: 00, then press the
PAUSE button.
12) Select page: 4, address: 13, and set data: 04, then press the
PAUSE button.
(The data will be automatically return to “00”.)
13) When the IC1901 (A1) playback system is normal, following
data will be displayed in page: 4, address: 14 and 15.
14) Select page: 4, address: 11, and set data: 08, then press the
PAUSE button.
15) Select page: 4, address: 13, and set data: 07, then press the
PAUSE button.
(The data will be automatically return to “00”.)
16) Select page: 4, address: 11, and set data: 00, then press the
PAUSE button.
17) Perform “Recording System Check”.
Page
4
4
Address
15
14
Data
E5 (NTSC), 27 (PAL)
11 (NTSC), CA (PAL)
Page
4
4
Address
17
16
Data
C0 or BA (NTSC), DC (PAL)
6E or 04 (NTSC), 44 (PAL)
Page
4
4
Address
19
18
Data
33 or B2 (NTSC), A2 (PAL)
59 or 19 (NTSC), 03 (PAL)
Page
4
4
Address
15
14
Data
7B (NTSC), CC (PAL)
B5 (NTSC), C0 (PAL)
Summary of Contents for Handycam Vision DCR-TRV5
Page 10: ...1 2 ...
Page 11: ...1 3 ...
Page 12: ...1 4 ...
Page 13: ...1 5 ...
Page 14: ...1 6 ...
Page 15: ...1 7 ...
Page 16: ...1 8 ...
Page 17: ...1 9 ...
Page 18: ...1 10 ...
Page 19: ...1 11 ...
Page 20: ...1 12 ...
Page 21: ...1 13 ...
Page 22: ...1 14 ...
Page 23: ...1 15 ...
Page 24: ...1 16 ...
Page 25: ...1 17 ...
Page 26: ...1 18 ...
Page 27: ...1 19 ...
Page 28: ...1 20 ...
Page 29: ...1 21 ...
Page 30: ...1 22 ...
Page 31: ...1 23 ...
Page 32: ...1 24 ...
Page 33: ...1 25 ...
Page 34: ...1 26 ...
Page 35: ...1 27 ...
Page 36: ...1 28 ...
Page 37: ...1 29E ...
Page 45: ...DCR TRV5 TRV5E SECTION 3 BLOCK DIAGRAMS 3 1 OVERALL BLOCK DIAGRAM 1 3 1 3 2 3 3 3 4 ...
Page 46: ...DCR TRV5 TRV5E 3 2 OVERALL BLOCK DIAGRAM 2 3 6 3 7 3 8 DCR TRV5 TRV5E ...
Page 47: ...DCR TRV5 TRV5E 3 3 POWER BLOCK DIAGRAM 3 9 3 10 3 11 3 12 3 13E ...
Page 71: ...DCR TRV5 TRV5E 4 75 4 76 4 77 AUDIO PROCESSOR AU 204 ...
Page 73: ...DCR TRV5 TRV5E 4 81 4 82 AUDIO PROCESS IR TRANSMMITER MA 330 ...
Page 107: ...ARRANGEMENT DIAGRAM FOR ADJUSTMENT PARTS VC 207 board SIDE A VC 207 board SIDE B 5 26 ...
Page 131: ...ARRANGEMENT DIAGRAM FOR ADJUSTMENT PARTS VC 207 board SIDE A VC 207 board SIDE B 5 52 ...


