


1-4
BEFORE USING THE MACHINE
Contents
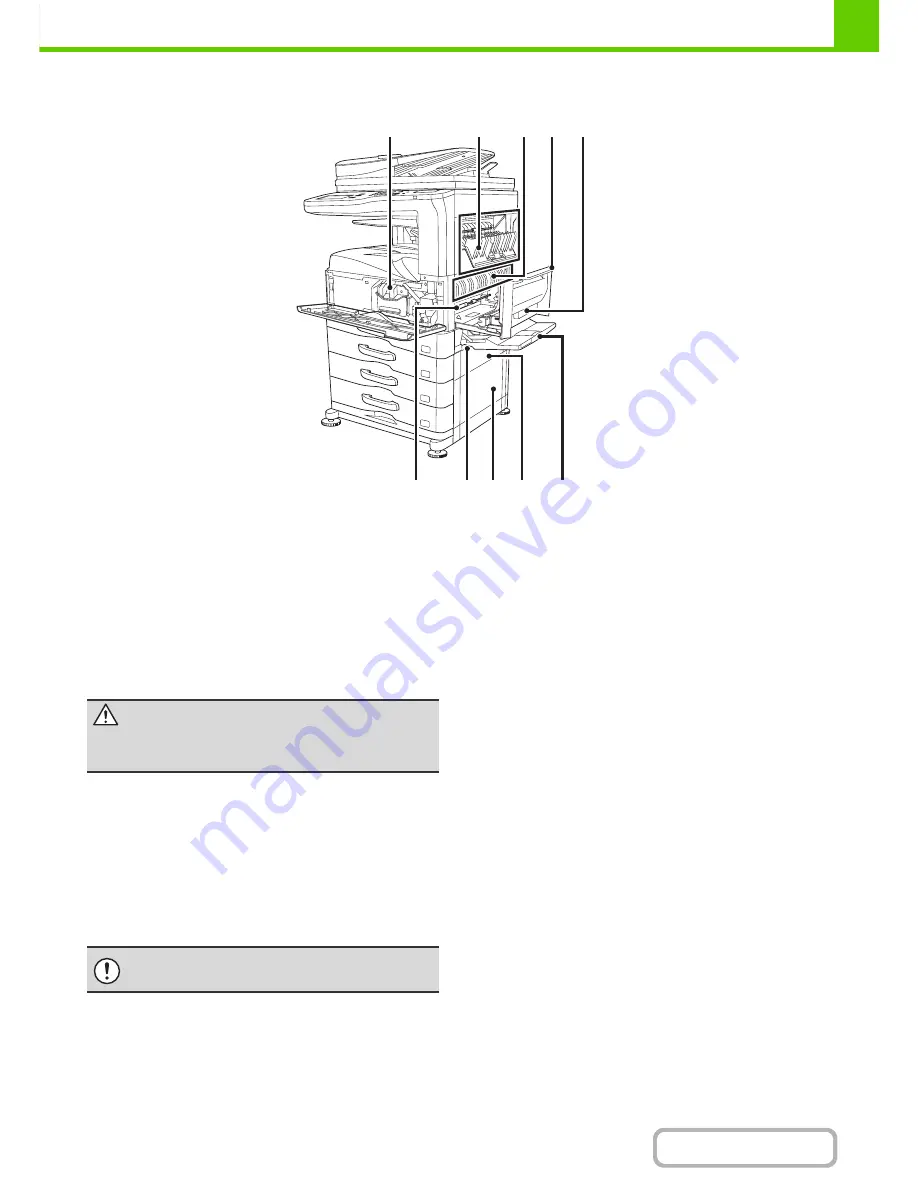
INTERIOR
(15) Toner cartridges
This holds toner for printing. The toner cartridge must be
replaced when indicated on the operation panel.
☞
REPLACING THE TONER CARTRIDGES
(page 1-51)
(16) Paper reversing section cover
This is used when 2-sided printing is performed. Open
this cover to remove a paper misfeed.
(17) Fusing unit
Heat is applied here to fuse the transferred image onto
the paper.
(18) Right side cover
Open this cover to remove a misfeed.
(19) Right side cover release lever
To remove a paper misfeed, pull and hold this lever up to
open the right side cover.
(20) Photoconductive drum
This drum has a photoconductive coating on its surface.
The images are formed on top of this photoconductive
surface. (The photoconductive coating is green in color.)
(21) Handle
Pull this out and grasp it when moving the machine.
(22) Right cover of paper drawer
(when a paper drawer is installed)
Open this to remove a paper misfeed in tray 2, tray 3 or
tray 4.
(23) Paper tray right side cover
Open this to remove a paper misfeed in tray 1.
(24) Bypass tray
Use this tray to feed paper manually.
When loading a large sheet of paper, be sure to pull out
the bypass tray extension.
☞
LOADING PAPER IN THE BYPASS TRAY
(page 1-33)
(15)
(16)
(17) (18)
(23)
(24)
(22)
(21)
(20)
(19)
Caution
The fusing unit is hot. Take care not to burn yourself
when removing a paper misfeed.
Do not touch it or damage it.
If this is not observed, image faults will occur.
Summary of Contents for MX-M264N
Page 8: ...Assemble output into a pamphlet Create a stapled pamphlet Staple output Create a blank margin ...
Page 11: ...Conserve Print on both sides of the paper Print multiple pages on one side of the paper ...
Page 35: ...Organize my files Delete a file Delete all files Periodically delete files Change the folder ...
Page 256: ...3 19 PRINTER Contents 4 Click the Print button Printing begins ...