P3F - Pakscan Master Station Technical Manual
22 of 82
Publication S703E V1.1
Issue 06/09
5.3 Adjusting the Network Settings of the Laptop / PC
Ensure nothing is connected to the Ethernet port of the laptop / PC.
Open the Control Panel and select Network Connections.
In the ‘Network Connections’ window, double-click on the ‘LAN or High Speed Internet’ icon
and the ‘Local Area Connection Status’ window will open.
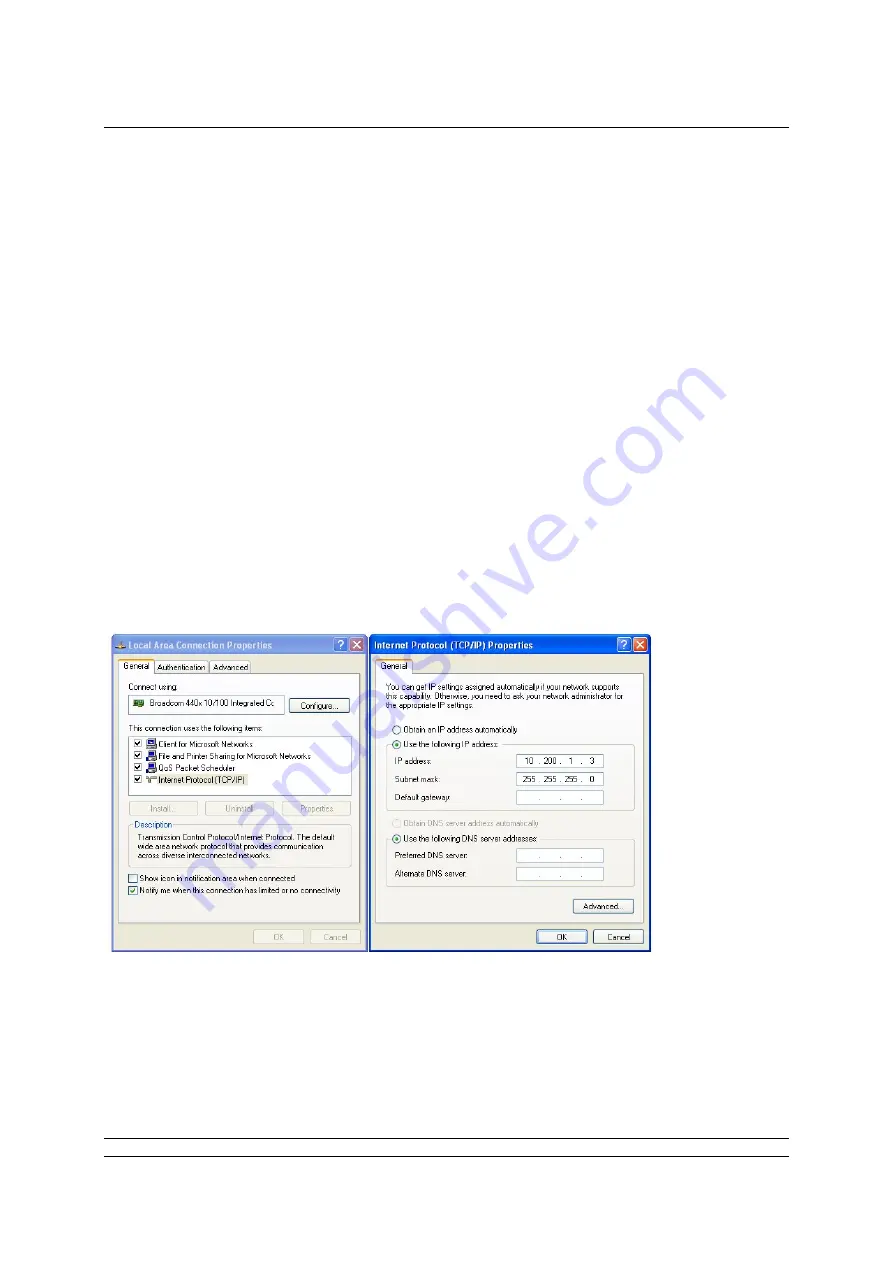
Click on the ‘Properties’ button, and a second window will open. Select ‘Internet Protocol
TCP/IP’ and click on the ‘Properties’ button in this window.
The ‘Internet Protocol TCP/IP Properties’ window will open. Next change the setting to force
the Laptop to adopt a fixed IP address and enter an address for the Laptop / PC of 10.200.1.3
and a subnet mask of 255.255.255.0. Click on the OK button and the window will close.
Click OK on the ‘Local Area Connection Properties’ window and then Close the status window.
Finally, close the Network Connections window and the Control Panel.
It may be necessary to reboot the PC to be sure that the new settings take effect correctly.
Connect the cable between the PC and the Pakscan master station.
Fig 17: Changing the Network Connections TCP/IP Properties


