background image


Manual 

Double Sheet Detector R1000 series E20 

with integrated fieldbus interface 

Communication with the PLC 

B0046191 / Rev. 1.12


90 

ROLAND ELECTRONIC GmbH  ·  Otto-Maurer-Str. 17  ·  DE 75210 Keltern  ·  Phone +49 (0)7236-9392-0  ·  Fax +49 (0)7236-9392-33


6.4.1 

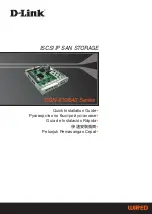
Structure of the parameter channel  

Structure of the parameter channel  

Meaning I/O 

Byte 

Notes 

Byte 

0 1 2 3 4 5 6 7  

Management 

x        

Data access control  
(reading, writing, handshake) 

Program index 


Selection of the tooling program 

Parameter index 


Selection of the parameter 

Application data byte 0  


MSB (most significant byte) 


LSB (least significant byte) 

Application data byte 1  


Application data byte 2  


Application data byte 3  


Checksum 


Checksum of the transferred bytes 1 - 6 


Data access control  

Services are initiated exclusively by the master. The R1000 as slave cannot initiate data 
transmissions. 

The management byte (E0) is used by the master to select the service (for example writing or 
reading) and to confirm the access. The R1000 confirms via the management myte (A0) the 
execution of the command. If an access is not allowed and therefore, the service cannot be 
executed, then the R1000 declares this action a collision.  


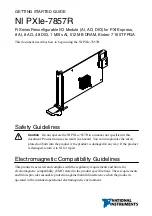
Structure of management byte


Management byte (I0/O0)  

Bit 


6   5   4   3   2   1 

0  

Collision

  0 = access correct, 1 = access not correct." 

"1"" is set by the R1000 only if a service is inadmissible or cannot be executed. In 
this case the master has to take the service back, in order to reset the error 
condition. See section "reset faulty access" in this chapter. 


Handshake

 This condition is changed with each new command. Only the master 

controls, if a new order from the R1000 has to be executed. The R1000 mirrors that 
handshake as soon as the order has been processed. If the order could be 
executed, the collision bit remains set to 0. If the order could not be executed, then 
the collision bit is set to 1 by the R1000. Additional orders can be executed only by 
cancelling the incorrect service. 


x  


Application data length

 always set to 11 (11 = 4 byte) 


x  


Service selection


0000 = Empty service 
0001 = Read parameter  
0010 = Write parameter 
0100 = Open parameter channel 
1000 = Close parameter channel 
00000000 = Reset parameter channel 

    x 


Summary of Contents for R1000 series E20

Page 1: ...mm 004 472 inch sheet thickness Optional version 4P allows connection of up to four identical sensors Programmable for 255 different sheet thicknesses and materials Calibration without sheet samples Digital display of sheet thickness and operational parameters Monitoring of over gauge and under gauge limit Monitoring of operating voltage and sensor gap Galvanically isolated 3 bit input interface a...

Page 2: ...7 DE 75210 Keltern All rights on this document are at Roland Electronic GmbH Reproduction also partly electronical coverage translation transmission to third parties only with our prior permission Subject to change without further notice Ende der Stückliste ...

Page 3: ... System description 27 3 1 Measurement principle 27 3 2 General hints for process security 27 3 3 Control unit 28 3 4 Parameters of the control unit 28 3 5 Application samples 33 4 Mounting 39 4 1 General mounting instructions 39 4 2 Dimensions of the system 40 4 3 Mounting of sensors 44 5 Electrical installation 59 5 1 General instructions 59 5 2 Configuration of connectors 60 5 3 Connecting diag...

Page 4: ...cerning PLC parallel inputs 132 9 9 Faults concerning Fieldbus interface 132 9 10 Other faults 133 10 Maintenance 135 10 1 Replacement of sensors 135 10 2 Exchange of control unit 136 10 3 Replacement of fuses 137 10 4 Data backup via the fieldbus interface or serial interface 137 10 5 Firmware update via RS232 interface 137 10 6 Short description RPP XP software 138 10 7 Spare parts 138 11 Techni...

Page 5: ...ove complies with the requirements of the EMC directives listed below Applied Directives 2006 95 EG Low Voltage Directive EN61010 1 2010 2004 108 EG EMC Directive EN61000 6 2 2005 08 EN61000 6 4 2007 01 Date of mark s apposition 09 12 2015 Keltern 09 12 2015 Managing Director Place Date Signature Function of the signer The declaration confirms the compliance with the cited directives However it is...

Page 6: ...grated fieldbus interface Safety advice B0046191 Rev 1 12 6 ROLAND ELECTRONIC GmbH Otto Maurer Str 17 DE 75210 Keltern Phone 49 0 7236 9392 0 Fax 49 0 7236 9392 33 Blank page Pos 4 Kapitelübersicht 01 Sicherheitshinweise 0 mod_1121421059859_501 docx 505 1 1 ...

Page 7: ...Only professional electrical tools should be used Note The factory pre settings especially the upper lower limit values have been chosen such that an optimal machine protection is ensured Diverging settings can impair the machine protection Safety advice for persons with cardiac pacemakers Persons with cardiac pacemakers are to stay away from the sensors The strong magnetic electromagnetic fields ...

Page 8: ...specifically developed for this technical environment Depending on the application type of material thickness sensor gap the E20 can be used with up to four sensors The reliable function of the Double Sheet Detector depends therefore markedly on the selection of the correct sensors and the mounting of the sensors Pos 8 Feldbus allgemein Feldbusbegriffe 0 mod_1189609197140_501 docx 4639 2 1 1 4 Fie...

Page 9: ...IP65 E20 xx without connected plugs approx 225 x 240 x 80 mm L x W x H approx 8 85 x 9 45 x 3 15 inch L x W x H E20 with connected plugs approx 225 x 360 x 80 mm L x W x H approx 8 85 x 14 2 x 3 15 inch L x W x H Front panel enclosure Protection category IP40 inside IP65 front cover E20 xx x FP approx 240 x 240 x 120 mm L x W x H approx 9 45 x 9 45 x 4 7 inch L x W x H Additional characteristics 2...

Page 10: ...ware and cannot be changed by user Fieldbus interface Profibus DP interface according to EN 50170 protocol version 1 10 max baud rate 12 Mbit s ControlNet communication adapter profile number 12 according to int ControlNet specification DeviceNet communication adapter profile number 12 according to ODVA specification group two only server Interbus S interface certification protocol no 440 500 kbit...

Page 11: ... of up to 4 sensors B Type of fieldbus PR Profibus DP CN ControlNet DN DeviceNet B coded DNT DeviceNet A coded IN Interbus S CP CanOpen PN ProfiNet IO CC CC Link EN EtherNet IP ET EtherCAT C pluggable connections at control unit D Control unit in front panel enclosure Basing on the article key shown above the following versions are available E20 xx S Control unit for wall mounting with data backup...

Page 12: ...GS Techn Daten 1 mod_1304686037382_501 docx 9169 3 1 2 3 1 Sensor P30GS P30GS P30GS P30GS with straight cable plug with 90 angled cable plug All dimensions are in mm Length tolerance 0 8 mm all other dimensions 0 2 mm Fig 2 Sensor P30GS Technical data Measuring range 1 0 1 2 5 mm 004 1 inch Ambient temperature 0 60 C 30 140 F Class of protection IP65 Weight approx 0 21 kg 0 46 lbs Sensor cable plu...

Page 13: ...sions are in mm Length tolerance 0 8 mm all other dimensions 0 2 mm Fig 3 Sensor P42AGS Technical data Measuring range 2 0 2 4 0 mm 01 16 inch Ambient temperature 0 60 C 30 140 F Class of protection IP65 Weight approx 0 42 kg 0 93 lbs Sensor cable pluggable Measurable ohmic resistances 2 Pin 1 2 Approx 20 Ω Pin 4 3 Pin 1 4 0 Ω Pin 2 3 1 Related to single sheet thickness 2 Pins are not connected to...

Page 14: ...or P75VGS Technical data Measuring range 1 0 2 6 5 mm 004 25 inch 0 2 8 0 mm 008 31 2 Ambient temperature 0 60 C 30 140 F Class of protection IP65 Weight approx 1 65 kg 3 64 lbs Sensor cable pluggable Measurable ohmic resistances 3 Pin 5 6 Approx 15 Ω 1 Related to single sheet thickness 2 with restriction 3 Pins are not connected to the sensor housing Pos 16 Doppelblech Sensoren P Sensoren P128 P1...

Page 15: ...92 0 Fax 49 0 7236 9392 33 15 2 3 4 Sensor P128GPPS Fig 5 Sensor P128GPPS Technical data Measuring range 1 1 0 12 0 mm 04 47 inch Ambient temperature 0 60 C 30 140 F Class of protection IP65 Weight approx 7 0 kg 15 43 lbs Sensor cable pluggable 1 Related to single sheet thickness Pos 17 Doppelblech Geräte E20 Bus 2 Technische Daten Sensordaten Messzeit 0 mod_1173874538093_501 docx 3896 2 1 ...

Page 16: ...mum response time corresponds to the maximum sheet thickness Example 1 System parameter Measure fast P75VGS sensor Measurement with one sensor Nominal thickness 1 0 mm 100 upper limit UP 120 1 2 mm Actual sheet thickness 1 mm actual response time 120 ms Actual sheet thickness 2 x 1 mm actual response time 130 ms Actual sheet thickness 7 x 1 mm sensor on stack actual response time 130 ms The maximu...

Page 17: ... 02 2006 Having the old sensor diagrams before HW version 5 available could be useful e g for exchanging control units with old new Hardware versions For this reason the old sensor diagrams are shown in the appendix Measuring time P30GS Device Hardware Version 5 and higher Fig 6 System reaction time P30GS 1 0 1 5 2 0 2 5 4 sensors 3 sensors 2 sensors 1 sensor P30GS 150 120 0 System reaction time m...

Page 18: ...36 9392 33 Measuring time P42AGS Device Hardware Version 5 and higher Fig 7 System reaction time P42AGS 1 0 1 5 2 0 2 5 0 3 0 3 5 4 0 P42AGS 150 120 4 sensors 3 sensors 2 sensors 1 sensor System reaction time ms Standard working range Single sheet thickness Nominal thickness mm 40 50 60 70 80 90 100 110 120 130 140 150 160 170 180 190 200 210 220 230 240 250 260 270 280 290 300 310 320 330 340 350...

Page 19: ...ring time P75VGS Device Hardware Version 5 and higher Fig 8 System reaction time P75VGS 50 100 150 200 250 300 350 400 450 500 550 600 650 700 750 800 850 900 1 0 2 0 0 950 1000 1050 1100 1150 1200 1250 1300 1350 1400 1450 1500 1550 1600 1650 3 0 4 0 P75VGS 150 120 5 0 6 0 7 0 8 0 with restriction 4 sensors 3 sensors 2 sensors 1 sensor Single sheet thickness Nominal thickness mm Standard working r...

Page 20: ...me P128GPPS 500 600 700 800 900 1000 1100 1200 1300 1400 1500 1600 1700 1800 1900 2000 2100 2200 2300 2400 2500 2600 2700 2800 2900 3000 3100 3200 3300 3400 3500 3600 3700 3800 3900 4000 4100 4200 4300 4400 4500 4600 4700 1 0 2 0 0 Standard working range 3 0 4 0 Single sheet thickness Nominal thickness mm 5 0 6 0 7 0 8 0 with restriction 9 0 10 0 11 0 12 0 P128GPPS 0 100 200 300 400 4800 4900 5000...

Page 21: ...ould be no air gap between sheet and sensor and also between the sheets The most reliable double sheet recognition results if no air gap exists These aspects should be specifically observed when mounting the sensors The influence of air gaps are described in the following diagrams Attention The performance data of both diagrams cannot be combined Max air gap between sensor and first sheet 1st air ...

Page 22: ...GG straight receptacle at the sensor SM12CPS GW right angle receptacle at the sensor for P128GPPS SM12CPPPS GG straight receptacle at the sensor SM12CPPPS GW right angle receptacle at the sensor The cables are equipped with quick disconnect plug at the sensor side and with bootlace ferrules at the control unit side Note The sensor cable is an active component of the sensor technology The technical...

Page 23: ... be placed directly adjacent to cables with large noise potential The cable is drag cable suitable and oil resistant Cable type Oilflex FD810CY 2 x 1mm2 Unitronic FDCP TP plus 1 x 2 x 1mm2 UL CSA Ø 20 55 Ø 20 62 Cable socket to sensor to cable extension Cable plug to cable extension to control unit Plug contacts 3 3 View plug side 1 black 1 white 2 black 2 brown 3 N C 4 N C 5 blank Shield 1 black ...

Page 24: ...ronic FDCP TP plus 1 x 2 x 1mm2 UL CSA 78 5 1 2 3 6 4 Cable plug Plug contacts1 1 View plug side 1 black 1 white 2 black 2 brown 5 blank Shield Cable socket to sensor Right angle cable socket optional black 1 white black 2 brown blank shield 5 6 1 View contact side Receptacle contact 1 N C 1 4 3 4 N C OILFLEX FD810CY 2 x 1 mm Unitronic FDCP TP plus 1 x 2 x 1 mm UL CSA Ø 30 75 53 OILFLEX FD810CY 2 ...

Page 25: ... TP plus 1 x 2 x 1mm2 UL CSA Cable plug to control unit to cable extension Plug contacts1 1 View plug side 1 black 1 white 2 black 2 brown 3 N C 4 N C 5 blank Shield Cable socket to sensor Right angle cable socket optional N C black 1 white black 2 brown blank shield 1 2 3 4 1 View contact side Receptacle contact 1 Ø 19 60 1 2 3 4 OILFLEX FD810CY 2 x 1 mm Unitronic FDCP TP plus 1 x 2 x 1 mm UL CSA...

Page 26: ...e of Delivery Included in the delivery of each E20 I20 UDK20 L20 is the following accessorial material 1 plug for power supply inputs 1 plug for output signals 1 plug for fieldbus output 1 plug for fieldbus input 1 cable for communication RS232 or USB All this material is packed in a plastic bag as shown below Fig 13 Typical accessorial material Note Connectors are only included if the ordered ver...

Page 27: ...gnals are generated Pos 23 Doppelblech Geräte E20 Bus 3 Systembeschreibung Hinweise zur Prozesssicherheit 1 mod_1195739072046_501 docx 5234 2 1 3 2 General hints for process security The process security of the system is influenced by the following factors the stability of the measuring values the setting of under gauge threshold and over gauge threshold the evaluation of the status signals Stable...

Page 28: ...0 Bus 3 Systembeschreibung Auswertegerät 0 mod_1173874473250_501 docx 3860 2 1 3 3 Control unit The E20 is based on the product platform R1000 Major features of the control unit Programmable for 255 different sheet thicknesses Fieldbus interface for the control operation and data exchange with the PLC Calibration by a teach in procedure see 3 3 Calibration Digital display of sheet thickness and op...

Page 29: ...he command requires several minutes since the program memory will completely cleared All program parameters will be reset to the default values and existing teach in data will be deleted Using this function only makes sense if a unit is to be newly used for another machine Measurement fast normal For time critical applications the measuring time can be slightly shortened for measuring FE material ...

Page 30: ... system executes measurements as long as the Measurement start signal is applied via the external PLC input The repetition rate of the measurement depends on the type of sensor 0 5 seconds for P42 P30 P42A P75V 1 second for P36 2 seconds for P75 7 seconds for P128 2 sheet hold Currently only no is possible External Measurement start The signal Measurement start can be linked via 3 opto coupler inp...

Page 31: ...signals depend In a window comparator the three signals will be generated from the measuring signal The signal 0 sheet is generated when the measuring signal falls short of the lower switching threshold The lower switching threshold TU can be set from 1 99 The signal 2 sheet is generated when the upper switching threshold is exceeded The upper switching threshold TO can be set from 100 150 If the ...

Page 32: ...e sufficiently to generate nuisance trips If for example among the measured value is too low or too high the control unit generates an under gauge signal 0 sheet or an over gauge signal 2 sheet As a consequence the transportation of the sheet is stopped by the PLC even though no obvious fault has occurred Such a deviation of the measured value can have different causes for example a the measured s...

Page 33: ...tion samples The following are two typical application examples for the usage of the E20 If more than one sensor is required then the E20 4P is a good choice Four sensors of the same type can be connected to this control unit These sensors cannot be operated simultaneously but only sequentially The switching sequencing can be made as follows a by program switching b by external sensor selection A ...

Page 34: ...hickness and sensor number The selection of the program is then performed by the PLC Disadvantage Relative long time required for switching the program via the parallel interface Note Sensor selection via program must be selected in the system configuration 0 7 mm 028 in 0 5 mm 020 in 0 8 mm 032 in 2 3 4 1 Start PLC 1 Select program 1 2 Measuring program 1 3 Analysis result of program 1 4 Select p...

Page 35: ... Substantial time saving compared to program switching Note Sensor selection via external inputs A and B must be selected in the system configuration 0 9 mm 035 in 0 9 mm 035 in 0 9 mm 035 in 0 9 mm 035 in 2 3 4 1 Start Program Thickness Sensor 1 0 9 mm If sensor selection A B configured the sensor number cannot selected in the program PLC 01 Select sensor 1 via A B 02 Measure program 1 03 Evaluat...

Page 36: ... smaller software effort on the PLC side Only one output is generated for connected sensors The summary output is formed with the following priorities 2 sheet before 0 sheet 0 sheet before 1 sheet The measurement results are simultaneously available via Fieldbus Byte 12 23 Note To activate this method sensor selection has to be done via program in the system configuration A separate selection of t...

Page 37: ...ivated each possible sequence with only 2 or 3 sensors can be selected On the other hand the sequences for example for the sensor number 4 cannot be selected if only 3 sensors are activated The following rule applies The highest sensor number in the sequence determines the minimum number of activated sensors Note The sequence is a program parameter therefore methods a and c can form a practical co...

Page 38: ...et Detector R1000 series E20 with integrated fieldbus interface System description B0046191 Rev 1 12 38 ROLAND ELECTRONIC GmbH Otto Maurer Str 17 DE 75210 Keltern Phone 49 0 7236 9392 0 Fax 49 0 7236 9392 33 Blank page ...

Page 39: ...for wall mounting meets IP65 and is designed for mounting the enclosure close to the sensor location This results in the use of shorter sensor cables with a corresponding lower exposure to electromagnetic noise and could therefore result in better measurements The control unit should be installed in locations where no vibration exists and no additional heat is transferred into the system even bett...

Page 40: ...E 75210 Keltern Phone 49 0 7236 9392 0 Fax 49 0 7236 9392 33 4 2 Dimensions of the system 4 2 1 Unit in industrial enclosure Version E20 for one sensor Fig 15 Dimensions of the wall mount enclosure connection view Version E20 4P for up to four sensors All dimensions are in mm Tolerance 0 4 mm Fig 16 Dimensions of the wall mount enclosure connection view ...

Page 41: ...LECTRONIC GmbH Otto Maurer Str 17 DE 75210 Keltern Phone 49 0 7236 9392 0 Fax 49 0 7236 9392 33 41 Front view Note For the connection of the plugs a minimum additional space of 120 mm below the control unit is necessary All dimensions are in mm Tolerance 0 4 mm Fig 17 Dimensions of the wall mount enclosure front view ...

Page 42: ...o Maurer Str 17 DE 75210 Keltern Phone 49 0 7236 9392 0 Fax 49 0 7236 9392 33 4 2 2 Front panel enclosure Note A minimum depth of 120 mm is required for connecting the plugs All dimensions are in mm Tolerance 0 2 mm Fig 18 Dimensions of the front panel enclosure front view 4 x Ø 4 2 for Philips head screw M4 DIN 74 240 220 240 220 23 23 ...

Page 43: ... GmbH Otto Maurer Str 17 DE 75210 Keltern Phone 49 0 7236 9392 0 Fax 49 0 7236 9392 33 43 All dimensions are in mm Tolerance 0 2 mm Fig 19 Dimensions of the front panel enclosure front view Pos 30 Doppelblech Geräte E20 Bus 4 Montage Sensormontage 0 mod_1173693761984_501 docx 3414 2 1 240 100 150 Mounting Space 120 4 73 in 50 ...

Page 44: ... important to set the upper gauge threshold of the control unit and analyze the upper gauge signal at the 2 sheet output A spring loaded mounting bracket or the installation directly into the vacuum cup is recommended see the following sections Attention Air gaps can result in faulty measured values This applies also to tilting or partial gaps or bowed sheets Ignoring these factors can result in u...

Page 45: ...heets This avoids unnecessary wear of sensor contact surface 6 Properly adjust sensor edge so that it aligns with the rubber burls of the suction cup Do not allow excess end See enclosed sketch This avoids unnecessary wear of sensor contact surface 7 Properly adjust sensor mounting in regard to the lifting suction cups of tooling Do not allow sensor suction cup to excess lifting suction cups This ...

Page 46: ...um feed n a Hose 8 mm OD Hose 8 mm OD Hose 8 mm OD Hose 8 mm OD Spare parts Spring Kit 2395117 Spring Kit 2395117 Rubber lips black 2395110 2395168 Rubber pressure pad 2395109 Bellows suction cup 100 mm red 2395045 Bellows suction cup 80 mm red 2395100 SHS42G FB80 Strap set SHX42 STRAP 80 Rubber lips black 2395110 Rubber pressure pad 2395109 Strap set SHX42 STRAP 80 Bellows suction cup 110 mm yell...

Page 47: ...Maurer Str 17 DE 75210 Keltern Phone 49 0 7236 9392 0 Fax 49 0 7236 9392 33 47 4 3 2 1 Spring loaded sensor bracket SH42GS Fig 21 Spring loaded sensor bracket SH42GS 6 6 A 57 Hub max 65 min 25 98 10Ø View in direction A without sensor ø20 5 3 0 O 50 110 80 45 1 2 0 75 40 90 Sensor movable fixed All Dimensions are in mm Tolerance 0 4 mm ...

Page 48: ...2 Spring loaded sensor bracket SH75GS Fig 22 Spring loaded sensor bracket SH75GS Pos 33 Doppelblech Sensoren Sensorhalterungen Gefederte Sensorhalterung SHS42GS SHS75GS mit Flachsauger 1 mod_1215005515656_501 docx 6417 344 1 Sensor 6 6 A 54 Hub max 65 min 25 98 View in direction A without sensor 152 5 152 5 20 5 75 44 5 x 45 19 x 45 R 66 7 R 4 2 5 120 10 5 4 5 movable 10Ø fixed All Dimensions are ...

Page 49: ...urface or in inclined sheet to the sensor leading to instability of measurement The forces acting in this process can lead to wear and tear to the bracket and lips of the suction cups Generating and releasing vacuum requires considerably longer time The suction cups are not designed to lift and carry the sheet In order to prevent inadvertently the sensor losing touch to the sheet it is necessary t...

Page 50: ...lications only vertical motions no turning motions For usage with robotic destackers the sensor bracket SHS42G FB with bellow suction cup is to be preferred All dimensions are in mm The dimensional tolerance is 0 4 mm Fig 24 Spring loaded sensor bracket SHS42GS with flat suction cup View in direction A without clamping bracket Hose 8 mm ø20 5 30 O 50 110 80 45 1 2 0 75 40 90 Sensor Clamping bracke...

Page 51: ... feeder destacking applications only vertical motions no turning motions All dimensions are in mm The dimensional tolerance is 0 4 mm Fig 25 Spring loaded sensor bracket SHS75GS with flat suction cup Pos 34 Doppelblech Sensoren Sensorhalterungen Gefederte Sensorhalterung SHX42 1 mod_1215005516500_501 docx 6422 34 1 Clamping bracket SHK 160 Spring loaded sensor bracket Sensor 6 6 ø25 25 94 M8 Rubbe...

Page 52: ...ry elastic in pressed condition and movable into all directions Lateral motions of the sheet being transported can thereby also be compensated up to approx 1 centimetre No appearance of lateral forces thus only minimal wear Fast suction and releasing of the sheets due to small air volume under the suction hood compared to bellows suction cups Same sealing gasket and burled plate as used with the R...

Page 53: ...ting of the sensor bracket The mounting plate has a total of 10 M8 tap holes at distances of 50 and 100 mm At least 2 of them must be used for mounting An adapter with 25 mm shank for swivel arm is available Other adapters may be ordered by request Item 1 4 describes the mounting of the sensor into the sensor bracket and item 5 8 describes the mounting of the sensor bracket Fig 28 Mounting of the ...

Page 54: ...ion up to 2g Thus precise putting on the sheet without canting also on splayed sheets or bevelled TWB stacks Very elastic in pressed condition and movable into all directions Lateral motions of the sheet being transported can thereby also be compensated up to approx 1 centimetre No appearance of lateral forces thus only minimal wear Fast suction and releasing of the sheets due to small air volume ...

Page 55: ...sheet The suction cup has a Shore hardness of 45 red harder suction cups with a Shore hardness of 60 black are available see chapter 12 Order data sensors and accessories On installing attention must be paid that the sensor is thoroughly sealed e g with Teflon tape in the thread seating Considerations The sensor face must align with the naps The vacuum must adequately effect The suction facility m...

Page 56: ...H Otto Maurer Str 17 DE 75210 Keltern Phone 49 0 7236 9392 0 Fax 49 0 7236 9392 33 4 3 6 1 Clamping bracket SHX AZ2 25 For fixing the sensor bracket SHX42 to swivel arms with 25 mm clamp collar Fig 32 Clamping bracket SHX AZ2 25 Pos 37 Doppelblech Sensoren Sensorhalterungen Klemmvorrichtung SHK 1 mod_1215005517687_501 docx 6429 3 1 ...

Page 57: ...an affect the measuring accuracy of the sensor Therefore the sensors should not be installed close to devices which cause electromagnetic interference Such devices are e g frequency converters servo motors or proximity switches on inductive basis In case of switching magnets a minimum distance of 20 mm should be observed in order to avoid feedback The sensor cables should not be placed directly ad...

Page 58: ...cular on the sheet the sensor bracket is apparently not suitable Faulty An air gap exists between the first and the second sheet The sensor is mounted in an unfavourable position Faulty An air gap exists between the first and the second sheet The second sheet clings to the first sheet perhaps by stamping residuals Faulty Fault prone control in a bucket An air gap exists between bended sheets Fig 3...

Page 59: ...at female connector B Positioning nose at male connector C Threaded arresting ring D Connector assembly ring Never turn this ring when arresting the plug with the arresting ring C Fig 35 Positioning facility and arresting ring When the connection is established correctly as described plug and socket can be arrested with the arresting ring Important 1 Turn only the threaded arresting ring C If the ...

Page 60: ... 2 1 Configuration of connectors at the R1000 E20 Connection for one sensor System in industrial enclosure System as front plate mount A Connector for RS232 B1 RSI interface B2 Optocoupler output C1 Fieldbus 1 output C2 Fieldbus 1 input D Connector for sensor E Connector for system grounding G Power supply connector optocoupler input Fig 36 Connections at E20 1 the fieldbus connections are specifi...

Page 61: ...n for up to 4 sensors System in industrial enclosure System as front plate mount A Connector for RS232 B1 RSI interface B2 Optocoupler output C1 Fieldbus 1 output C2 Fieldbus 1 input D1 Connector for sensor 1 D2 Connector for sensor 2 D3 Connector for sensor 3 D4 Connector for sensor 4 E Connector for system grounding G Power supply connector optocoupler input Fig 37 Connections at E20 4P 1 the fi...

Page 62: ...r RS232 pos A Connections at control unit Manufacturer types notes RS232 M8 3 pin female connector at control unit Binder type 768 and others View plug side pin 1 GND pin 2 RXD pin 3 TXD Shield ground Internal at enclosure common The interface cable SM8KRS232D9S belongs to the scope of supply Cable SM8KRS232D9S X grounding connection at cable socket Fig 38 Cable SM8KRS232D9S 3 RXD 2 TXD 3 5 3 2 1 ...

Page 63: ...l supply 24V DC pin 2 OUT0 1st optocoupler output pin 3 OUT1 2nd optocoupler output pin 4 OUT2 3rd optocoupler output pin 5 OUT3 4th optocoupler output pin 6 OUT4 5th optocoupler output pin 7 pin 8 Shield ground Internal at enclosure common RSI M12 5 pin A coded female connector at control unit Binder type 713 and others View plug side pin 1 Shield ground Internal at enclosure common pin 2 pin 3 G...

Page 64: ...istor should be placed into the open connector The resistor is not included in the scope of supply Allocation of Profibus connection Profibus DP Slave Input Pos C2 Output Pos C1 M12 5 pin B coded male connector at control unit M12 5 pin B coded female connector at control unit View plug side Pin 1 5V View plug side Pin 2 Line A Pin 3 GND Pin 4 Line B Pin 5 Shield Earth Suppliers types notes Binder...

Page 65: ...M12 5 pin B coded female connector at control unit View plug side Pin 1 shield View plug side Pin 2 V Pin 3 V Pin 4 CAN High Pin 5 CAN Low Suppliers types notes Binder type 715 B coded and others 5 2 5 4 DeviceNet A coded An M12 plug with inverse coding is used for the DeviceNet connection A T connector is not necessary because the control unit is equipped with input and output The corresponding c...

Page 66: ... a Pin 3 GND Pin 4 CAN_H Pin 5 CAN_H Suppliers types notes Binder type 715 B coded and others 5 2 5 6 Interbus S The corresponding cable plugs are part of the standard scope of supply Allocation of Interbus S connection Input Pos C2 male connectors Output C1 female connectors M12 5 pin B coded Male contacts at the control unit male socket M12 5 pin B coded Female contacts at the control unit femal...

Page 67: ... Port Round shape connector M12 4 pin D coded socket contact at control unit Pos C2 View Plug side Pin 1 TD Pin 2 RD Pin 3 TD Pin 4 RD Plug enclosure Shield The corresponding cable plugs are part of the standard scope of supply 1 2 3 4 Note If the E20 is the last participant in the bus then an external termination resistor should be placed into the open connector The resistor is not included in th...

Page 68: ...nnect type The following cables are to be used SM12CPS GG and SM12CPS GW for P36GS P42GS P75GS and P75VGS SM12CPM12S GG and SM12CPM12S GW for P30GS and P42AGS SM12CPPPS GG and SM12CPPPS GW for P128GPPS Connector at control unit pos D Manufacturer types notes P30GS P42AGS P75VGS P128GPPS M12 5 pin Female connector at control unit Binder series 713 View Plug side pin 1 Sensor signal 1 pin 2 Sensor s...

Page 69: ...pply Note The connecting cable for the power supply should be kept short Up to 20 m length use a 2 x 1 mm cable For longer cables the cross section must be increased accordingly see power consumption data in chapter 2 1 Technical data Attention The earth ground central machine ground must not be connected to 24 VDC Optocoupler inputs for fast measurements For real time measurements it is possible ...

Page 70: ...CSA 1a Cable plug 5 contacts 2a Cable plug 5 contacts 3a Cable plug 5 contacts Order no 2277704 Order no 2277704 Order no 2277704 Pin 1 black 1 white Pin 2 black 2 brown Pin 3 N C Pin 4 N C Pin 5 blank shield Pin 1 black 1 white Pin 2 black 2 brown Pin 3 N C Pin 4 N C Pin 5 blank shield Pin 1 black 1 white Pin 2 black 2 brown Pin 3 N C Pin 4 N C Pin 5 blank shield 1b Cable socket 5 contacts 2b Cab...

Page 71: ... x 1mm or Unitronic FDCP TP plus 1 x 2 x 1 mm UL CSA 2a Cable plug 5 contacts 3a Cable plug 5 contacts 4a Cable plug 5 contacts Order no 2277704 Order no 2277704 Order no 2277704 Pin 1 black 1 white Pin 2 black 2 brown Pin 3 N C Pin 4 N C Pin 5 blank shield Pin 1 black 1 white Pin 2 black 2 brown Pin 3 N C Pin 4 N C Pin 5 blank shield Pin 1 black 1 white Pin 2 black 2 brown Pin 3 N C Pin 4 N C Pin...

Page 72: ...le plug 5 contacts Order no 2277704 Order no 2277704 Order no 2277704 Pin 1 black 1 white Pin 2 black 2 brown Pin 3 N C Pin 4 N C Pin 5 blank shield Pin 1 black 1 white Pin 2 black 2 brown Pin 3 N C Pin 4 N C Pin 5 blank shield Pin 1 black 1 white Pin 2 black 2 brown Pin 3 N C Pin 4 N C Pin 5 blank shield 1b Cable socket 5 contacts 2b Cable socket 7 contacts 3b Cable socket 4 contacts Order no 227...

Page 73: ...system the status message and the slave address 1 Bus system message here Profibus DP 2 Status message 3 Parameter channel message 4 Bus slave address only if Fieldbus with node bus address 5 Fieldbus baud rate only if Fieldbus with baud rate or MAC ID Fig 42 Fieldbus specific message from the R1000 after the start Overview regarding the messages Status message Init Display after start up of the R...

Page 74: ...n facility Master Data direction Input Data direction R1000 Byte E0 Parameter channel Byte E1 Byte E2 Byte E3 Byte E4 Byte E5 Byte E6 Byte E7 Byte E8 Process channel Byte E9 Byte E10 Byte E11 Byte E12 Byte E13 Byte E14 Byte E15 Byte E16 Byte E17 Byte E18 Byte E19 Byte E20 Byte E21 Byte E22 Byte E23 Data direction Output Data direction Byte S0 Parameter channel Byte S1 Byte S2 Byte S3 Byte S4 Byte ...

Page 75: ...ts Byte Description I8 Control I9 Program selection 1 255 I10 Program selection block 1 4 reserved Sensor selection only for systems E10 E20 I11 free I12 Control sensor 1 I13 free I14 free I15 Control sensor 2 I16 free I17 free I18 Control sensor 3 I19 free I20 free I21 Control sensor 4 I22 free I23 free Outputs Byte Description O8 Control signals 0 sheet 1 sheet 2 sheet O9 Mirroring E9 O10 Mirror...

Page 76: ...t measuring program 9 4 Bit 4 measuring program Bit 4 current measuring program 9 5 Bit 5 measuring program Bit 5 current measuring program 9 6 Bit 6 measuring program Bit 6 current measuring program 9 7 Bit 7 measuring program Bit 7 current measuring program 10 0 High byte thickness value 4 sensor 1 10 1 10 2 10 3 10 4 10 5 10 6 Sensor selection A 3 Current sensor selection A 10 7 Sensor selectio...

Page 77: ...1000 BIN R1000 PLC BOUT 12 0 Type of material at sensor 1 here always 1 12 1 Current measuring program S1 Teach In performed 12 2 Zero adjust sensor 1 12 3 Teach In 1 sheet sensor 1 12 4 Warning 2 12 5 0 sheet 2 sensor 1 12 6 1 sheet 2 sensor 1 12 7 2 sheet 2 sensor 1 13 0 High byte thickness value 4 sensor 1 13 1 13 2 13 3 13 4 13 5 13 6 13 7 14 0 Low byte thickness value 4 sensor 1 14 1 14 2 14 ...

Page 78: ...00 BIN R1000 PLC BOUT 15 0 Type of material at sensor 2 here always 1 15 1 Current measuring program S2 Teach In performed 15 2 Zero adjust sensor 2 15 3 Teach In 1 sheet sensor 2 15 4 Warning 2 15 5 0 sheet 2 sensor 2 15 6 1 sheet 2 sensor 2 15 7 2 sheet 2 sensor 2 16 0 High byte thickness value 4 sensor 2 16 1 16 2 16 3 16 4 16 5 16 6 16 7 17 0 Low byte thickness value 4 sensor 2 17 1 17 2 17 3 ...

Page 79: ...1000 BIN R1000 PLC BOUT 18 0 Type of material at sensor 3 here always 1 18 1 Current measuring program S3 Teach In performed 18 2 Zero adjust sensor 3 18 3 Teach In 1 sheet sensor 3 18 4 Warning 2 18 5 0 sheet 2 sensor 3 18 6 1 sheet 2 sensor 3 18 7 2 sheet 2 sensor 3 19 0 High byte thickness value 4 sensor 3 19 1 19 2 19 3 19 4 19 5 19 6 19 7 20 0 Low byte thickness value 4 sensor 3 20 1 20 2 20 ...

Page 80: ...7 2 sheet 2 sensor 4 22 0 High byte thickness value 4 sensor 4 22 1 22 2 22 3 22 4 22 5 22 6 22 7 23 0 Low byte thickness value 4 sensor 4 23 1 23 2 23 3 23 4 23 5 23 6 23 7 1 Ready ENABLE via I O If 0 0V then control unit fault Operator action necessary at the control unit e g memory fault voltage missing or too low 2 The control unit configuration can be selected 0V active or 24V active for thes...

Page 81: ...0 1 0 1 2 1 0 3 1 1 4 The sensor selection A B is active only if it is the version 4P and in the system configuration Sensor selection external has been selected Attention The sensor selection A B must take place when no measurement is active The selection is taken over with the next measurement This also applies to the general zero adjust and Teach In 1 sheet Note In the following timing diagrams...

Page 82: ...lt 1 Function result will sometimes remain at 0 Set Measurement start to HIGH Waiting for Function fault or Waiting for Function result In case of Function fault Pause 100 ms Set Measurement start to LOW Reset Function fault In case of Function result Analyse Set Measurement start to LOW Measurement start BIN 10 6 to 10 7 Sensor selection A B BIN 10 6 to 10 7 Sensor selection A B BOUT 8 0 Function...

Page 83: ...ration of the function then the Function result will not be displayed However the function is nevertheless executed For safety reason the control should not be executed in this fashion If the Measurement start cycle is longer than the duration of the function then the Function result will be displayed as shown in the timing diagram Note Faults which are not critical can be deleted via the process ...

Page 84: ...12 Mbit Profibus These timing periods can vary with different transmission rates and bus systems The cycle time of the PLC has not been taken into account ts System reaction time Measuring time see chapter 2 4 tp additional break times P30 P42 P42A P75V 0 5 seconds P36 1 0 second P75 2 0 seconds P128 7 0 seconds 1 In case of Function fault 1 Function result will sometimes remain at 0 ts 10ms ts p ...

Page 85: ... These timing periods can vary with different transmission rates and bus systems The cycle time of the PLC has not been taken into account 1 In case of Function fault 1 Function result will sometimes remain at 0 Program no Bit 7 Bit 6 Bit 5 Bit 4 Bit 3 Bit 2 Bit 1 Bit 0 1 0 0 0 0 0 0 0 0 2 0 0 0 0 0 0 0 1 255 1 1 1 1 1 1 1 0 not used 1 1 1 1 1 1 1 1 10ms 1 if fault 0V if fault BIN 8 6 Program swit...

Page 86: ...d timing periods were determined with 12 Mbit Profibus These timing periods can vary with different transmission rates and bus systems The cycle time of the PLC has not been taken into account 1 In case of Function fault 1 Function result will sometimes remain at 0 10ms BIN 8 0 System test BIN 10 6 to 10 7 Sensor selection A B BOUT 10 6 bis 10 7 Sensor selection A B BOUT 8 0 Function result1 BOUT ...

Page 87: ... timing periods can vary with different transmission rates and bus systems The cycle time of the PLC has not been taken into account Note According to the setting in the configuration menu item 12 Sensor selection the Zero adjust causes following external the selected sensor in selection A B is nulled Program the selected sensors in the active program are nulled 1 In case of Function fault 1 Funct...

Page 88: ...eet wrong thickness bowed sheet air gap between sensor and sheet Note The measured timing periods were determined with 12 Mbit Profibus These timing periods can vary with different transmission rates and bus systems The cycle time of the PLC has not been taken into account Note According to the setting in the configuration menu item 12 Sensor selection the Teach In causes following external the se...

Page 89: ...0 Pos 50 Doppelblech Geräte E20 Bus 6 Kommunikation mit der SPS Parameterkanal 0 mod_1173433345859_501 docx 3344 23333333333 1 6 4 Parameter channel The parameter channel is designed to exchange systems and parameter data of the R1000 with the master Primary purpose is the central data backup on the master In addition certain measurement and operating parameters can be extracted from the R1000 and...

Page 90: ...s via the management myte A0 the execution of the command If an access is not allowed and therefore the service cannot be executed then the R1000 declares this action a collision Structure of management byte Management byte I0 O0 Bit 7 6 5 4 3 2 1 0 Collision 0 access correct 1 access not correct 1 is set by the R1000 only if a service is inadmissible or cannot be executed In this case the master ...

Page 91: ... the parameters of each program Parameter index Meaning Parameter index byte Notes Bit 0 1 2 3 4 5 6 7 Parameter no x x x x x x x x 0 18 at program parameter 1 24 at system parameter see section 12 5 Parameter channel commands Application data bytes The application data bytes 0 to 3 contain the data which can be transmitted Application data bytes Meaning Application data byte 0 3 Notes Bit 0 1 2 3...
Page 92: ...dex parameter index 2 Switch handshake In addition consistent data transmission from master is necessary Note For the service Open parameter channel the index bytes E1 E2 and the application data bytes E3 E6 are not relevant The R1000 checks the data with the checksum and mirrors the application data the service selection and the index selection into A1 A2 The R1000 sets the handshake bit in A0 0 ...

Page 93: ...ensure a consistent data transmission Attention If the checksum is correct then the closing of the parameter channel is always executed A set collision bit is thereby deleted 6 4 4 Service Read parameters The master initiates the service Read parameter by selecting the service and index bytes E1 and E2 The content of the application data bytes 0 to 3 is not relevant The checksum of byte 1 through ...

Page 94: ... service The master initiates the service Empty service with the setting of the service selection The content of the index bytes E1 E2 and the application data bytes 0 to 3 are not relevant The checksum of byte 1 through 6 is calculated and inserted in byte 7 To initiate the service the master switches the handshake bit In order to avoid data faults the following sequence is compulsory 1 Service s...

Page 95: ...asons above can prevent the service execution during reading or writing The R1000 indicates this problem by the collision bit In order to prevent an additional uncontrolled access procedure the R1000 expects the reset of the called service by the master In addition the master executes an Empty service with the confirmation of a handshake After receipt of this empty order the R1000 puts the collisi...

Page 96: ... If necessary evaluate fault number in application data byte 6 Set the upper limit to the desired program index e g program number 7 120 Transfer 0H110010b 06h 05h 00h 00h 04h B0h BFh Wait for answer 0H110010b 06h 05h 00h 00h 04h B0h BFh In case of a collision Undo the collision with the service Empty service remove the cause of the collision and open again If necessary evaluate fault number in ap...

Page 97: ...ay optocoupler inputs Signal Meaning Notes IN0 Measurement start input 1 Optocoupler input 1 24 V active IN1 Measurement start input 2 Optocoupler input 2 24 V active IN2 Measurement start input 3 Optocoupler input 3 24 V active The Measurement start inputs are linked in different combinations via AND The following configuration can be selected in the control unit IN0 IN0 and IN1 IN0 and IN1 and I...

Page 98: ... any condition 2 sheet any condition any condition 2 sheet any condition any condition 2 sheet 1 sheet is issued if 1 sheet 1 sheet 1 sheet 1 sheet 0 sheet is issued if 0 sheet 0 sheet 1 sheet 0 sheet 1 sheet 0 sheet 0 sheet 1 sheet 0 sheet 1 sheet 0 sheet 0 sheet 1 sheet 0 sheet 1 sheet 0 sheet The results of the separate sensors are available in the bytes 12 23 and can be used as required 6 5 2 ...

Page 99: ...ow 80 or above 120 of the preset nominal value Application If the Warning is active in the measurement though only one sheet in front of the sensor measurement problems may have occurred Air gap between sensor and sheet Wrong type of sheet Sensor coverage not sufficient Note If these requirements are met but a warning signal is issued then the Teach in must be repeated The requirements from sectio...

Page 100: ...t single measurement via process channel If no control is done via the process channel then the measurement operation must be controlled by the signal ENABLE see section 6 5 2 Signal ENABLE Note If several measurements are executed consecutively the measuring operation time should not exceed 10 seconds It is advisable to keep a recovery time of at least twice the measuring operation time Example 1...

Page 101: ... remains set ts System reaction time Measuring time see chapter 2 4 tp additional break times P30 P42 P42A P75V 0 5 seconds P36 1 0 second P75 2 0 seconds P128 7 0 seconds 1 In case of Function fault 1 Function result will sometimes remain at 0 Pos 52 Doppelblech Geräte E20 Bus 6 Kommunikation mit der SPS Feldbus Konfigurationsdateien 0 mod_1173432978734_501 docx 3334 233333333 1 5ms ts 10ms ts p ...

Page 102: ...s the specific configuration data of the ControlNet adapter The data must be known to the scanner The manufacturers of the scanner supply the tools for the integration of the EDS file into the ControlNet network Suitable are for example Rockwell RSNetworx configuration tools Roland Electronic does not supply such tools because they have to be compatible with the interface design of the scanner The...

Page 103: ...supply such tools because they have to be compatible with the interface design of the master The EDS file is supplied on a CD or can be downloaded from the Roland homepage Note 3 PDOs with 8 Bytes each are set 6 6 5 GSD file for ProfiNet IO The GSD file contains the specific configuration data of the device The data must be known to the controller The manufacturers of the controller supply the too...

Page 104: ...d homepage Three occupied Stations with 36 Byte are used 12 Byte are Bit Data Area and 24 Byte Word Data Area Link Input Roland R1000 PLC W0 W1 W2 W3 W4 W5 W6 W7 W8 W9 W10 W11 W12 W13 W14 W15 W16 W17 Bit Data area word 0 to 4 Byte 0 9 System area word 5 Word Data area word 0 to 3 Word Data area word 4 to 11 not used Bit 3 Remote Ready 1 Roland I20 Parameter channel see Chapter 6 2 Roland I20 Proce...

Page 105: ...e controller The EDS file is supplied on a CD or can be downloaded from the Roland homepage Note 24 Bytes I O must be set 6 6 8 Device Description file for EtherCAT The Device Description file contains the specific configuration data of the device The data must be known to the controller The manufacturers of the controller supply the tools for the integration of the Device Description file into th...

Page 106: ... fieldbus interface Communication with the PLC B0046191 Rev 1 12 106 ROLAND ELECTRONIC GmbH Otto Maurer Str 17 DE 75210 Keltern Phone 49 0 7236 9392 0 Fax 49 0 7236 9392 33 Blank page Pos 53 Kapitelübersicht 06 Inbetriebnahme 0 mod_1121421999890_501 docx 511 1 1 ...

Page 107: ...ldbus The modification of the configuration is described in the following sections After applying power to the system the version number and the bus system message are briefly displayed Afterwards the system switches into that measurement menu which was active before the unit was switched off 1 LED functions 2 Pushbutton functions 3 Program number 4 Selected sensor 5 Type of material 6 Nominal thi...

Page 108: ...p 7 8 Backup of the data stored in the system via RS232 Interface Firmware Update 7 9 Firmware Update up 100 150 and absolute 1 2 3 4 1 2 1 3 1 4 2 3 2 4 3 4 1 2 3 1 2 4 1 3 4 2 3 4 1 2 3 4 Sensor number low 0 99 and absolute P30 Nominal thickness P36 P42 P42A P75 P75V Zero adjust off on separate only the sensors selected in the menu Sensor 1 on off Sensor 2 on off Sensor 3 on off Sensor 4 on off ...

Page 109: ...Measuring mode external continuous measurement demo mode Hold 2 sheet yes Password no 0 V active Output 0 1 2 24 V active external adjust yes no 1 2 3 4 only for Version 4P Number of sensors program Sensor selection external normal Measurement fast yes CLR Parameter no Clear Program Parameter mm inch Bus readout mm inch only for Version 1P not available reserved P30 P36 P42 P42A P75 P75V P128 Sens...

Page 110: ...ting up or checking the configuration In order to select set up or check the system program parameters press the MENU key The following menu is shown here Profibus Fig 58 Indication after calling up the menu This menu option permits either reviewing or changing the configuration Configuration review The system program parameters cannot be changed The measurement mode is not interrupted Configurati...

Page 111: ...am parameters contain the information required for the various measurement programs For accessing the program parameters select the mode configuration program parameter and confirm with ENTER Program parameter 1 Selecting the measuring program to be configured Fig 61 Selecting the program to be configured Here the measuring program 1 255 to be configured is selected All following adjustments apply...

Page 112: ...letes the values determined during teach in A new teach In is required Program parameter 4 Setting the percentage threshold of the upper limit value Fig 64 Adjusting the upper limit Value range between 100 and 150 with simultaneously displaying the absolute limit value The maximal settable absolute limit depends on the sensor P42 P42A 5 mm 197 in P30 P36 3 mm 118 in P75 6 8 mm 268 in P75V 9 2 mm 3...

Page 113: ...rm Zero adjust separate All connected sensors must be zero adjusted individually each sensor is addressed individually for on or off common All sensors are zero adjusted at the same time Note The choices separate and common are available only for 4P versions with more than one sensor connected The choice on is available only for 4P versions with one sensor connected and for 1P versions During the ...

Page 114: ...NTER key Attention A sheet without air gap must be attached to the sensor The position of the sheet during teach in must be the same as for normal operation Otherwise the measurement result could be faulty During the teach in procedure the Teach in value is displayed Fig 71 Teach in measurement value This measured value can be accepted or changed e g to calibrate the control unit The Teach in proc...

Page 115: ...han 50 of the nominal dimension II Unlimited displayed value must be larger than 0 05 mm and smaller than the max measurable thickness depends on sensor size III 100 25 related to the measured thickness If this correction range is not sufficient in order to reach the nominal dimension an error message is generated The teach In affects only the selected program Pos 60 Doppelblech Geräte E20 Bus 7 I...

Page 116: ...r 5 Setting the bus address Abb 76 Setting the fieldbus address Profibus 1 125 ControlNet 0 99 DeviceNet 0 63 CanOpen 1 127 ProfiNet IO CC Link 1 62 EtherNet IP EtherCAT Note for Profibus If this adjustment is to be made in the hardware then the bus address can be set with the rotary switches inside the enclosure 1 to 99 If this adjustment is to be made via software then the rotary switches must b...

Page 117: ...fibus up to 12Mbps s selection at master ControlNet DeviceNet 125 250 500 kBit CanOpen 10 20 50 125 250 500 800 1000 kbps ProfiNet IO CC Link 125 625kbps 2 5 5 10Mbps EtherNet IP EtherCAT Interbus 500 kbits s System parameter 6 Deleting all measuring programs Fig 82 Deleting of measuring programs Possible choices yes no Attention The deletion cannot be undone System parameter 7 not available reser...

Page 118: ...et thickness The maximum can be inferred from the diagrams in chapter 2 4 Sensor data fast Here the system is enabled to detect double sheets before the normal end of the measurement The system reaction time is shorter and depending on the adjusted nominal thickness as well as the upper limit value Disadvantage In case of measuring results larger than the double sheet threshold a double sheet sign...

Page 119: ...pes the nominal thickness values must be re entered and the Teach In must be performed again System parameter 12 Specifying the type of actuating the sensors only for 4P control unit Fig 88 Sensor selection Possible choices External Switching of sensor is accomplished via the external PLC lines Sensor selection A and B Advantage faster sensor switching procedure Program Switching of sensor is acco...

Page 120: ...iming diagram single measurement must be abided by Demo mode This mode of operation is intended for equipment demonstrations but not for normal process operation The system executes measurements continuously The repetition rate of the measurement depends on the type of sensor 1 second for P42 P30 P42A P75V 2 seconds for P36 4 seconds for P75 15 seconds for P128 System parameter 15 Specifying the s...

Page 121: ...17 Setting the output logic 0 sheet 1 sheet 2 sheet outputs Fig 93 Setting the output logic Possible choices 0 V As shown in the timing diagrams 24 V The outputs 0 sheet 1 sheet and 2 sheet are inverted i e the respective signals in the timing diagrams must be seen inverted Note The outputs Enable and Warning are not affected thereby System parameter 18 Deactivating activating the external calibra...

Page 122: ...m channel O stands for the outgoing data to the fieldbus and I for the incoming data of the fieldbus The bytes are displayed in hexadecimal format Pos 61 Doppelblech Geräte E20 Bus 7 Inbetriebnahme Datensicherung RS232 0 mod_1173277907015_501 docx 3239 2 1 7 8 Data storage via serial RS232 interface For better prevention from loss of data a data backup procedure is available for the system configu...

Page 123: ...nected to the RS232 interface of the computer via the supplied cable In the configuration mode the firmware update must be selected then the following messages are alternatingly displayed Fig 100 Messages for activating firmware update The firmware update is activated by simultaneously pressing the keys arrow and ENTER for 5 seconds Fig 101 Start firmware update The update will then be executed vi...

Page 124: ...th integrated fieldbus interface Start up B0046191 Rev 1 12 124 ROLAND ELECTRONIC GmbH Otto Maurer Str 17 DE 75210 Keltern Phone 49 0 7236 9392 0 Fax 49 0 7236 9392 33 Blank page Pos 63 Kapitelübersicht 07 Betrieb 0 mod_1121422024046_501 docx 512 1 1 ...

Page 125: ...dbus The modification of the configuration is described in chapter 7 Start up 1 LED functions 2 Pushbutton functions 3 Program number 4 Selected sensor 5 Type of material 6 Nominal thickness 7 Measurement status 8 Bus address 9 Upper limit value 10 Sensor number with measured value 11 Fieldbus status 12 Bus type 13 Lower limit value 14 Bus baud rate or MAC ID Fig 102 Frontal view of the R1000 with...

Page 126: ...Note Do not adjust the upper limit up above 120 Pos 65 Doppelblech Geräte E20 Bus 8 Betrieb Messprogramm anlegen 0 mod_1173279301750_501 docx 3254 2 1 8 2 Entering a measurement program 1 Push the MENU key switch to change with the keys and confirm with ENTER key 2 Enter the password 3 Switch to program parameter and confirm with ENTER key 4 Select the desired program number at the control unit 5 ...

Page 127: ... in the configuration menu option 2 9 Return to the measurement mode with the MENU key Attention The actual measured value cannot deviate too far from the nominal dimension otherwise the fault message teach in fault appears this restriction is not valid if in the configuration option 2 mm or inch were selected The exact teach in procedure is described in the chapter 7 6 Program parameter 7 teach i...

Page 128: ...tegrated fieldbus interface Operation B0046191 Rev 1 12 128 ROLAND ELECTRONIC GmbH Otto Maurer Str 17 DE 75210 Keltern Phone 49 0 7236 9392 0 Fax 49 0 7236 9392 33 Blank page Pos 69 Kapitelübersicht 08 Fehlermeldungen 0 mod_1121422043093_501 docx 513 1 1 ...

Page 129: ...layed Fig 103 Example of a fault message The fault number indicates the fault and the probable cause The fault description and the suitable measures to remedy the fault condition are found in the following tables The cause of malfunction must be eliminated before the equipment can continue operation The fault can be cleared by pressing the MENU key on the control unit Note As long as the cause of ...

Page 130: ...ameter Number of sensors is not realistic 10 System parameter 2 sheet hold is not realistic 11 System parameter Measurement start is not realistic 12 see below 13 System parameter Sensor selection is not realistic 16 System parameter Sensor type is not defined 17 System parameter Output Level 0 1 2 is not realistic 18 System parameter External adjustment is not realistic 19 System parameter Bus ad...

Page 131: ...S4 Sensor 4 Check cable and connectors exchange sensor 52 a Measuring time is not realistic too short b Wrong sensor selected c The zero adjust was done with sheet a Exchange sensor b Set sensor on sheet 2 5 mm and select correct sensor c Perform zero adjust without sheet 53 Internal DC DC converter is defective Exchange hardware 54 The current between sensor and unit was interrupted during measur...

Page 132: ... come too fast via the parameter channel Always wait for the results of the parameter channel transmission before transferring new data 82 The fieldbus function is not possible to perform because a parallel PLC function is active for instance Measurement start via the parallel PLC inputs and in addition Measurement start via the fieldbus Avoid simultaneous operation 83 The fieldbus function is not...

Page 133: ...RONIC GmbH Otto Maurer Str 17 DE 75210 Keltern Phone 49 0 7236 9392 0 Fax 49 0 7236 9392 33 133 9 10 Other faults No Cause Remedy 91 An error has occurred which cannot be unequivocally identified to one of the above error codes Contact Roland Electronic Service Department Pos 71 Komponenten allgemein Leerseite 0 mod_1165223317234_501 docx 2343 1 ...

Page 134: ... fieldbus interface Fault messages causes and remedies B0046191 Rev 1 12 134 ROLAND ELECTRONIC GmbH Otto Maurer Str 17 DE 75210 Keltern Phone 49 0 7236 9392 0 Fax 49 0 7236 9392 33 Blank page Pos 72 Kapitelübersicht 10 Wartung 0 mod_1121422080015_501 docx 514 1 1 ...

Page 135: ...cement of sensors In order to further use the taught programs the following must be observed Before the sensor is removed its installation position must be exactly documented This applies especially to the installation position with regard to the measuring axis The original installation position in all directions has to be restored This applies especially to the gaps between the sheets Note If the...

Page 136: ...ro adjust is desired then select on and confirm with the ENTER key if zero adjust is not desired or sensor is not used in program then select off and confirm with the ENTER key Step 7 1 2 repeats for sensor 3 S3 and sensor 4 S4 if they were selected 7 2 If zero adjust common then confirm with the ENTER key all connected sensors will become zero adjusted 8 The display will show zero adjust active a...

Page 137: ...rtung Datensicherung und Firmware Update 0 mod_1173281852859_501 docx 3279 22 1 10 4 Data backup via the fieldbus interface or serial interface The R1000 offers the possibility of data exchange with a master The system and program parameter can be stored in the PLC via the fieldbus In addition stored or modified data can be written back again into the control unit The data backup via the RS232 int...

Page 138: ...s C version of a ROLAND unit series R1000 such as E10 E20 I10 UDK10 UDK20 or Fieldbus units PC with Windows 95 98 2000 NT XP Vista 7 installed and a free serial interface or USB set at COM1 COM10 null modem cable for the serial interface or USB serial adapter Your installation directory must have write permissions for later users Switch the device to backup mode For details refer to chapter 7 8 Po...

Page 139: ...not available for the fieldbus B version The data backup via the parameter channel of the fieldbus interface is possible with all versions ED UDK10 The heavy multipin industrial plug connector for the connection of the PLC interface and the supply voltage has been replaced by the smaller Harting HAN 3 plug All other plug connectors remain the same ED I10 All PG gland connectors have been replaced ...

Page 140: ...t with the additional bytes and offers additional operational features 4 External I O control The external I O control of the E20 fieldbus control unit corresponds to that of the E10 fieldbus system 5 Measurement functions The E20 fieldbus has a shorter measuring time With that new so called sequencer mode several sensors can be more efficiently interrogated 6 Sensors All presently available senso...

Page 141: ...001 00000100 00000000 00000000 00000000 00000000 checksum Read TO in 1 10 0H110001 00000101 00000000 00000000 00000000 00000000 checksum Read internal progr param 1 0H110001 example 00000000 1 11111110 255 11111111 is reserved for system parameter data 00000110 00000000 00000000 00000000 00000000 checksum Read internal progr param 2 0H110001 00000111 00000000 00000000 00000000 00000000 checksum Re...

Page 142: ...h multi S1 Answer internal progr param 2 0H110001 00000111 internal value internal value internal value internal value checksum float 0 75 2 0 teach multi S2 Answer internal progr param 3 0H110001 00001000 internal value internal value internal value internal value checksum float 0 75 2 0 teach multi S3 Answer internal progr param 4 0H110001 00001001 internal value internal value internal value in...

Page 143: ...1 00000111 internal value internal value internal value internal value checksum float 0 75 2 0 teach multi S2 Write internal progr param 3 0H110010 11111110 255 00001000 internal value internal value internal value internal value checksum float 0 75 2 0 teach multi S3 Write internal progr param 4 0H110010 00001001 internal value internal value internal value internal value checksum float 0 75 2 0 ...

Page 144: ...11111111 00001001 00000000 00000000 00000000 00000000 checksum Read sys param 10 0H110001 11111111 00001010 00000000 00000000 00000000 00000000 checksum Read sys param 11 0H110001 11111111 00001011 00000000 00000000 00000000 00000000 checksum Read sys param 12 0H110001 11111111 00001100 00000000 00000000 00000000 00000000 checksum Read sys param 13 0H110001 11111111 00001101 00000000 00000000 0000...

Page 145: ...am 10 0H110001 11111111 00001010 00000000 00000000 00000000 value 8 bit checksum 0 1 Sensor selection Answer sys param 11 0H110001 11111111 00001011 00000000 00000000 00000000 value 8 bit checksum 0 magnetic conveyor Answer sys param 12 0H110001 11111111 00001100 00000000 00000000 00000000 value 8 bit checksum 0 2 Meas Mode Answer sys param 13 0H110001 11111111 00001101 00000000 00000000 00000000 ...

Page 146: ...0H110010 11111111 00001011 00000000 00000000 00000000 value 8 Bit checksum 0 Magnetic conveyor Write sys param 12 0H110010 11111111 00001100 00000000 00000000 00000000 value 8 Bit checksum 0 2 Meas Mode Write sys param 13 0H110010 11111111 00001101 00000000 00000000 00000000 value 8 Bit checksum 0 Hold 2 sheet Write sys param 14 0H110010 11111111 00001110 00000000 00000000 00000000 value 8 Bit che...

Page 147: ... equal sensors E20 DN S FP Connection of 1 sensor in front panel enclosure data backup via DeviceNet or serial interface E20 4P DN S FP Connection of max 4 equal sensors DeviceNet A coded E20 DNT S Connection of 1 sensor in wall mount enclosure data backup via DeviceNet or serial interface E20 4P DNT S Connection of max 4 equal sensors E20 DNT S FP Connection of 1 sensor in front panel enclosure d...

Page 148: ...N S Connection of 1 sensor in wall mount enclosure data backup via EtherNet IP or serial interface E20 4P EN S Connection of max 4 equal sensors E20 EN S FP Connection of 1 sensor in front panel enclosure data backup via EtherNet IP or serial interface E20 4P EN S FP Connection of max 4 equal sensors EtherCAT E20 ET S Connection of 1 sensor in wall mount enclosure data backup via EtherCAT or seria...

Page 149: ...t clamping bracket suction cup diameter 110 mm SHS42GS85 Spring loaded sensor bracket for direct installation of sensors with threaded body M42 x 1 5 mm with vacuum cup without clamping bracket suction cup diameter 85 mm SHS75GS Spring loaded sensor bracket for direct installation of sensors with threaded body M75 x 1 5 mm with vacuum cup without clamping bracket suction cup diameter 110 mm SHX42 ...
Page 150: ... GG OILFLEX FD 810 CY 2 x 1 mm Cable for connection of sensor P128GPPS to E20 fieldbus both cable ends with quick disconnect plug straight cable plug for connection of the control unit and straight receptacle for connection of the sensor SM12CPPPS GW OILFLEX FD 810 CY 2 x 1 mm Cable for connection of sensor P128GPPS to E20 fieldbus both cable ends with quick disconnect plug straight cable plug for...

Page 151: ...om date 27 02 2006 the measurement times have been remarkably reduced The current sensor diagrams are shown under section 2 4 Sensor data Anyhow having the old sensor diagrams available could be useful e g for exchanging control units with old new Hardware version For this reason the old sensor diagrams are shown here Measuring time P30GS of old Device Hardware Versions 1 4 Fig 105 System reaction...

Page 152: ...7236 9392 33 Measuring time P42AGS of old Device Hardware Versions 1 4 Fig 106 System reaction time P42AGS 100 110 120 130 140 150 160 170 180 190 200 210 220 230 240 250 260 270 280 290 300 310 320 330 340 350 360 370 380 390 4 0 Single sheet thickness Nominal thickness mm Standard working range 3 5 3 0 2 5 2 0 1 5 1 0 0 5 0 150 120 P42AGS 4 sensors 3 sensors 2 sensors 1 sensor System reaction ti...

Page 153: ... time P75VGS of old Device Hardware Versions 1 4 Fig 107 System reaction time P75VGS 100 150 200 250 300 350 400 450 500 550 600 650 700 750 800 850 900 950 1000 1050 1100 1150 1200 1250 1300 1350 1400 1450 1500 1550 1600 1650 1700 0 1 0 2 0 3 0 4 0 5 0 6 0 7 0 8 0 150 120 P75VGS 4 sensors 3 sensors 2 sensors 1 sensor with restriction System reaction time ms Standard working range Single sheet thi...

Page 154: ...us interface Appendix B0046191 Rev 1 12 154 ROLAND ELECTRONIC GmbH Otto Maurer Str 17 DE 75210 Keltern Phone 49 0 7236 9392 0 Fax 49 0 7236 9392 33 Blank page Pos 88 Doppelblech Geräte E20 Bus 13 Anhang Formular Systemkonfiguration 0 mod_1173367026109_501 docx 3319 2 1 ...

Page 155: ...re Bus baud rate ______________ MAC ID ______________ DHCP _____________ IP ______________ SubNet _____________ Gateway _____________ Password yes no Measurement fast normal Sensor type P30 P42 P75V P128 Number of sensors 4P only 1 2 3 4 Sensor selection not with 4P program fixed 4P only program external Meas mode ext continuous meas ext single meas demo mode Hold 2 sheet no Meas start IN0 IN0 IN1...

Page 156: ...ntegrated fieldbus interface Appendix B0046191 Rev 1 12 156 ROLAND ELECTRONIC GmbH Otto Maurer Str 17 DE 75210 Keltern Phone 49 0 7236 9392 0 Fax 49 0 7236 9392 33 End of Document Pos 90 Komponenten allgemein Leerseite 0 mod_1165223317234_501 docx 2343 1 ...

Reviews: