Confidential & Proprietary|© ROKIT Healthcare Inc. 2019. All Rights Reserved
Creating a G-Code for Single Printing
1. Run [New Creator K] installed on your PC.
2. Make sure that the X-Y coordinates are updated in [New Creator K] on the PC.
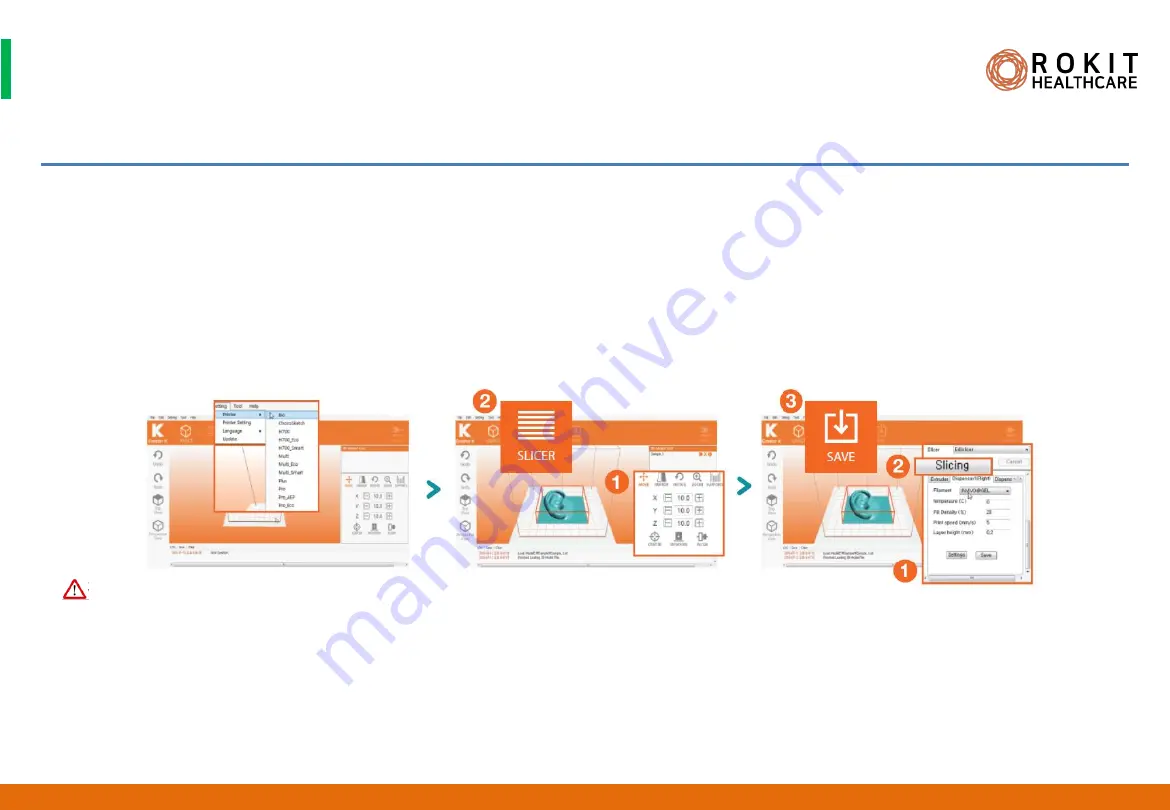
3. Select [Settings]> [Printer]> [Bio] on the top menu of NewCreatorK.
4. Press [File]> [Open] to select and import the 3D modeling file. (stl, obj, amf files)
5. Click the [OBJECT] tab to move, rotate, and change dimensions of the 3D model.
6. In [SLICER], enter the printing setting parameters (output speed, output nozzle temperature, fill%, etc.).
7. Click the [Slicing] button at the top to create a G-Code file, and then click the [SAVE] button to save the file.
1. Every time X-Y coordinates are updated on [New Creator K] on PC, a new G-Code file must be created.
2. For details on how to use [New Creator K], refer to the NewCreatorK User's Guide.
3. NewCreatorK does not support files with an extension of 3ds.
4. NewCreatorK supports file names up to 26 English characters.
5. With the help of a professional trained technician, familiarize yourself with how to set each and every slicing parameter.
6. The exact slicing parameters may vary for the same material depending on the surrounding environment (temperature, humidity, etc.)
and the object size to be printed.
36
Dr. INVIVO 4D User Guide
INV-CHS-20191210
CAUTION


