Confidential & Proprietary|© ROKIT Healthcare Inc. 2019. All Rights Reserved
Dr. INVIVO 4D User Guide
Use of the Air Dispenser Controller (Upgrade & Premium)
1. To use the Hot-Melt Pneumatic Dispenser system, first press [New Creator K APP] > [Setting] > [Option], and press [ON] on the
‘Dispenser Type(Bio INVIVO).
2. After unscrewing the barrel fixture, fill the stainless barrel(10ml) with the material to be printed.
3. After mounting the precision nozzle on the barrel, install it in the equipment, and screw the barrel fixture.
4. Set the preferred temperature at the right side of Air Dispenser Controller. (max ~ 350 ℃)
5. Wait for the material to sufficiently melt (i.e. 20-30 min). Periodically press [shot] for checking whether the material comes out.
6. Start the print.
25
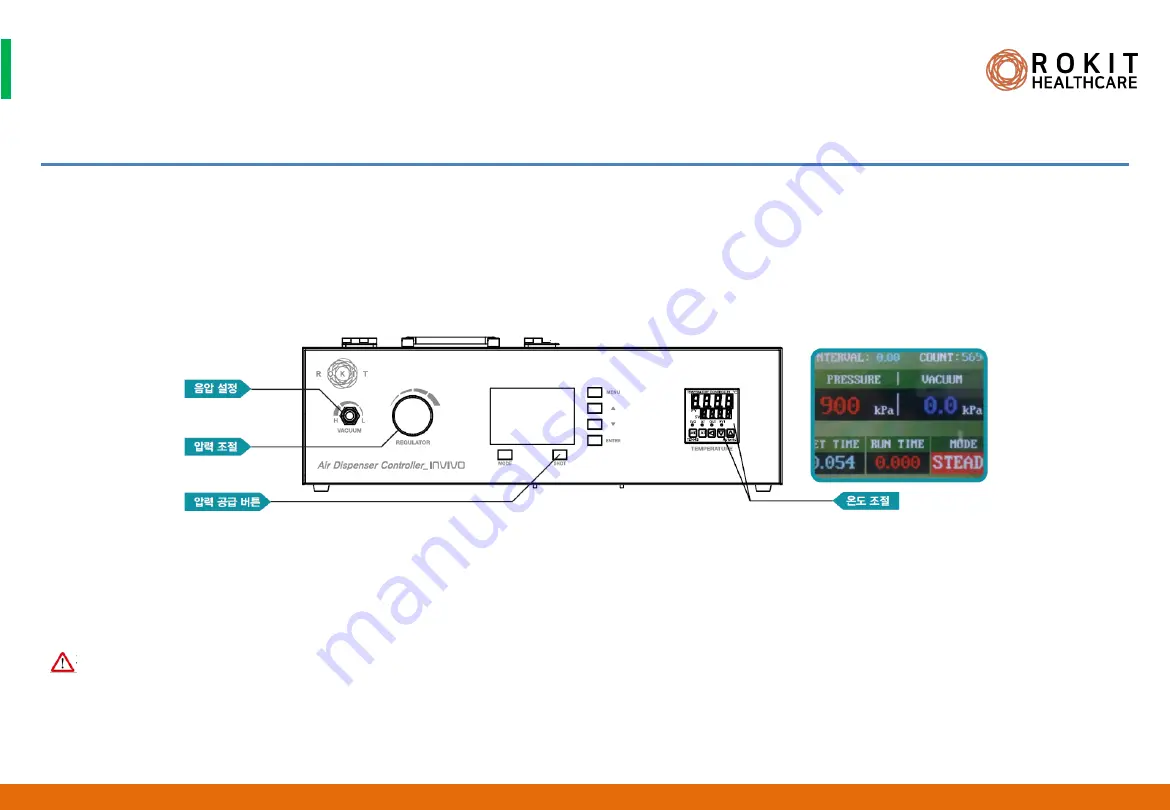
1. Turning the vaccum knob can often stop ooze from the printhead by applying a negative pressure on the total system.
2. The maximum pressure is 9.9 bar
3. If you are not using the Air Dispenser, lock the ‘Air In’ switch on the back of the control box to reduce air loss in the Air Compressor.
Vacuum Control
Pressure Control
Pressure Shot Button
Air Dispenser Temperature Control
INV-CHS-20191210
CAUTION
Using MODE and SHOT Buttons
1. When MODE is “TIME”: Pressing SHOT extrudes the material over a set period of time
2. When MODE is “STEADY”: Pressing SHOT extrudes the material continuously without time restraint
3. SET TIME can be adjusted using
▲,▼ buttons


