Renegade Labs Gray|328
Assigning ESAM II Crosspoints
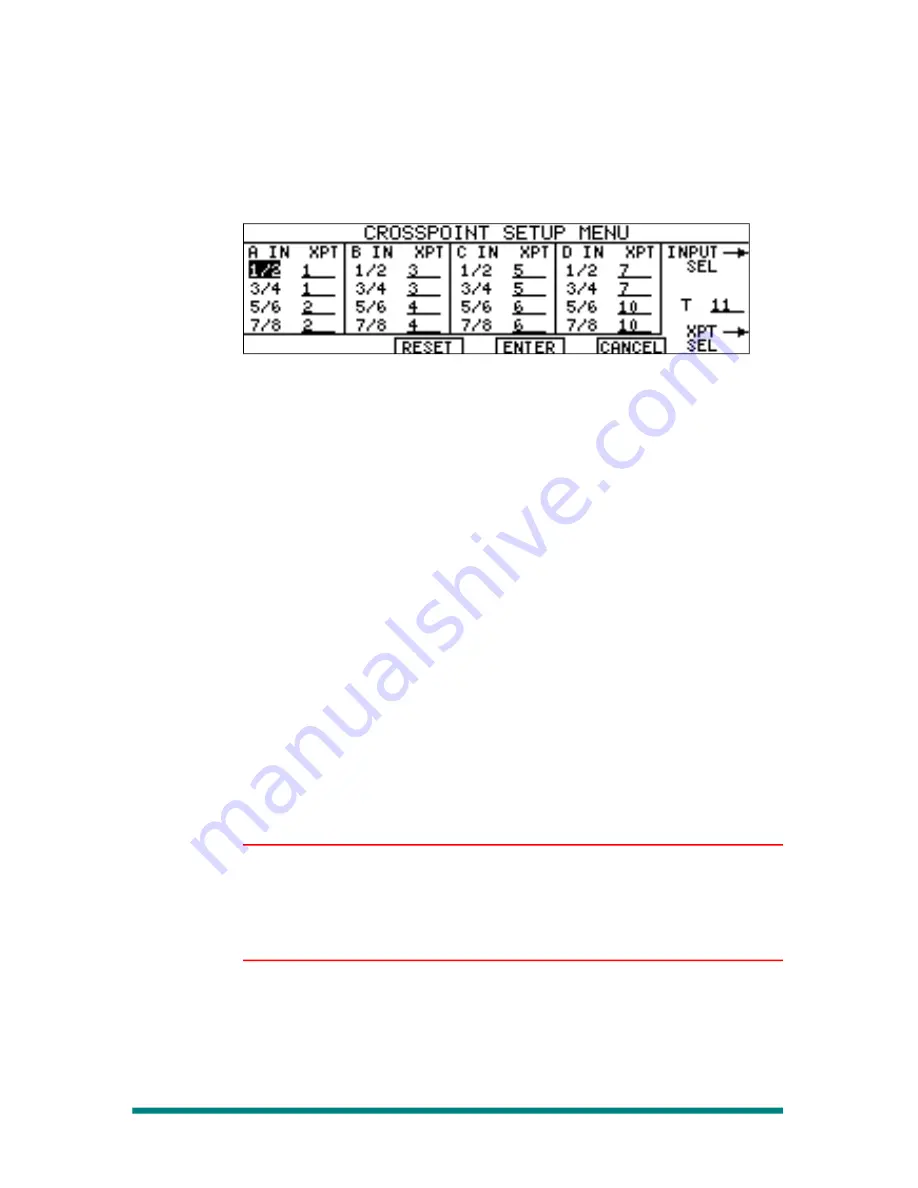
The CROSSPOINT SETUP Menu is used to assign inputs to ESAM II
editor system crosspoints and to display the current crosspoint settings.
Figure 109. CROSSPOINT SETUP Menu for 4-channel
editing
The Crosspoint Setup Menu is divided into 5 sections. Four of the
sections follow the input card slots A – D. Each input card slot section
allows each input pair to have a crosspoint number assigned to it. The
upper softknob (INPUT SEL) is used to scroll through the various inputs
while the lower softknob (XPT SEL) adjusts the crosspoint number. The
input pair that is reversed video is the current selected pair (A IN 1/2 in
above example).
The right most section of the Crosspoint Setup Menu allows for setting
the T (TONE) crosspoint number. Refer to “Enable/Disable TONE“ on
page 34 for additional information regarding TONE.
To assign ESAM II crosspoints to input pairs:
1.
Press the MENU button to bring up the System Menu.
2.
Press MORE twice to display the third level of the System Menu.
3.
Press XPTS to bring up the CROSSPOINT SETUP Menu.
4.
Choose a input pair or T to assign a crosspoint to by scrolling the
INPUT SEL control.
5.
Assign an editor system crosspoint to the selected channel, by
scrolling the XPT SEL control through the available crosspoints until it
displays the desired crosspoint. Crosspoint numbers 1-255 are
available for input pair assignments.
Note
The edit system Record VTR audio crosspoint number must be assigned
to the input pair(s) associated with the Record VTR for Auto Record to
function properly. Refer to “Auto Record“ on page 89 for additional
information regarding Auto Record.
Crosspoint 0 is designated as silence on the Gray|328.
6.
Press the ENTER soft button to accept the settings.
OR,
Press RESET to set the input crosspoints to the default 8 channel
setting.
Press CANCEL to abort all changes.
Page 90
ESAM II Control


