Optional Feeder
4-11
Printer Options
3
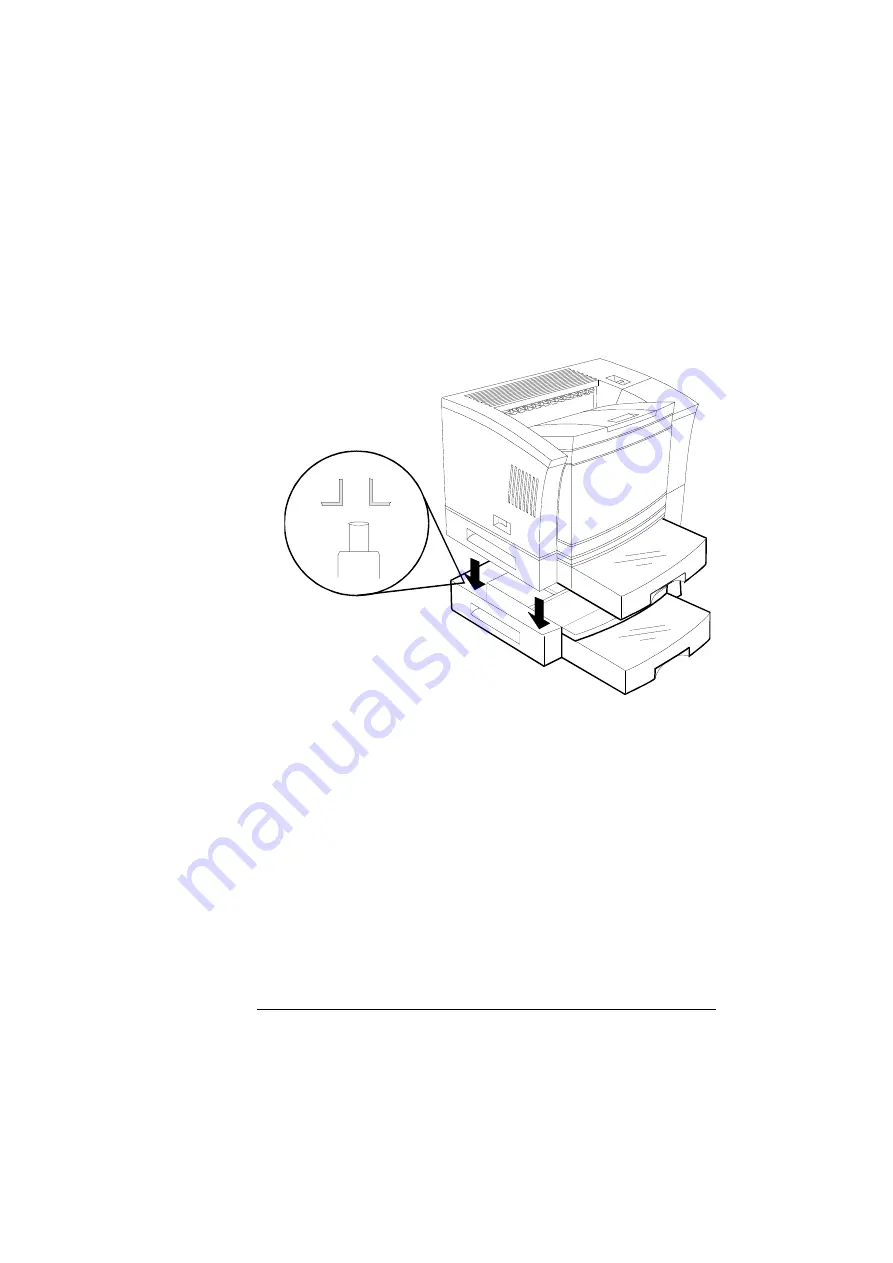
Using the carrying grips located on the sides of the standard
feeder, set the printer and standard feeder on the optional
feeder, using the coupling pins as guides.
»
Note: Align the printer over the pins on the optional feeder, and
set the printer down on the optional feeder so that the three
positioning posts on the optional feeder fit into the holes on the
printer’s bottom. Ensure that the printer and the optional feeder
are securely seated.
4
Reconnect the interface cables, plug in the power cord, and
turn the printer back on.
If you experience problems, check the order of the paper feeders
in the stack, making sure that the optional paper feeder’s connec-
tor is correctly aligned with the pins on top of the standard paper
feeder.
5
Load the optional cassette, using the directions in “Refilling
the Media Cassette” on page 2-45.
»
Note: In the printer driver this cassette is called the lower tray.
Summary of Contents for 2060 WX
Page 1: ...1800457 001 QMS 2060 WX Print System User s Guide...
Page 10: ......
Page 178: ...QMS World wide Offices QMS 2060 WX Print System User s Guide A 6...
Page 192: ......


