6.2
Mixer Controls
6.2.1 Microphone Channel Controls
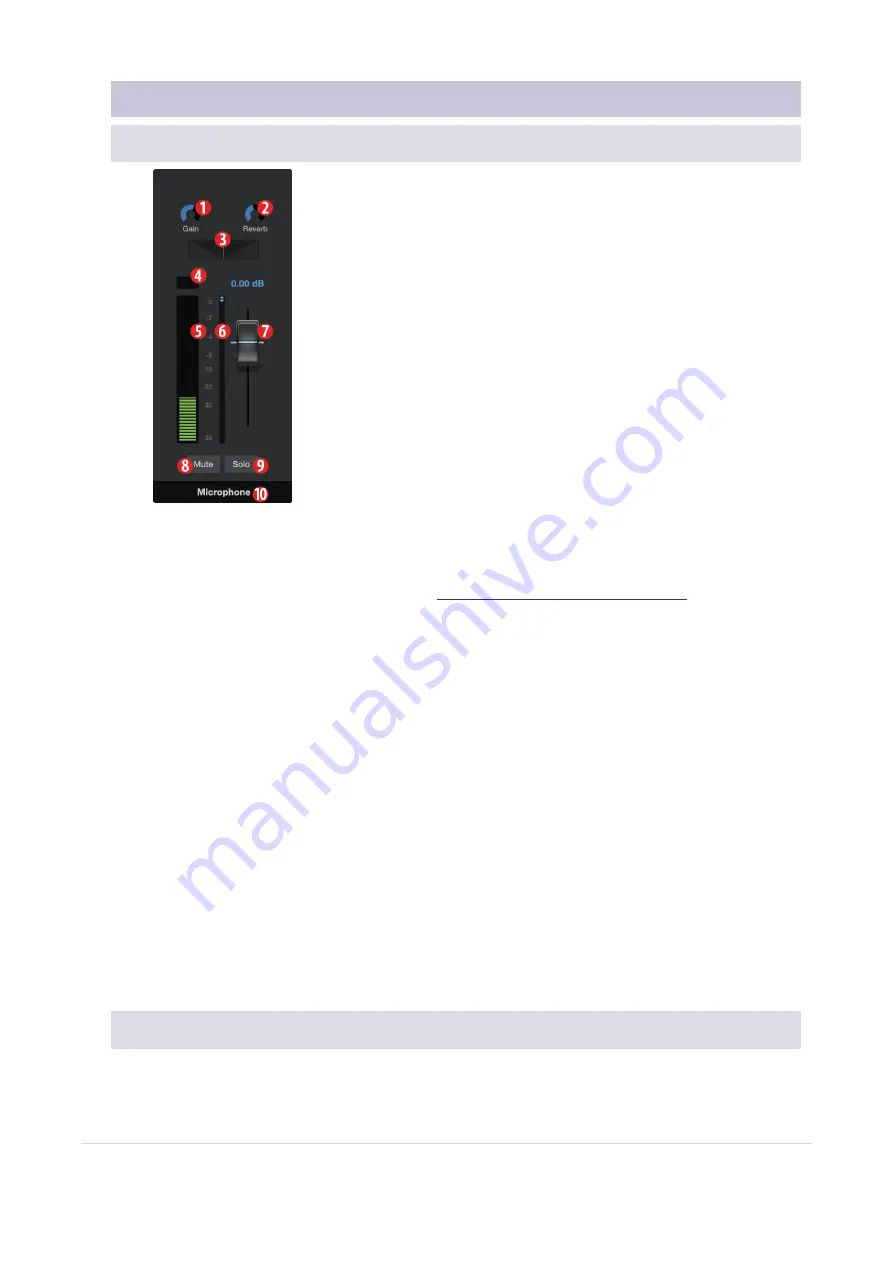
1.
Gain.
Use this control to set the gain for your connected microphone or instrument. Gain can also be
set using the Encoder knob on your Revelator Dynamic.
2.
Reverb.
Use this control to set the amount of Reverb applied to the signal. Reverb settings can be set
up to taste using the Reverb section. See the
Fat Channel and Voice Effects section
for more on
Reverb.
3.
Pan.
This sets the pan position for your signal in every stereo mix. Pan sets the position of the micro-
phone relative to the left and right side of the mix. When the Pan is set to the center position, your
microphone will sound equally in both the left and right side of the mix. As you turn it to the right, it will
be louder in the right side. As you turn it to the left, it will be louder in the left side.
4.
Clip Light.
This light will illuminate red when the input signal is too loud and clipping. If your input sig-
nal clips, it will overload the Revelator Dynamic’s analog-to-digital converters, causing digital dis-
tortion. This sounds terrible. If you record a signal with digital distortion, there is no undoing it or fixing
it. And because of this, it’s important to keep your eye on this indicator while you’re setting your
levels.
5.
Channel Meter.
This meter displays the current level of your microphone before the fader level.
6.
Gain Reduction Meter.
This meter displays the amount of gain reduction being applied to your micro-
phone signal by the gate, compressor and/or limiter.
7.
Microphone Channel Fader.
Controls the Overall Level of the Microphone Channel in the currently
selected mix.
8.
Mute.
Mutes the signal in every stereo mix.
9.
Solo.
Solos the signal in every stereo mix.
10.
Channel Name.
Double-clicking on the word “Microphone” will let you customize the name of the
microphone channel.
6.2.2 Mixer Channel Controls
Your Revelator Dynamic mixer has four channels:
6.2 Mixer Controls
63


