iNS/iDS 2-Wire System Manual
350-077
Rev. D - 1/20/2021
Page 80 of 107
11.2
iCCU-X2 Wired Connection
The iCCU-X2 can be connected via Ethernet connection to an internal network. Any Ethernet connection to the iCCU-X2
shou
ld not be open to the internet, but should be restricted to the department’s intranet. An IP address should be
assigned by the IT department prior to connection so proper setup can be performed.
Once the Ethernet cable has been attached to the iCCU-X2 and the PC or Laptop in use is also connected either directly
to the iCCU-X2 or connected through an intranet, the Intelligent Config software can be used to connect to the iCCU-X2.
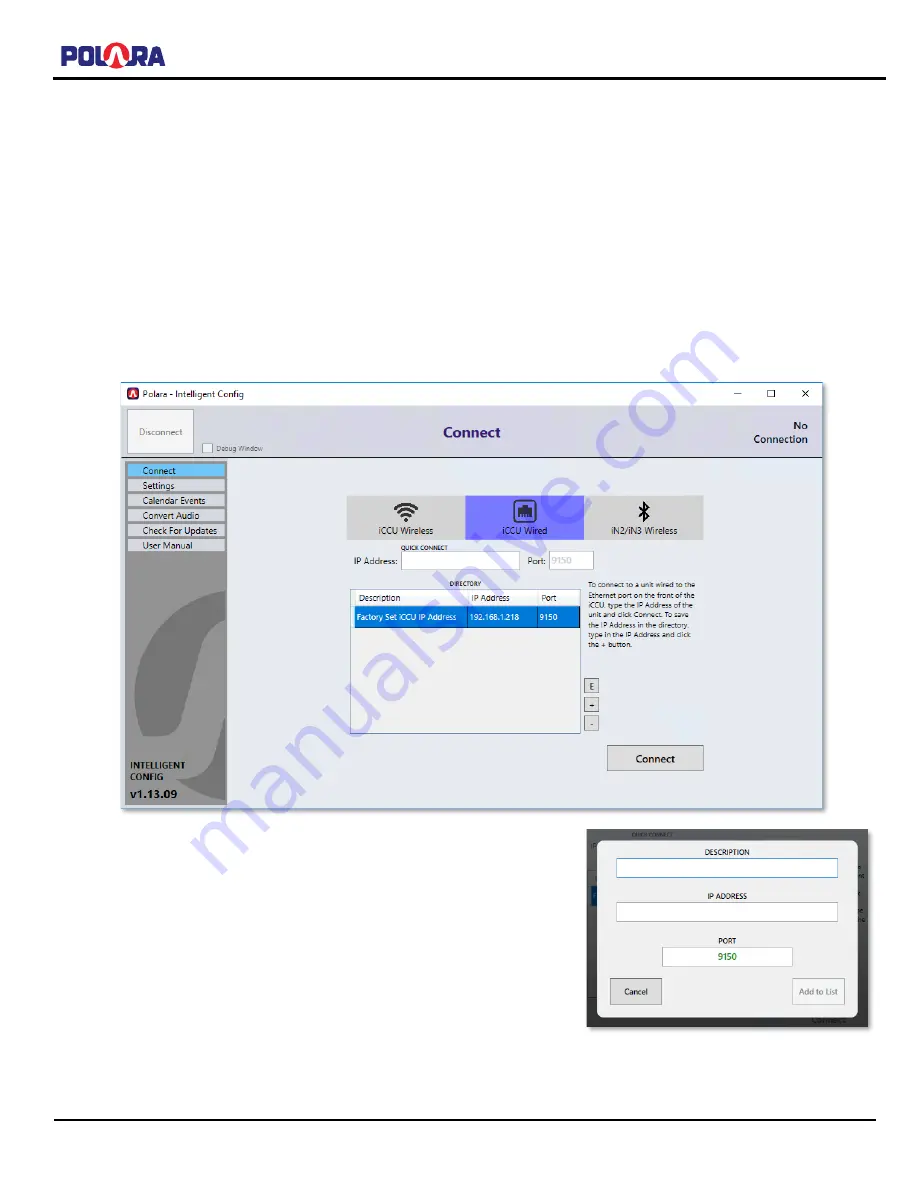
In the Intelligent Config software, click on the iCCU Wired tab on the Connect screen. If the iCCU-X2 you are connecting
to has the factory default IP address, you can double-click on the Factory Set iCCU IP Address item in the list and the App
will attempt to connect to the iCCU-X2. If a connection is successful, you will see a password prompt.
If the IP Address and/or port of the iCCU-X2 is not set to factory default, you can type the IP address and port into the
Quick Connect fields and click the Connect button to connect.
If you would like to save the IP address and port for one or more iCCU-X2s,
you can add new items to the Directory by clicking the [+] icon and entering
the appropriate information. Likewise, you can remove an item from the
directory by selecting the item and clicking the [-] icon and you can edit the
item by selecting it and clicking the [E] icon.
Once you are logged in, see section 10.12 for the Ethernet Settings screen to
change the IP Address, Subnet Mask, Gateway and port if necessary.


