iNS/iDS 2-Wire System Manual
350-077
Rev. D - 1/20/2021
Page 35 of 107
5.6
Setting the iCCU-X2 Time/Date, SNTP & DST Settings
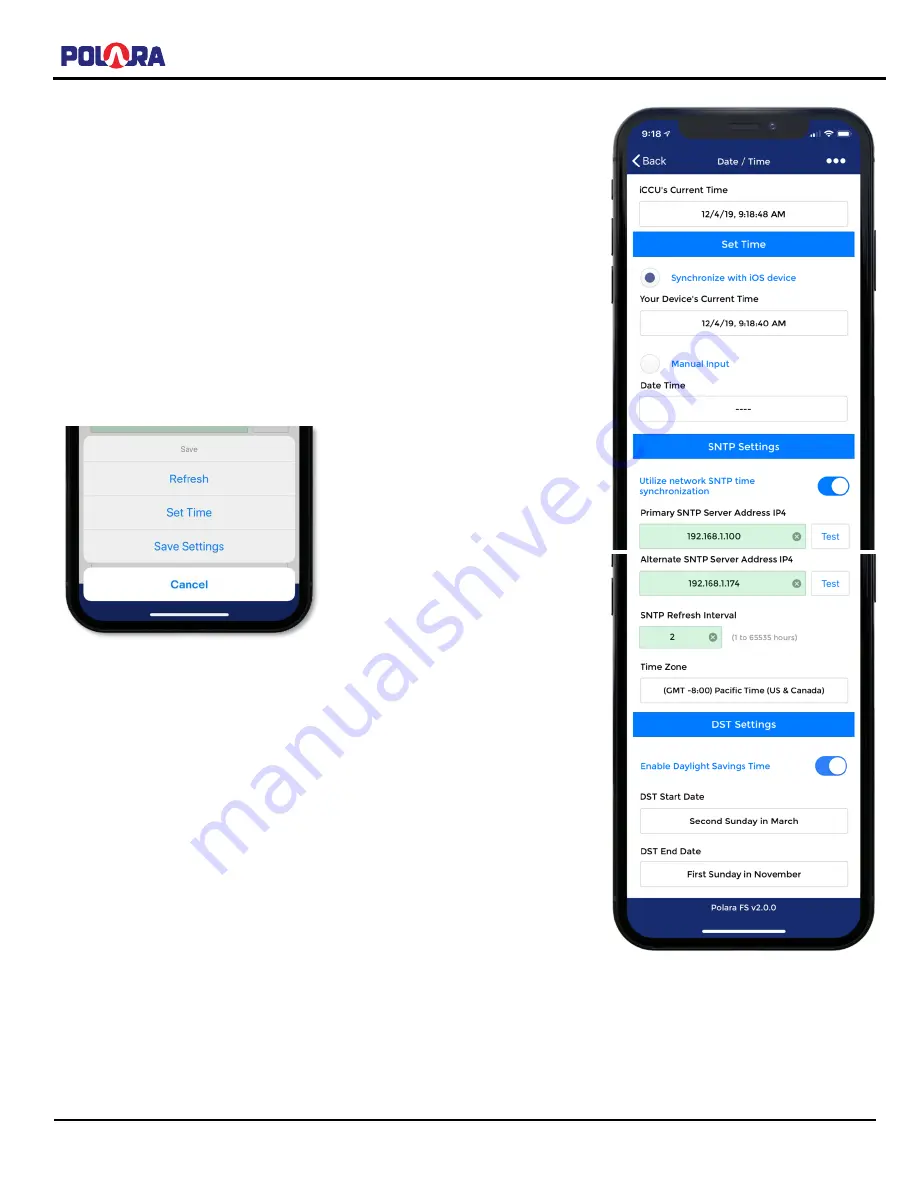
While viewing the Main Menu, select iCCU Configuration, then select Date/Time.
When the radio button is set to Synchronize with iOS device, the time on the
iCCU-X2 will be set to the time currently detected on your iOS device. Tap the
three dots on the upper right corner of the screen and select Set Time.
If you wish to specify a spe
cific date/time that is different from your computer’s
time select the Manual Input option and set the desired time, then tap Done. Tap
the three dots on the upper right corner of the screen, then select Set Time to
apply the changes.
Note that setting the time on the iCCU-X2 also sends the updated time to any
iNS2 PBSs currently connected to the network. Also, when new iNS2 units
establish a connection with the iCCU-X2, the time is synchronized with the iNS2
units automatically.
The iCCU-X2 has the ability to connect to a network time server to periodically
obtain the current time. The time server cannot be a device on the open internet
but must be a local server connected to the same network as the iCCU-X2.
Check with your IT Administrator for the appropriate IP Addresses to use. The
iCCU-X2 uses the industry standard port 123 (UDP) for SNTP. The Refresh
Interval setting adjusts how often (in hours) the iCCU-X2 will ask the server for
the updated time. Select the appropriate time zone for the area. If daylight
savings time is used in the selected time zone, then the daylight savings time
switch will automatically be set to the appropriate state.
Click the Test button next to the SNTP server to test and the server will be
queried for the current time. If successful, a dialog will appear with the current
time in GMT and the time converted using the selected Time Zone and DST
settings.
You can manually enable and disable the daylight savings time adjustment and
can also modify the date that DST starts and ends.
Tap the three dots on the upper right corner of the screen, then tap Save Settings to save the changes made to SNTP
and DST settings.


