


Troubleshooting
247
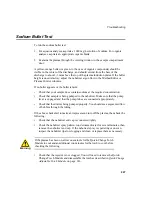
Sodium Bullet Test
To run the sodium bullet test:
1. For aqueous analyses, aspirate a 1000 mg/L solution of sodium. For organic
analyses, aspirate an appropriate organic blank.
2. Examine the plasma through the viewing window in the sample compartment
door.
A yellow-orange bullet (or green, in the case of organic compounds) should be
visible in the center of the discharge, and should extend from the base of the
discharge to about 2-3 mm above the top of the plasma induction plates. If the bullet
height is unsatisfactory, adjust the nebulizer argon flow in the Method Editor or
Plasma Control windows.
If no bullet appears or the bullet is faint:
•
Check that your sample does contain sodium at the required concentration.
•
Check that sample is being pumped to the nebulizer. Make sure that the pump
lever is engaged and that the pump tubes are connected appropriately.
•
Check that the drain is being pumped properly. You should see a segmented flow
of bubbles through the tubing.
If the above checks fail to make an improvement, turn off the plasma, then check the
following:
•
Check that the nebulizer end cap is connected tightly.
•
Check the nebulizer spray pattern: run deionized water for several minutes, then
remove the nebulizer end cap. If the nebulizer spray is sputtering or uneven,
inspect the nebulizer tips for clogging and clean or replace them as necessary.
•
Check that the injector is not clogged. You will need to remove the Quick-
Change Torch Module and disassemble the torch as described in
Quick-Change
Adjustable Torch Module
on page 146.
If the plasma has been on, allow one minute for the Quick-Change Torch
Module to cool and an additional two minutes for the torch to cool before
checking the following.
!
Warning
Summary of Contents for OPTIMA 8000
Page 1: ...OPTIMA 8000 Customer Hardware and Service Guide ICP OPTICAL EMISSION Return to Document Menu...
Page 2: ......
Page 3: ...Optima 8000 Customer Hardware and Service Manual...
Page 12: ...Contents 10...
Page 18: ...16 Indicates the ON position of the main power switch Indicates alternating current...
Page 24: ...22 Figure C Location of warning labels in the sample compartment 1 2...
Page 28: ...26...
Page 29: ...Safety Practices 1...
Page 49: ...Preparing Your Laboratory 2...
Page 61: ...Preparing Your Laboratory 60...
Page 62: ...System Description 3...
Page 89: ...Installation 4...
Page 136: ...Maintenance 5...
Page 241: ...Troubleshooting 6...
Page 264: ...Error Messages 7...
Page 284: ......