176
5
Edi
ting and Pr
in
ting
Ima
g
es
1
In the printing mode selection screen, use the four-way
controller (
23
) to select [DPOF AUTOPRINT].
2
Press the
4
button.
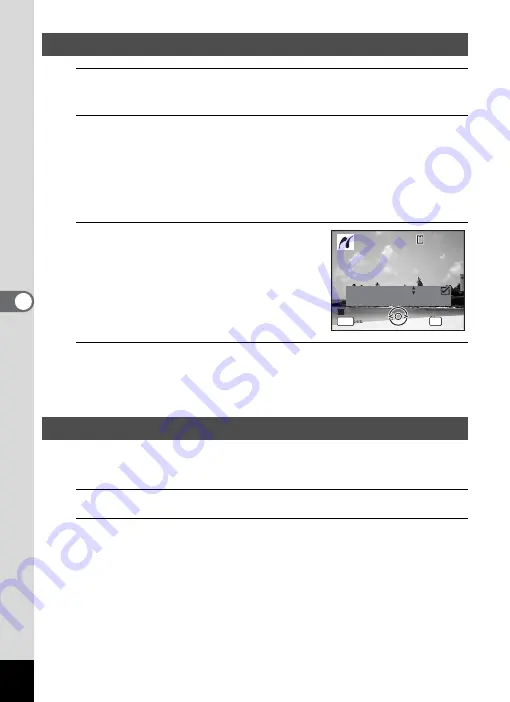
The DPOF settings you have made appear.
Use the four-way controller (
45
) to check the number of copies for
each picture, whether to insert the date or not, and the total number of
copies. Refer to p.168 for instructions on how to make the DPOF
settings.
3
Press the
4
button.
A confirmation dialog appears.
Refer to Steps 7 to 13 of “Printing Single
Images” (p.173) for details of changing print
settings.
4
Press the
4
button.
The images are printed according to the settings.
Press the
3
button to cancel printing.
Disconnect the USB cable from the camera and printer when you have
finished printing.
1
Turn off the camera and printer.
2
Disconnect the USB cable from the camera and printer.
Printing Using the DPOF Settings
Disconnecting the Cable from the Printer
D a t e
D a t e
C o p i e s
T o t a l
D a t e
0 1
P r i n t w i t h DPOF s e t t i n g
P r i n t w i t h DPOF s e t t i n g
OK
1 0
MENU
1 0 0
1 0 0 - 0 0 1 7
0 0 1 7
1 0 0 - 0 0 1 7
C a n c e l
C a n c e l
C a n c e l
D a t e
Summary of Contents for 17601 - Optio P70 Digital Camera
Page 50: ...Memo 48 ...
Page 51: ...2 Common Operations Understanding the Button Functions 50 Setting the Camera Functions 55 ...
Page 64: ...Memo 62 ...
Page 185: ...7 Settings Camera Settings 184 ...
Page 222: ...Memo ...
Page 247: ...Memo ...
Page 252: ...Memo ...
Page 253: ...Memo ...
Page 254: ...Memo ...
Page 255: ...Memo ...


