Local Firmware Update Tool (Parallel /USB Port)
Page 8
4. Using the Local Firmware Update Tool
1
Set the machine to the Firmware Update Mode and then connect the unit and PC with a Parallel
cable or USB cable depending on machine option.
Note: For the USB Port Models, the Plug & Play of the Printer mode is activated when the
USB cable is connected without the unit set in the USB Firmware Update Mode. If
this happens, please click the [Cancel] button for the Plug and Play Driver
installation.
2
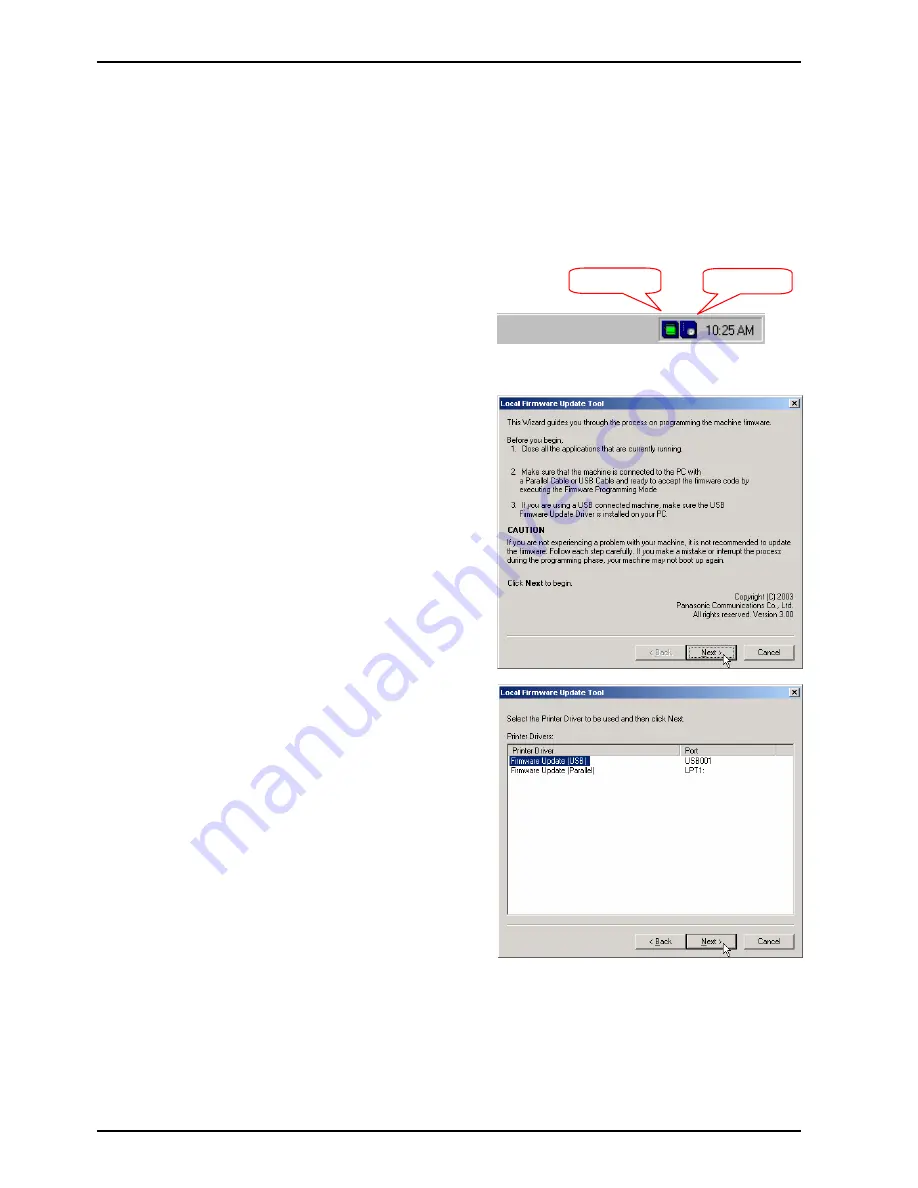
Please close the all applications that are
currently running.
Also ensure that the
Status Monitor
and/or
Port Controller
are
closed
. If they are
running, right click on the icons in the system
tray and select Exit/End.
Note:
For Windows 2000/XP Administrator
privileges are required.
3
From the Windows Desktop, double-click on
the
Local Firmware Update Tool
shortcut
icon to start the Panasonic Firmware
Programming Wizard.
Note:
If a shortcut was not created to the
Windows Desktop at the time of installation,
click the
Start
button on the Taskbar, point to
(All) Programs
►
Panasonic
►
Panasonic
Firmware Update
,
then select
Local
Firmware Update Tool
.
Click [
Next>
].
4
Select the Firmware Update Driver USB or
Parallel depending on how the machine is
connected to the PC.
Click [
Next>
].
Note:
The “Firmware Update Driver (USB)” is
only displayed if you installed it with the
unit as Plug and Play.
Port Controller
Status Monitor
Summary of Contents for DP-8032
Page 2: ...2 ...
Page 3: ...3 ...
Page 5: ...5 Hinweis Beispiel ...
Page 9: ...9 ...
Page 10: ...10 ...
Page 11: ...11 ...
Page 12: ...12 memo ...
Page 397: ...Published in Japan ...


