


Enabling [Auto Port Forwarding] using the [Internet] tab
1.
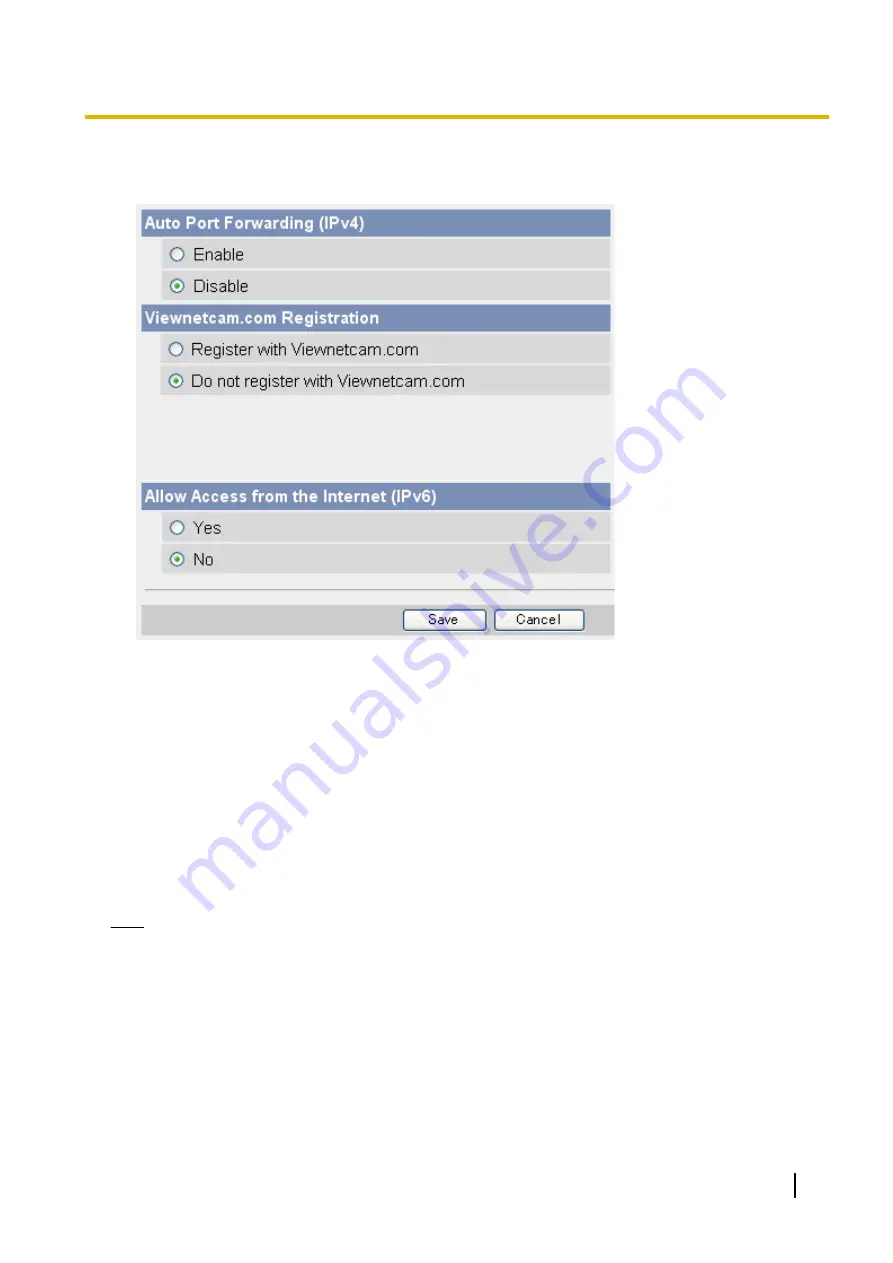
Click the [Internet] tab.
2.
Under [Auto Port Forwarding (IPv4)], select [Enable].
3.
Click [Save].
•
A notice is displayed informing you that the camera’s port number may change.
4.
Click [OK].
•
[Router configuration in progress to allow access from the Internet.] is displayed.
•
If you want to register with Viewnetcam.com (visit http://www.viewnetcam.com for details), select
[Register with Viewnetcam.com] before clicking [Save]. Click [Go to Viewnetcam.com Registration
page] when this button is displayed. The Viewnetcam.com website will open in a new window. Follow
the on-screen instructions to register with Viewnetcam.com.
•
When [Setup completed] is displayed, the addresses for accessing the camera over the LAN and over
the Internet are displayed.
5.
Click [To Single Camera page].
6.
Confirm that port forwarding was configured correctly (see Page 102).
Note
•
If you have multiple cameras connected to the same network, only one of the cameras needs to be
registered with Viewnetcam.com. All cameras connected to the network can be accessed from the
Internet using your Viewnetcam.com URL (for example,
***.viewnetcam.com
) and adding the
desired camera’s port number after the URL. Example:
http://***.viewnetcam.com:50000
,
http://***.viewnetcam.com:50001
, etc. Note, however, if the camera that is registered to
Viewnetcam.com is turned off and your ISP-provided global IP address changes, you will not be able
to access any of the cameras.
•
To disable Viewnetcam.com service for this camera later, access the Viewnetcam.com website
(http://www.viewnetcam.com) and cancel your registration.
•
If auto port forwarding is enabled or disabled on this page, it is also enabled or disabled on the
[UPnP] page.
Operating Instructions
101
4.1 Configuring Port Forwarding
Summary of Contents for BL-C210 Series
Page 124: ...6 After the wizard is displayed click Next 124 Operating Instructions 5 2 HTTPS Settings ...
Page 126: ...9 Click Next 126 Operating Instructions 5 2 HTTPS Settings ...
Page 127: ...10 Click Finish Operating Instructions 127 5 2 HTTPS Settings ...
Page 131: ...6 Click Finish 7 Click Yes Operating Instructions 131 5 2 HTTPS Settings ...


