62
10.3.2 Positioning
Each
Overlay layer
also includes
Position
controls, to let you resize the overlaid
source and place it according to taste.
Roll the mouse pointer over the layer’s
viewport to reveal the familiar gear icon.
Click this to open the
Positioning
settings
pane for the associated layer.
Note: The Titles layer includes addition
controls for editing title pages in this
panel. These features are discussed in
Chapter 12.
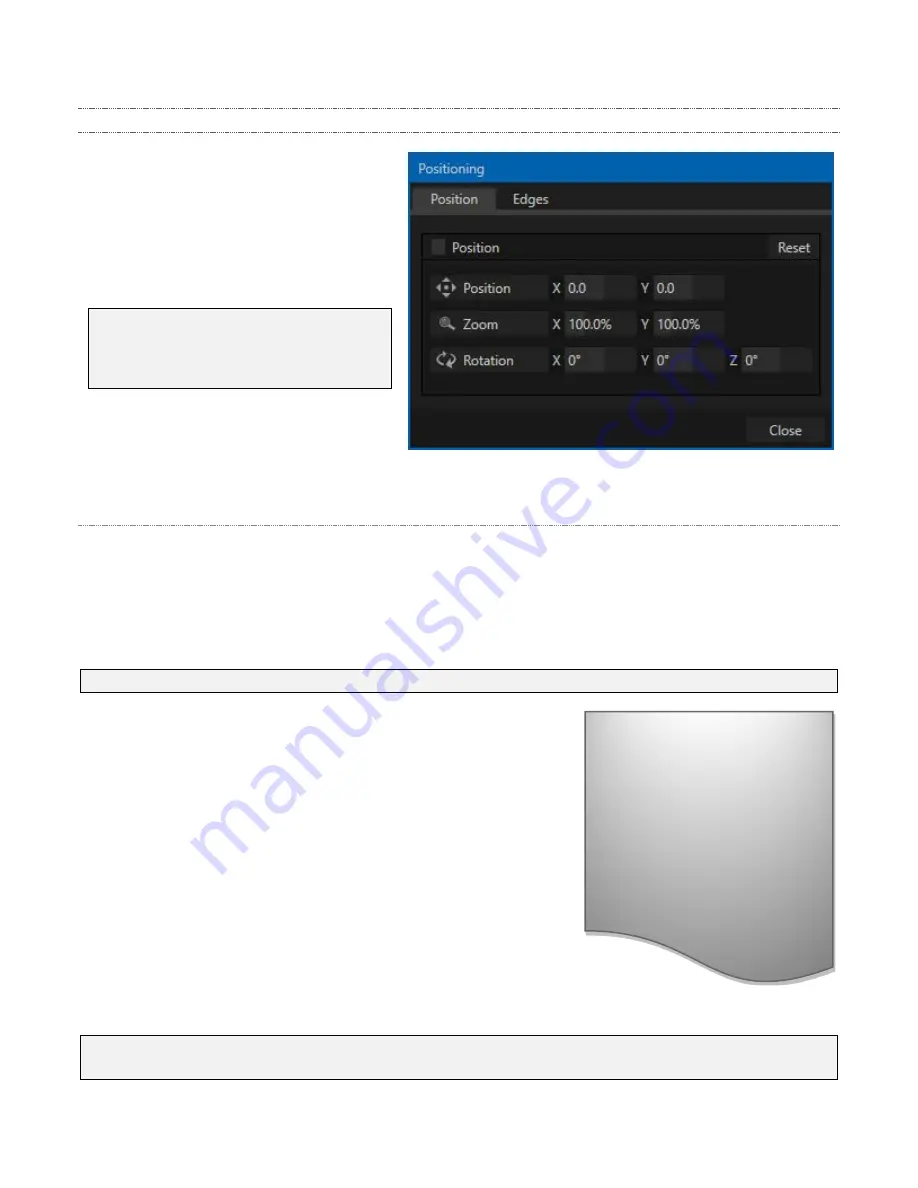
Position Tab
The Positioning
panel is organized into tabs. The first,
Position
, includes
Position
,
Zoom, and Rotation controls
.
All
Position
settings can be toggled on and off together using the switch provided.
•
Click and drag on the
Position
button to relocate the
PiP
layer vertically or horizontally within the
frame. Dragging left or right directly on either of the two nearby numeric controls adjusts the
position on a single axis only.
Hint: You can also constrain mouse actions to one axis by holding down the Ctrl key before dragging.
•
Dragging the cursor on the
Zoom
button (magnifying glass)
affects the apparent size
of the overlay.
Again, if you drag just one of the associated numeric gadgets
you can adjust the corresponding layer in one dimension–
width or height.
•
In similar fashion, drag the pointer over the
Rotation
button
with the left mouse button depressed to turn the overlay
source on three axes as follows:
o
Drag left/right to rotate the source about the Y
(vertical) axis.
o
Drag up/down to rotate about the X (horizontal) axis.
o
Drag while holding
Alt
down to rotate about the Z axis.
o
Drag on a single numeric slider, or hold down
Ctrl
to constrain rotation to one axis.
Hint: If you click a numeric field (or right-click it), you can type a value into the gadget using the
keyboard; press Enter to complete the editing action, or Esc to cancel it.
Overlay
layers are automatically
shown on the
Preview
monitors
when the
Position
panel is open.
This allows you to adjust
positioning without the result
being inadvertently shown on
output.
FIGURE 60


