10
11
GB
Always exercise extreme caution on handling the appliance while cooking. To open
the appliance, hold the black plastic part of the handle. This part of the handle
remains cold during cooking; the rest of the handle is made from cast aluminium
and will heat up on using the appliance. Do not touch this part while cooking or
immediately after cooking.
The appliance casing will heat up during cooking.
The top cover is manufactured in stainless steel, and as such will heat up a lot; do not
touch while cooking or immediately after cooking. If you need to adjust the top cover,
make sure you use an oven glove to prevent burning.
The base casing is manufactured in plastic and although it heats up, it will not melt. If
you need to move the appliance while cooking, make sure you take hold of it only by
the base; do not touch the top cover.
Leave the appliance to cool for at least 30 minutes before handling.
USE
CAUTION: do not use this product to cook from frozen or to defrost frozen food. All food
must be completely defrosted before using this product.
NOTE: during the first uses of the product, it may smoke a little smoke. This smoke is
normal and it will diminish with further use.
1. Before using this product for the first time, clean as described in the “Cleaning”
section.
. Open the unit by lifting the handle upwards.
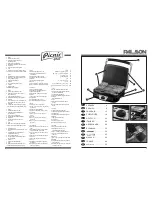
3. To remove the plates, press down on the release buttons and carefully remove
them. (Fig. 1).
4. Fit the grilling plates onto the appliance by inserting the plate locking tabs into the
connectors and press down until you hear them clicking into place. The plates may
be greased with oil, butter, margarine or lard. As the appliance is equipped with a
non-stick surface it is not necessary to grease the plate with butter or oil.
5. Close the plates and turn on the unit plugging it into a standard mains supply. Check
that the ON light is red.
WARNING: the plates and metal surfaces will heat up considerably when cooking.
To prevent possible risk of burning, use oven gloves or heat resistant gloves and
touch only the black part of the handle.
6. Once the unit is preheated to the desired temperature, the green “Ready” light will
come on thereby indicating that the product is now ready to be used.
7. Use the handle to lift the top plate. Place the food on the bottom plate using wooden
or heat resistant plastic utensils.
CAUTION: do not use metal utensils on this product, as they can scratch and
damage the non-stick coating of the plates.
8. Lower the top plate and place down on the food by using the handle.
NOTE:
- Cooking time depends on the type and the thickness of food.
- The food must be properly cooked before consuming.
9. Once the food has been cooked as desired, lift the handle and open the plates; then
remove the food using kitchen utensils. If you are going to cook more food, close the
plates in order to conserve heat.
10. Repeat steps 7-9 until cooked, greasing with oil as required.
11. Disconnect the product by unplugging the power plug from the mains supply.
1. Once the appliance is completely cooled down, clean and dry.
GRILLING TIMES
(with the grill completely open and at a temperature of 150ºC)
FOOD
TIME IN MINUTES
Bacon
5-8
Fish
5-10
Hamburgers
8-1
Potatoes
10-1
Sausages
0-30
Steak
18-0
NOTE: These grilling times are approximate; cooking times always depend on the type
and thickness of food placed on the grill. Please note that these cooking times are with
the grill plates completely open and at a temperature of 150ºC. If the grill plates are
closed, grilling times are reduced by approximately 50%.
CLEANING
- Before cleaning, unplug the appliance and wait for the grill and the plates to cool
down.
- Wipe the outside of the appliance with a slightly damp cloth taking care not to allow
any moisture, oil or grease to penetrate the cooling air slots.
- To clean the plates, you may leave them on the appliance or you may remove
them; to remove the plate, press the button situated next to the handle (Fig. 1). If
you choose to leave them on the appliance, wipe them with a damp cloth. If you
remove them, which is advisable, they may be washed under running water. Dry
after washing.
- Do not clean the inside or the outside with a scouring pad as doing so will damage
the coating.
- Do not immerse the appliance in water or in any other liquid.
- The appliance must be completely dry before using.
Thank you for choosing one of our products.
Summary of Contents for PICNIC
Page 17: ...32 33 GR PICNIC PALSON 10 15 cm 1 2 180 180 3 4 5 6 7 8 9 10 0 8...
Page 18: ...34 35 GR 30 1 2 3 1 4 5 6 7 8 9 10 7 9 11 12 150 C 5 8 5 10 8 12 10 12 20 30 18 20 150 C 50 1...
Page 19: ...36 37 RU PICNIC PALSON 10 15 a b 1 2 180 180 3 4 5 6 7 8 9 10 0 8...
Page 21: ...40 41 AR 150 50 1 1 2 3 1 4 5 6 7 8 9 10 7 9 11 12 150 5 8 5 10 8 12 10 12 20 30 18 20...
Page 22: ...42 43 AR PICNIC PALSON 10 15 1 2 180 180 3 4 5 6 7 8 9 10 0 8 30...
Page 27: ...52 53 BG PICNIC PALSON 10 15 cm a b 1 2 180 180 3 4 5 6 7 8 9 10 0 8...
Page 28: ...54 55 BG 30 1 2 3 1 4 5 6 7 8 9 10 7 9 11 12 150 C 5 8 5 10 8 12 10 12 20 30 18 20 150 C 50 1...


