MicroHAWK Engine Integration Guide
2-13
Using ESP
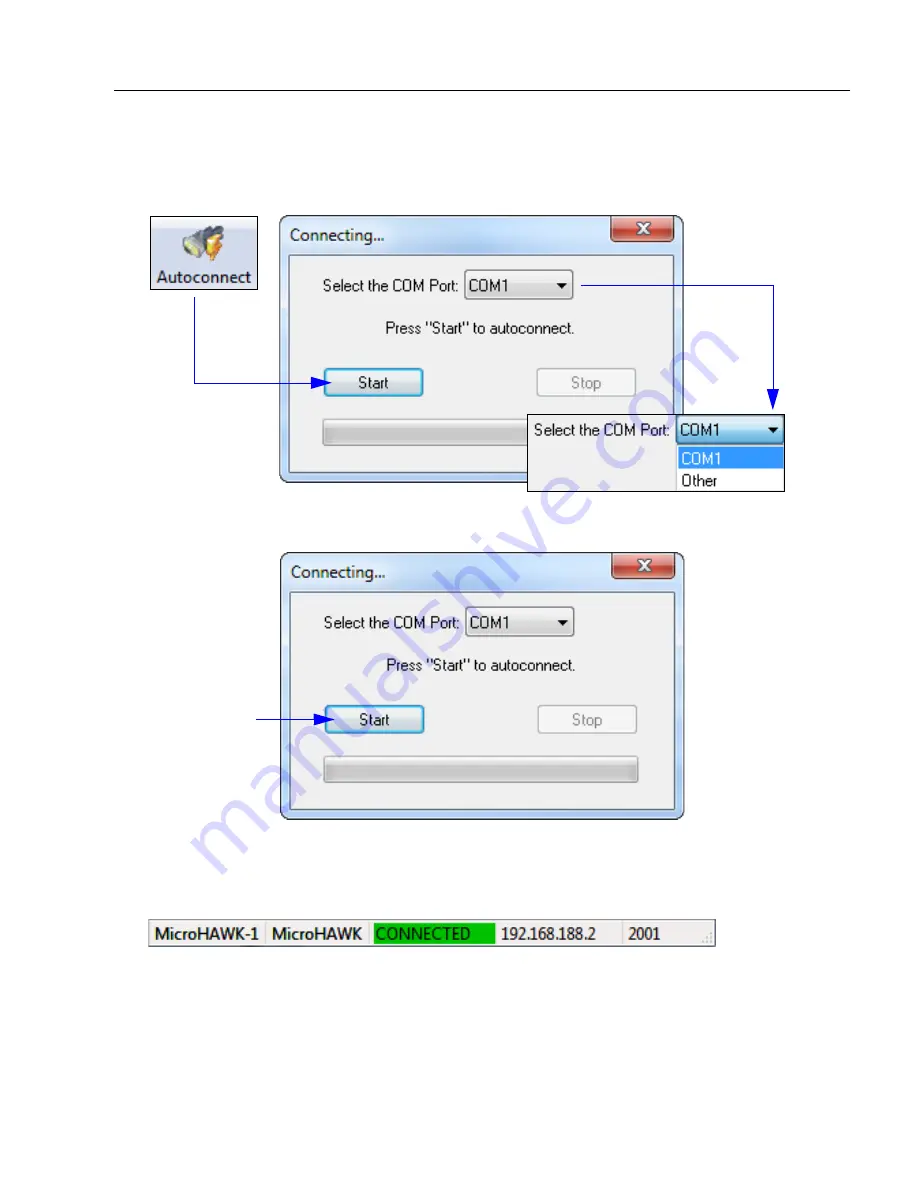
Autoconnect
• If the RS-232 connection attempt fails, use
Autoconnect
to establish a connection between
the MicroHAWK Engine and the host.
• If the communication port is not the default
COM1
, use the dropdown menu to change
the port.
• When a connection is established, the green indicator in the status bar at the bottom
right of the screen will be visible.
• Once you have
chosen the
correct port,
click
Start
to
connect.
Summary of Contents for MicroHAWK
Page 1: ...MicroHAWK Engine Integration Guide P N 84 9007100 02 Rev B...
Page 74: ...2 18 MicroHAWK Engine Integration Guide Send Receive Options...
Page 78: ...3 4 MicroHAWK Engine Integration Guide Optical Requirements Optical Requirements Base Side...
Page 79: ...MicroHAWK Engine Integration Guide 3 5 Integration Viewing Port Specifications...
Page 80: ...3 6 MicroHAWK Engine Integration Guide Expansion Connector FPC Expansion Connector FPC...
Page 101: ...MicroHAWK Engine Integration Guide 4 21 Communications Keyboard Languages...
Page 102: ...4 22 MicroHAWK Engine Integration Guide USB HID Keyboard Keyboard Languages continued...
Page 103: ...MicroHAWK Engine Integration Guide 4 23 Communications Keyboard Languages continued...
Page 108: ...4 28 MicroHAWK Engine Integration Guide Entering ASCII Characters as Hex Values...
Page 120: ...5 12 MicroHAWK Engine Integration Guide Additional Notes about Calibration...
Page 148: ...6 28 MicroHAWK Engine Integration Guide Minimum Good Reads...
Page 188: ...7 40 MicroHAWK Engine Integration Guide DotCode...
Page 238: ...8 50 MicroHAWK Engine Integration Guide Image Push to Host Detailed Setup...
Page 268: ...10 14 MicroHAWK Engine Integration Guide New Master Pin...
Page 296: ...11 28 MicroHAWK Engine Integration Guide Set License...
Page 314: ...12 18 MicroHAWK Engine Integration Guide Request All Configuration Database Settings...


