


70
18.Configuration Options
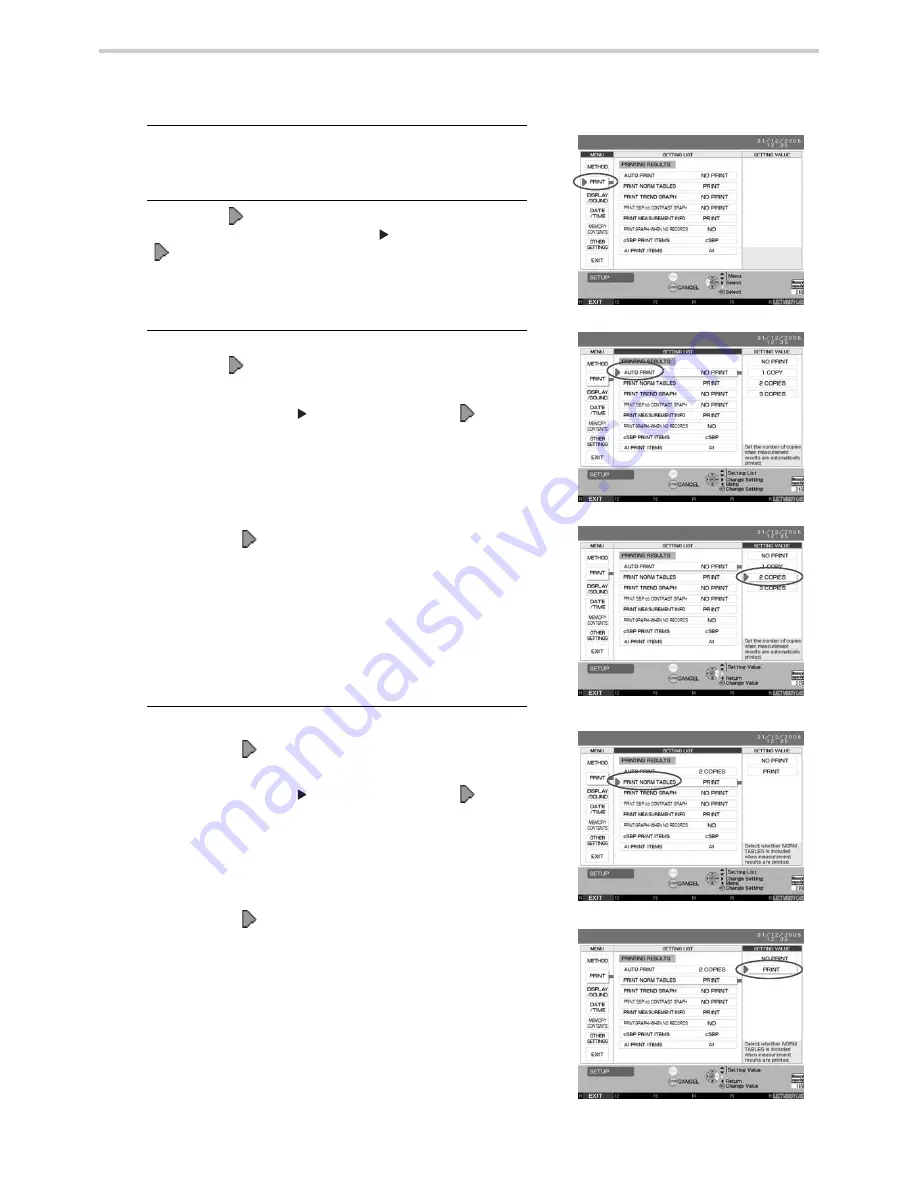
18.4. How to Change Settings for Printing
It is possible to change the content of data to be printed and saved.
1.
Press the F5 key to enter the [SET UP] screen.
(Refer to Section 18.2.)
2.
Move the [
] cursor to [PRINT] under the [MENU]
column and press the SET or [
] button to move the
[
] cursor to [SETTING LIST]. [Fig. 1]
3.
To print the result automatically after measurement:
Move the [
] cursor to [AUTO PRINT]. [Fig. 3]
1. Press the SET or [
] button to move the [
] cursor to
[SETTING VALUE].
2. Move the [
] cursor to the desired setting, selecting
from [NO PRINT], [1 COPY], [2 COPIES] or [3 COPIES]
under [SETTING VALUE].
The default setting is [NO PRINT].
3. Press the SET button to accept the setting value
4. Press the F1 key [EXIT] to return to the default screen.
4.
To print the norm table with measurement results:
1. Move the [
] cursor to [PRINT NORM TABLES].
2. Press the SET or [
] button to move the [
] cursor to
[SETTING VALUE].
3. Move the [
] cursor to the desired setting, selecting
from [NO PRINT] or [PRINT] under [SETTING VALUE].
The default setting is [PRINT].
4. Press the SET button to accept the setting value.
5. Press the F1 key [EXIT] to return to the default screen.
[Fig. 1]
[Fig. 2]
[Fig. 3]
[Fig. 4]
[Fig. 5]
Summary of Contents for HEM-9000AI
Page 94: ...94 22 Specifications ...
Page 95: ...95 22 Specifications EN ...


