EM1401 / EM1401 UT EMA Thickness Gauge. Operation Manual.
+7(812) 385-54-28
47
Humidity
80% at +25
C
Atmosphere pressure
86 to 106 kPa
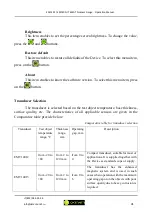
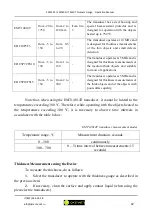
Calibration Test Description
External examination
The following requirements are checked during the external examination:
1.
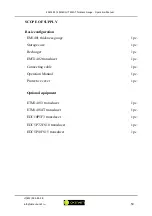
The scope of the Device supply shall be as specified in the operation
manual;
2.
The marking and the serial number of the Device shall comply with the
marking and the serial number specified in the operation manual;
3.
The Device shall have no mechanical damages affecting its performance
and worsening its technical specifications.
Functional test
The functional test of the Device shall be carried out in accordance with
"Operation Description" and using a test sample from the scope of supply or another
test sample that has the required certificate.
The functional test procedure is as follows:
1.
Calibrate the Device using a test sample;
2.
Measure the thickness of the test sample. The measured value of the
sample thickness shall not differ from the actual value (10 mm) by more than 0.04 mm.
Measurement error calculation
The measurement error calculation is performed using a set of samples made
of a single blank as follows:
1.
Place the Device on a 2 mm thick test sample;
2.
Calibrate the Device using a calibration method based on the known
thickness of the test object;
3.
Perform 5 thickness measurements at five different points of the 2 mm
thick test sample;
4.
Calculate the maximum measurement error (Δ) using the formula:
∆ = max(H
i
– H
о
)
where H
i
is the result of the measurement; Н
о
is the thickness of the sample;

