2.SETTING ITEMS (ADMIN)
Setting General Functions 113
2 SETTING ITEMS (ADMIN)
6
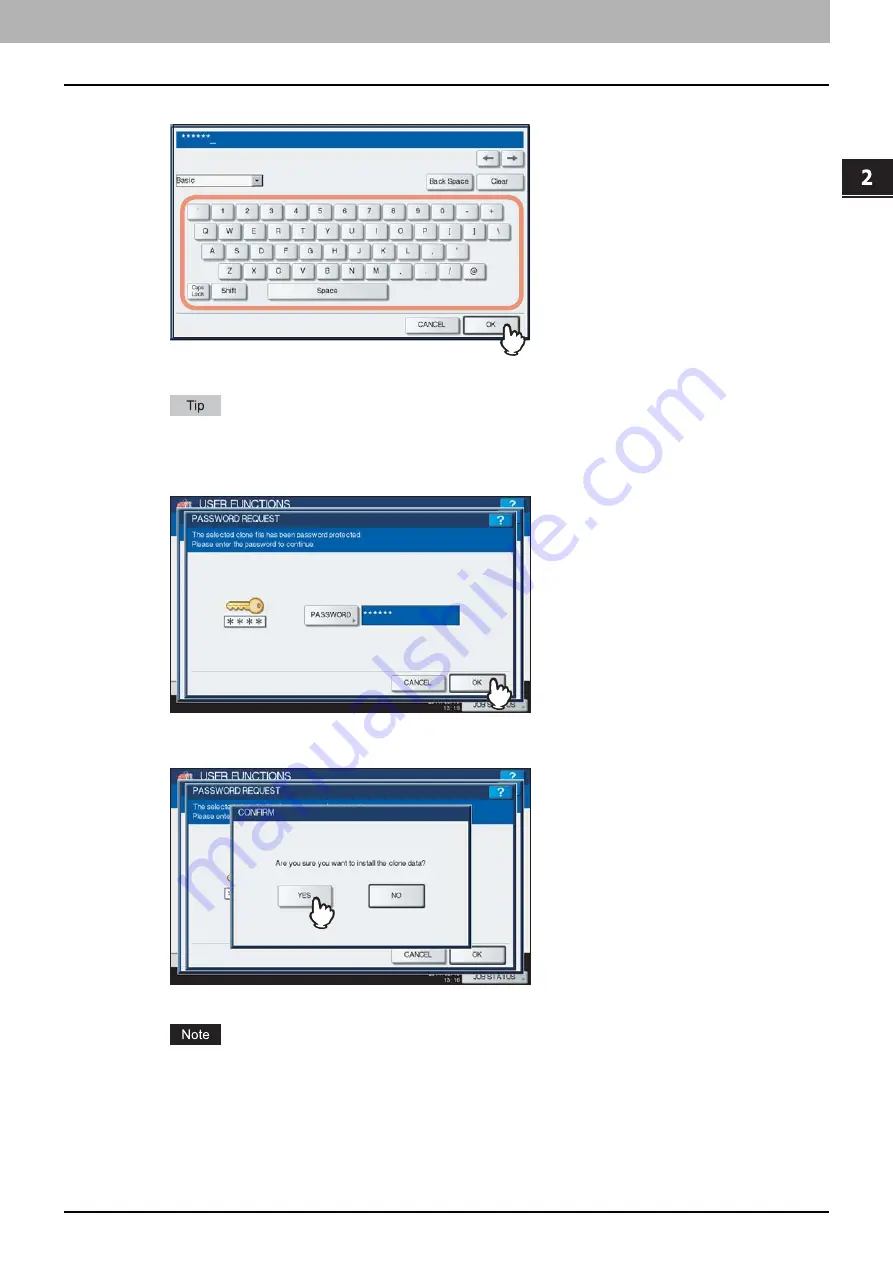
Enter the password and press [OK].
You will be returned to the PASSWORD REQUEST screen.
The input password appears as asterisks (*). You can also use the digital keys on the control panel to enter
numerals.
7
Press [OK].
The installation confirmation screen is displayed.
8
Press [YES].
The installation begins.
Do not disconnect the USB storage device until the data transfer is complete. Removing the device while data
are being transferred could destroy them or cause a malfunction of the equipment.
Summary of Contents for CX4545 MFP
Page 8: ...6 CONTENTS...
Page 210: ......
Page 238: ......
Page 265: ...4 APPENDIX List Print Format 263 4 APPENDIX PS font list Output example of the PS Font List...
Page 266: ...4 APPENDIX 264 List Print Format PCL font list Output example of the PCL Font List...
Page 271: ...ES9160 MFP ES9170 MFP ES9460 MFP ES9470 MFP CX3535 MFP CX4545 MFP...


