


SAMM
User Manual
50
6.4
Connect To…
This section describes how to connect SAMM with each brand of supported imaging sonar and
scanning sonar. For each sonar system, default acquisition and processing parameters are
provided, the user may set their own. The following settings are common to all:
Resolution
: The size of one pixel in centimeter. Note that setting too small a value may
cause long processing times and dropped packets.
Use ground range
: Check this to use ground range correction. This option requires
altitude data to be present. If altitude is not found, processing will default to slant range.
Use course for heading
: Check this to use course instead of heading. Some sensors
do not provide heading, but derive course from position.
6.4.1 Kongsberg Mesotech M3
SAMM interfaces with the M3 sonar by receiving a data and metadata string from the sonar
software directly. The M3 sonar software is capable of running in several application modes. If
you run the sonar in EIQ -Fine or EIQ- Ultrafine modes without remaining stationary, the
resulting mosaic may be distorted (see the M3 manual for reference).
To interface with the M3 sonar:
1. Launch the M3 sonar software
and connect the sonar as usual.
2. Launch SAMM.
3. Click the
Add data
icon.
4. Click
Connect to...
5. Select
Kongsberg M3
from the
supported sensors list and click
Load
.
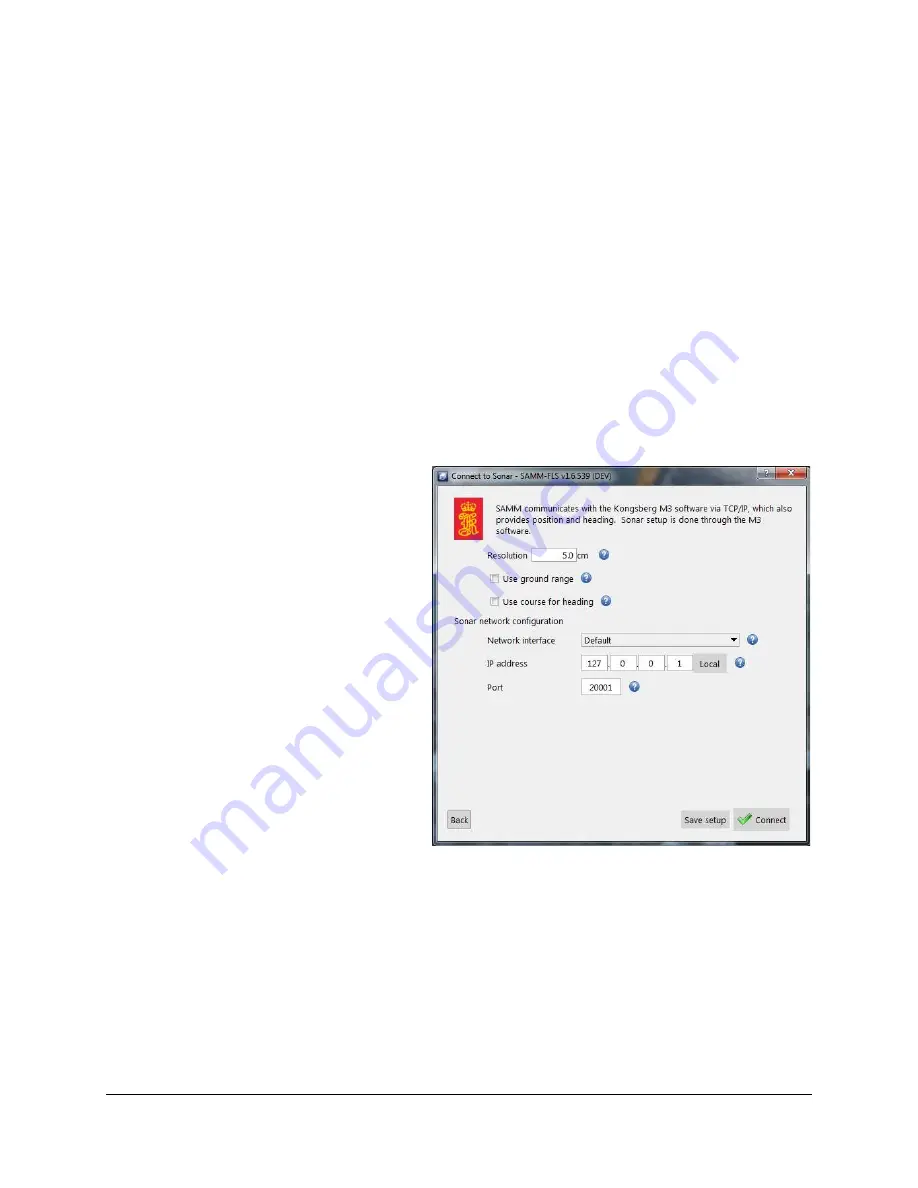
6. In the M3 interface window
(Figure 40), set processing
parameters as necessary.
7. If SAMM and the M3 software are
running on the same computer, do
not change the IP address from
127.0.0.1
. If the sonar software
is running on a different computer
and networked to the SAMM
computer, select an appropriate
network from the Network
interface dropdown and enter the
IP address of the computer
running the M3 software in the
IP
address
field.
Figure 40. M3 Interfacing
8. Do not change the port number from 20001 unless you change it in the M3 sonar
software. Then, enter the matching port number in the
Port
field.
9. Click the Connect button.
10. Monitor the connection status in the Device status popup and in the status bar on the
bottom left. Acquisition begins automatically. SAMM flashes a warning if it is not
recording. Click the
Record toggle
icon to switch recording on and off.


