


SAMM
User Manual
49
6.3
Interface with Metadata Sensors
SAMM can receive the metadata inputs of position, heading, and time (if available) through one
serial port for integrated systems, two serial ports, or a networked GreenSea™ navigation
system. SAMM automatically detects the NMEA data protocols and selects the most accurate
type available. The following string types are listed in order of preference:
Lon/Lat
o
PTNL, GGK
o
GGA
o
RMC
o
GLL
Heading
o
HDT
o
(HDG, HDM, DPT, and RMC are not yet supported.)
Time and Date
o
ZDA (While not required for mosaicking, it will increase the accuracy of the
mosaic if available.)
Please set your navigation devices to the highest available data protocol in this list.
Please note
that at this time SAMM receives data only in the National Marine Electronics Association
(NMEA) formats. If you have alternative data string formatting, please contact OIC.
SAMM assumes the received lon/lat are on the WGS 1984 datum. This is the most frequently
used datum for navigation systems because it is the datum used by the Global Positioning
System (GPS) satellite constellation. Confirm that your navigational system is set to the WGS
1984 datum.
To configure the metadata input:
1. Click the
Add Data
icon.
2. Click
Connect to...
3. Pick your sonar
from the list.
(
Navigation/heading interfacing is
required for the Tritech Gemini,
R2Sonic Marine Electronics
Dolphin, BluePrint SubSea Oculus
and Imagenex sonar systems at this
time. All other systems receive
navigation and heading data via
their native software
)
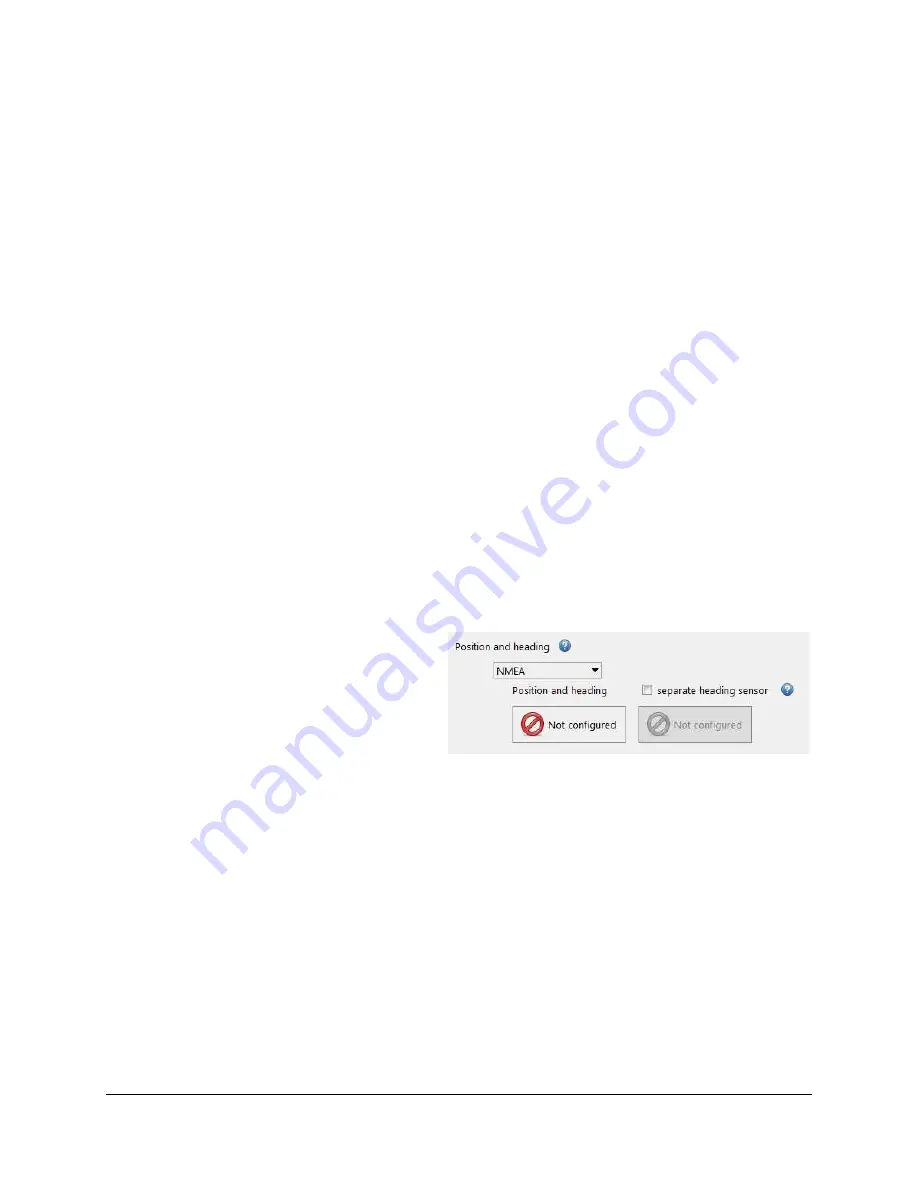
Figure 39. Navigation Interfacing
4. In the Position and heading options, select
NMEA
or
GreenSea Navigation
from the
dropdown menu (Figure 39). Enabling GreenSea navigation disables the serial ports.
5. Click the
separate heading sensor
checkbox if you are using separate heading sensor.
6. Click the
Not configured
button and select
Serial Port
or
Network
.
7. If the Serial port is selected, choose the serial port into which the sensor is plugged and
ensure that the
Baud
,
Data bits
,
Parity
, and
Stop bits
fields match the corresponding
sensor settings.
8. If the Network is selected, configure the network interface, IP address and port.
9. If you are using two different ports for position and heading, repeat steps 6 through 8 to
configure for the heading sensor.


