Océ | Printer Maintenance
5-8
•
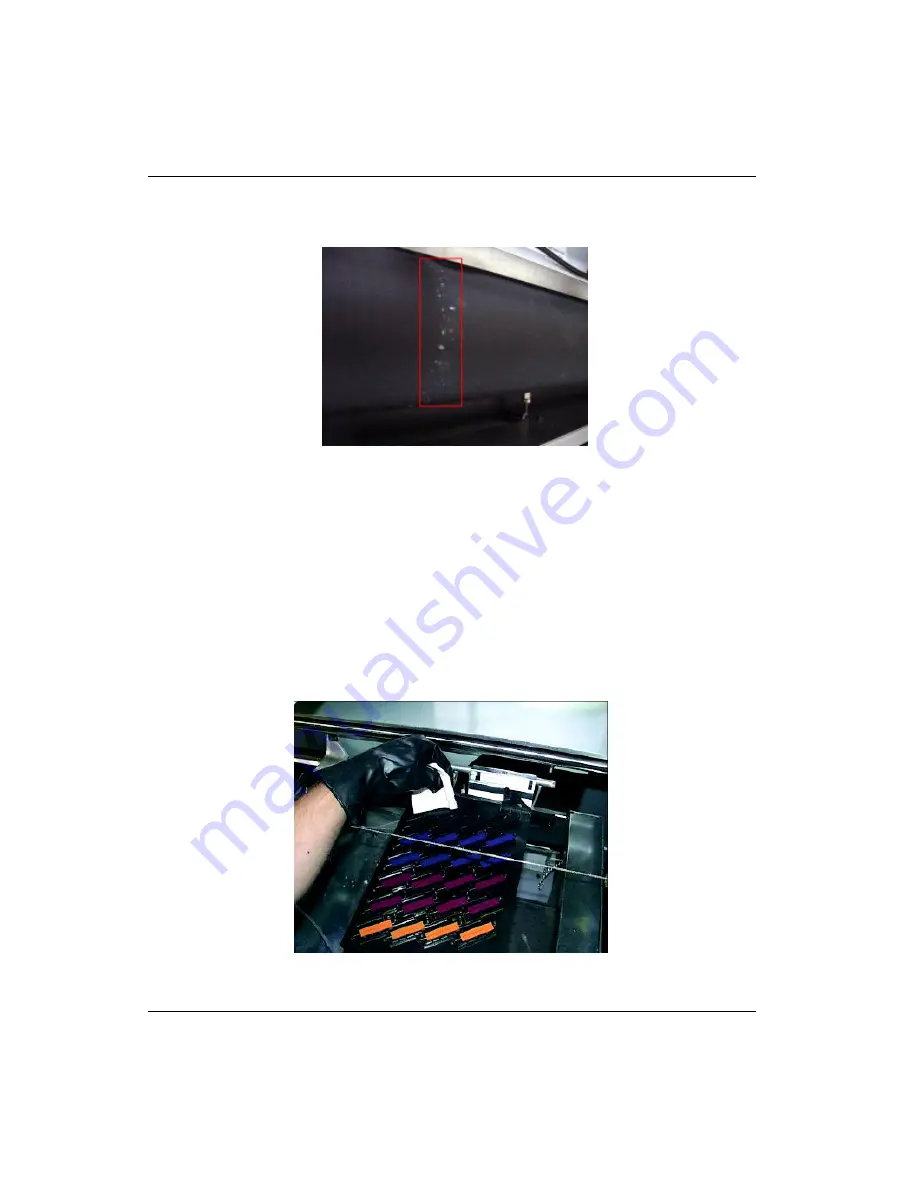
Media drive roller - follow the general cleaning procedure (see "General
Cleaning" on page 5-5) with emphasis on the debris that accumulates on the
center of the roller (see Figure 5-5).
Figure 5-5 Debris on the Media Driver Roller
5.5
Capping Station Maintenance
The capping station (see Figure 5-6) consists of a single plate with 24 small saturated foam
pads (OIN #3011924173). The station is used to cap and preserve the print-head nozzles
when the printer is idle between images. The cleaning solution/fluid is pumped up to the
plate to provide continuous saturation to the pads to prevent the solvent ink from drying
on the nozzles.
The capping station has funnel-shaped sections with drain holes for each of the print heads.
During daily printing operations, purges ensure nozzle integrity before and during prints.
The ink is sucked away through a manifold and into a single tube down to the waste bottle.
Over time, the bottle fills and must be emptied. Notification is via the control panel.
Figure 5-6 Capping Station
Summary of Contents for Arizona 500
Page 2: ...Oc Display Graphics Systems 2004 All Rights Reserved...
Page 6: ...Oc vi...
Page 12: ...Oc Table of Contents xii...
Page 26: ...Oc Ink System 2 6...
Page 54: ...Oc Media System 3 28...
Page 88: ...Oc Control Panel 4 34...
Page 106: ...Oc Printer Maintenance 5 18...
Page 114: ...Oc Error Messages and Troubleshooting 6 8...
Page 116: ...Oc A 2 Figure A 1 Copies Reprints Menu...
Page 117: ...7 26 04 A 3 Figure A 2 Print Parameters Menu...
Page 118: ...Oc A 4 Figure A 3 Test Prints Menu...
Page 119: ...7 26 04 A 5 Figure A 4 Maintenance Menu Part 1...
Page 120: ...Oc A 6 Figure A 5 Maintenance Menu Part 2...
Page 121: ...7 26 04 A 7 Figure A 6 Prewarm Menu...
Page 122: ...Oc A 8 Figure A 7 Media Menu...
Page 123: ...7 26 04 A 9 Figure A 8 Ink Menu...
Page 124: ...Oc A 10 Figure A 9 About Printer Menu...
Page 125: ...7 26 04 A 11 Figure A 10 Units Menu...
Page 126: ...Oc A 12 Figure A 11 Set Clock Menu...
Page 127: ...7 26 04 A 13 Figure A 12 Configure I O Menu...
Page 128: ...Oc A 14...
Page 136: ...Oc B 8 The printer is now ready to receive the first print of the day Photo 1...
Page 137: ...7 26 04 B 9 Photo 2 Photo 3...
Page 138: ...Oc B 10 Photo 4 Photo 5...
Page 152: ...Oc C 14...
Page 156: ...Oc Index Index 4...


