


123
OPERATING PROCEDURE
:
Control Menu
2
Connect LAN to
(NAVIS, FILE)
File
(When NIDEK
image filing
software NAVIS-
EX is not used)
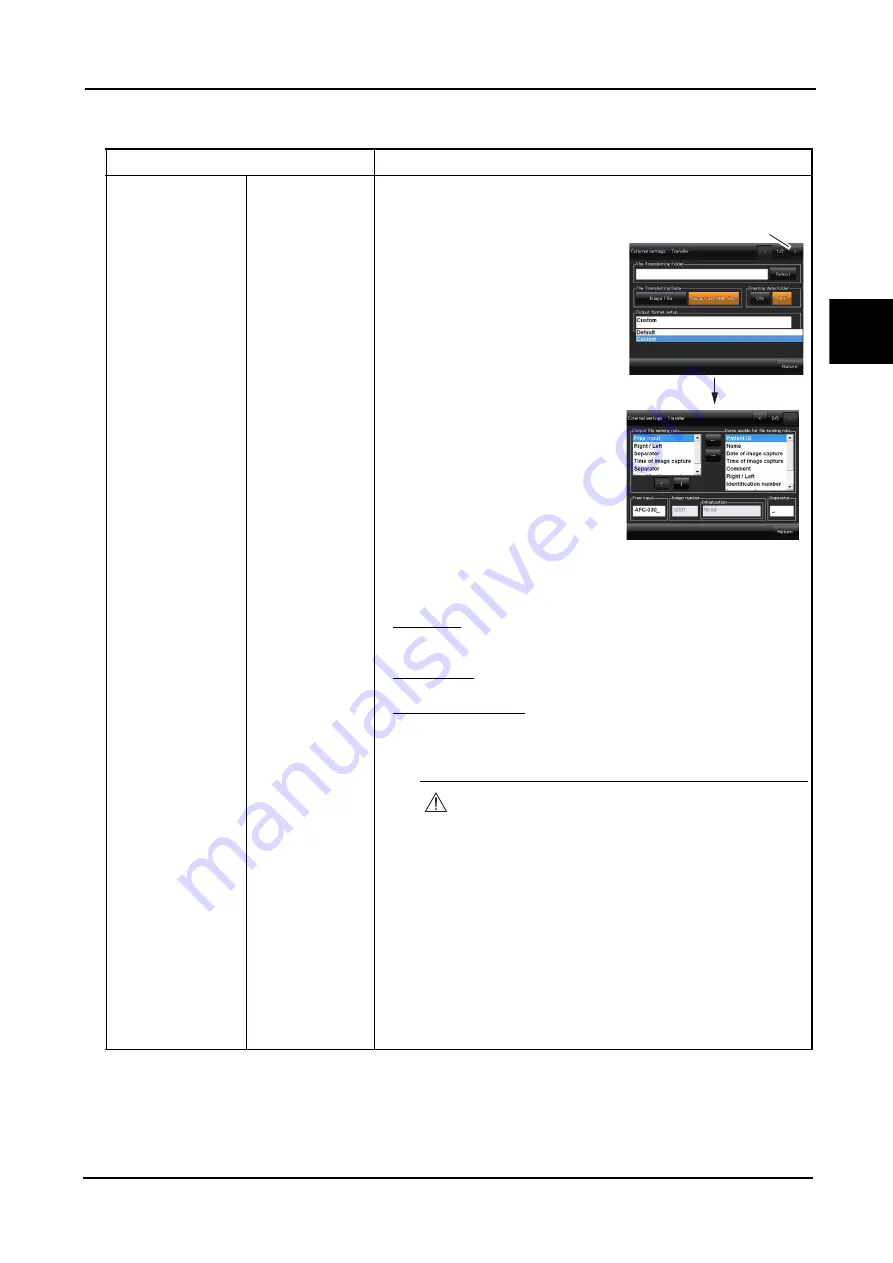
Output format setup: Default/Custom
Default: Same file name as the one
transferred to NAVIS-EX
Custom: Selected to change the file
name.
Selecting “Custom” enables the
Advance button at the top right of the
screen, and Page 2/2 can be displayed.
Page 2/2 when Custom is selected
(screen shown to the right)
Output file naming rule:
Left box: Items and order in file name
Right box: Available items for naming rule
Patient ID, Name, Date of image
capture, Time of image capture,
Comment, Right / Left, Identification number, Image number,
Free input, Separator
To add items
Select any items from the right box, then press “
←
” to add them to the left
box.
To delete items
Select any items from the left box, then press “
→
” to delete them.
To change order of items
Select any items from the left box, then press “
↓
” to move it down (back).
Pressing the “
↑
” button moves the item one position up (front).
Free input:
The desired characters can be input. (A maximum of 10 double-byte or 20
single-byte characters)
Available only when “Free input” is selected for “Output file naming rule”.
1) Press the blank box.
The keyboard appears.
2) Input the desired characters, then press the OK button on the keyboard.
The input characters become effective as “Free input” characters.
Item
Options
Only when “Custom“ is selected,
there is Page 2/2.
CAUTION
• Be sure to set the output file naming rule to
avoid assigning the same file name to different
files.
When the file name duplication occurs,
transferring of captured images fails.


