86
OPERATING PROCEDURE
:
Registering, editing, and searching patient information
Registering patients
This section explains the method of registering a new patient.
1
Press the patient register button
.
The new patient register screen appears.
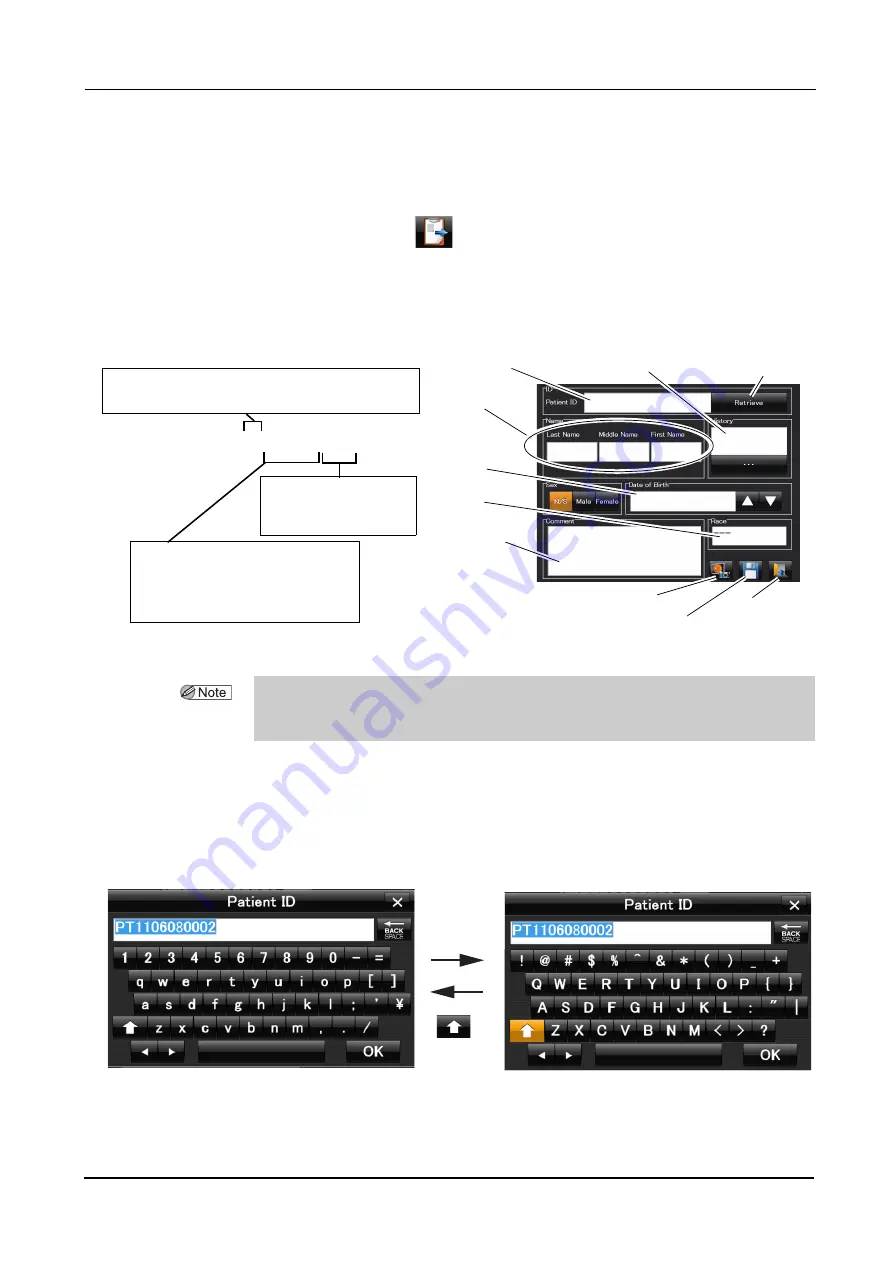
The patient ID is automatically assigned to the patient ID box.
If the device is LAN-connected (to NIDEK Image filing software NAVIS-EX), and patient
information registration with a CSV file are enabled, the patient ID is not automatically
assigned.
Changing the patient ID:
The patient ID can be changed only when it is newly registered.
Once the patient ID is registered, it cannot be changed.
1) Press the patient ID box in the new patient register screen.
A keyboard is displayed.
2) Edit the patient ID using the keyboard.
37
Example of patient ID: PTYYMMDD0001
Automatically assigned
four digits starting from
0001 every day
Registration date
YY: Last two digits of year
MM: Month shown with two digits
DD: Day shown with two digits
“PT1105120002” is the second patient on May 12, 2011.
Name
Patient ID
Date of
birth
Medical history
Race
Comment
Save button
Return button
Image capture button
Retrieve button
Changeable with auto patient ID setting
For details, see “
Operation settings” (Page 106).
• When the device is connected to NAVIS-EX, the desired patient information can be read
from the connected storage device by pressing the Retrieve button after inputting the
patient ID in the Patient ID box.
Keyboard for patient ID
Lowercase characters
Uppercase characters


