


i.
Press the
release button.
ii.
Place the drive on a
static-free, level surface.
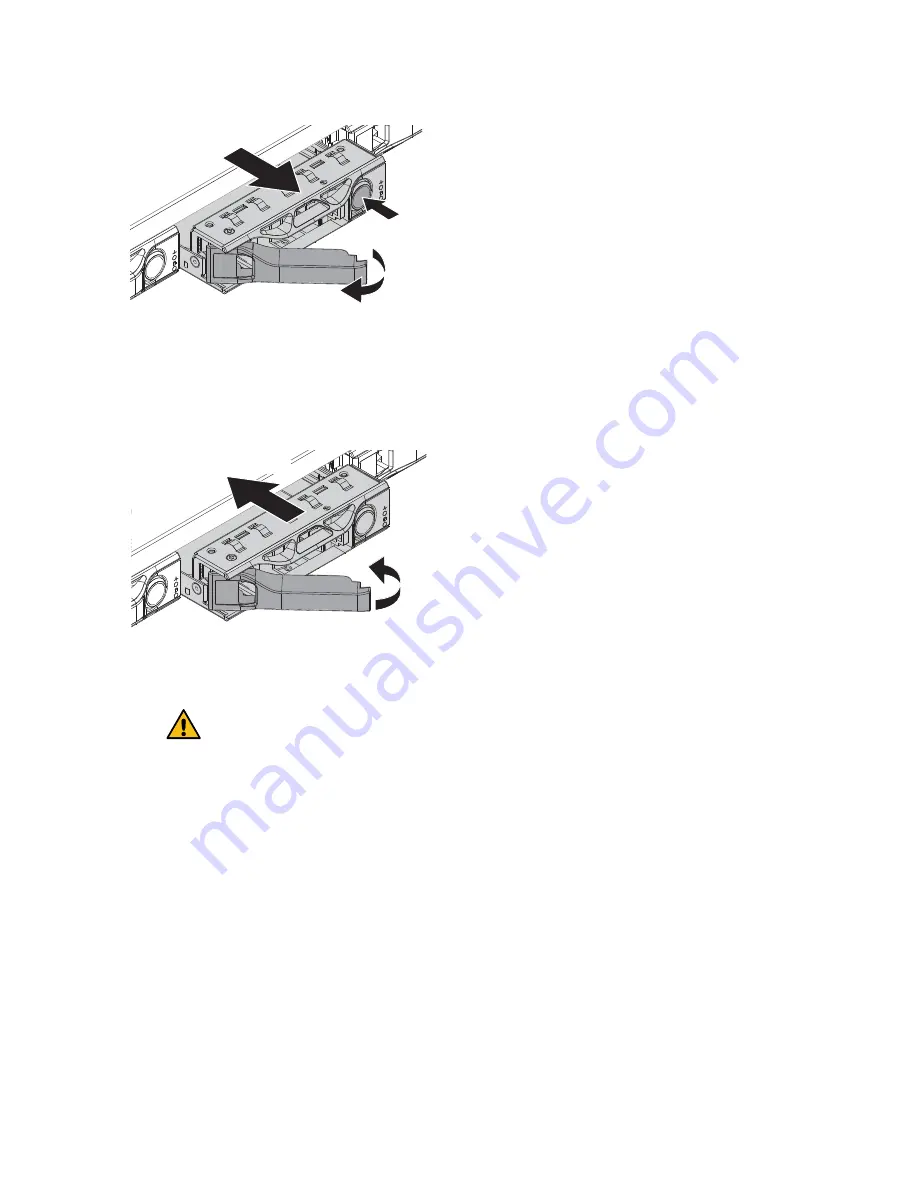
Attention: Ensure
that the tray handle
is fully open before
you attempt to slide
the drive out.
The handle on the drive springs open partially, and the drive releases from the slot.
5. Open the handle, slide the drive out, and place it on a static-free, level surface.
6. Press the release button on the replacement drive before you insert it into the drive slot.
The latch springs open.
ii.
Close the drive tray handle.
Note: Do not use excessive force
while closing the handle.
i.
Insert the drive.
7. Insert the replacement drive in the slot, and then close the drive handle.
Attention: Do not use excessive force while closing
the handle.
When the drive is fully inserted, you hear a click.
The drive is automatically rebuilt with mirrored data from the working drive. You can check
the status of the rebuild by using the Grid Manager. Select Nodes. Then select
Appliance
Node
> Hardware. The Storage RAID Mode field contains a "rebuilding" message until the
drive is completely rebuilt.
8. Contact technical support about the drive replacement.
Technical support will provide instructions for returning the failed drive.
Changing the link configuration of the services appliance
You can change the Ethernet link configuration of the services appliance. You can change the port
bond mode, the network bond mode, and the link speed.
Before you begin
•
You must place the appliance in maintenance mode. Putting a StorageGRID appliance into
maintenance mode might make the appliance unavailable for remote access.
Placing an appliance into maintenance mode
on page 78
Hardware Installation and Maintenance Guide for SG100 and SG1000 Appliances
90
Maintaining the appliance


