Getting Started,
Continued
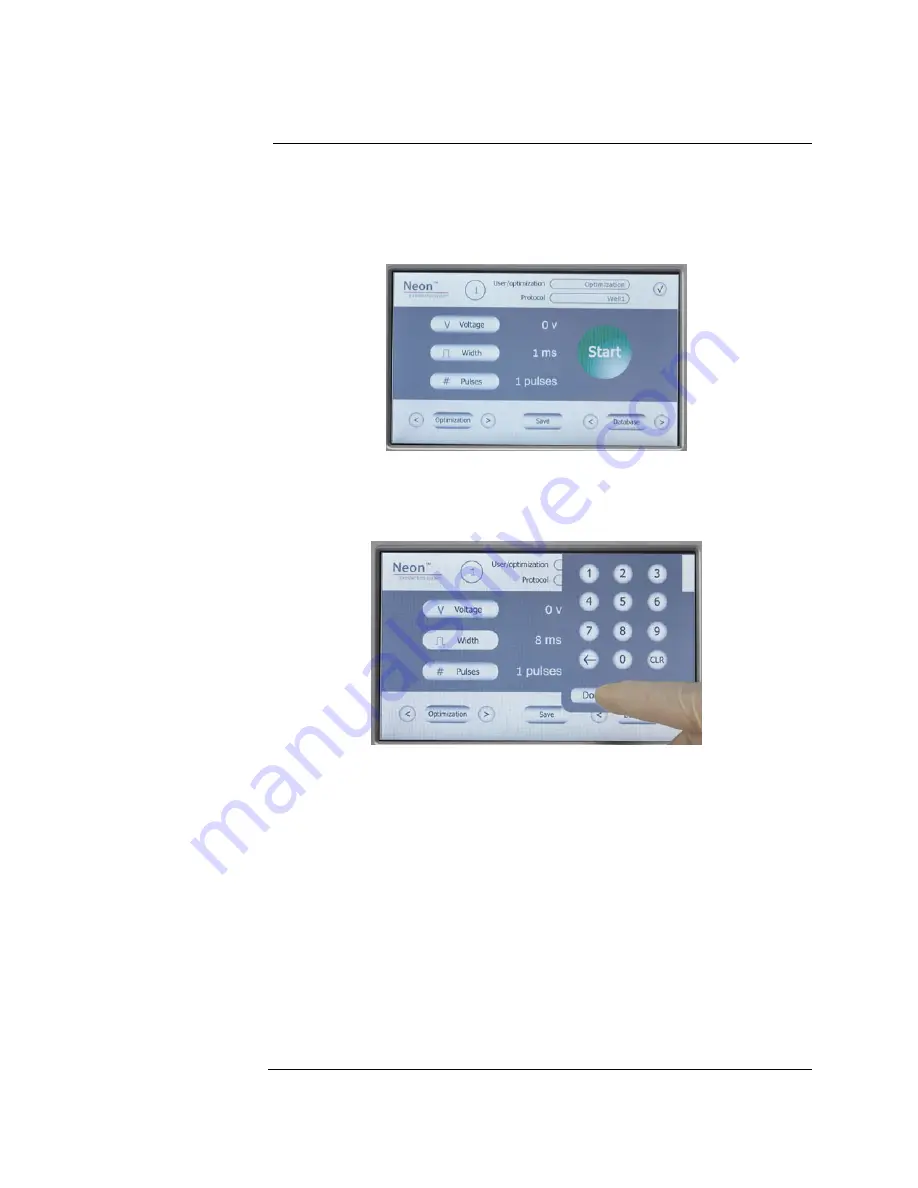
Input Window,
Continued
To create a cell specific protocol, if you already have the electroporation
parameters for your cell type:
1.
Press the power switch (located on the rear side of the unit, page vii) to turn
ON
the Neon
™
device. The unit checks to ensure that the Neon
™
Pipette
Station is connected to the device and then the start up screen is displayed.
2.
Press
Voltage
to activate the number key pad to input voltage value. Press
the desired voltage value and press
Done
to save the value.
Note:
If any input value is out of the limit, an error message is displayed and the
lowest value of limit is automatically set.
3.
Press
Width
to activate the number key pad to input width value. Press the
desired width value and press
Done
to save the value.
4.
Press
Pulses
to activate the number key pad to input pulse value. Press the
desired pulse value and press
Done
to
save the value.
5.
If you wish to save these electroporation parameters, press
Save
on the
main screen to save the protocol in the database.
6.
Press the desired protocol number button to edit the protocol. The selected
protocol is highlighted.
7.
Once the Edit screen is displayed, enter the
User
name by pressing the key
pad buttons. The cursor automatically moves to the next field
Protocol
and
is highlighted red.
Continue to enter the information for
Voltage
,
Width
, and
Pulse.
8.
Press
Enter
to save the information in the database.
9.
Proceed to preparing cells (pages 16–17) and DNA, and setting up the
Neon
™
Pipette Station for electroporation (page 14).
Continued on next page
8


