• Read “Installation Guidelines” on page 25 to ensure that you work safely.
• Power off the server and disconnect all power cords for this task.
• Memory modules are sensitive to static discharge and require special handling. Refer to the standard
guidelines for “Handling static-sensitive devices” on page 26:
– Always wear an electrostatic-discharge strap when removing or installing memory modules.
Electrostatic-discharge gloves can also be used.
– Never hold two or more memory modules together so that they do not touch each other. Do not stack
memory modules directly on top of each other during storage.
– Never touch the gold memory module connector contacts or allow these contacts to touch the outside
of the memory module connector housing.
– Handle memory modules with care: never bend, twist, or drop a memory module.
– Do not use any metal tools (such as jigs or clamps) to handle the memory modules, because the rigid
metals may damage the memory modules.
– Do not insert memory modules while holding packages or passive components, which can cause
package cracks or detachment of passive components by the high insertion force.
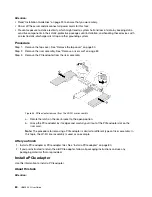
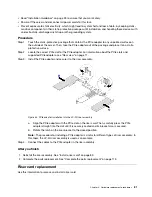
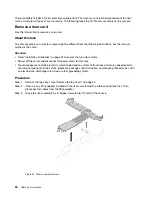
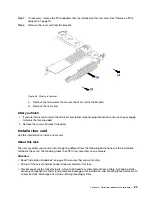
Procedure
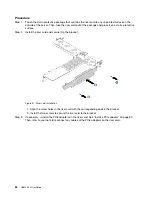
Step 1. Touch the static-protective package that contains the memory module to any unpainted surface on
the outside of the server. Then, take the memory module out of the package and place it on a
static-protective surface.
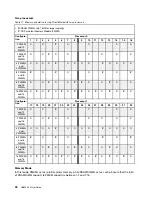
Step 2. Locate the required memory module slot on the system board.
Note:
Ensure that you observe the installation rules and sequence in “Memory module installation
94
HR650X V2 User Guide
Summary of Contents for HR650X V2
Page 1: ...HR650X V2 User Guide Machine Types 7D4D ...
Page 8: ......
Page 14: ...6 HR650X V2 User Guide ...
Page 30: ...22 HR650X V2 User Guide ...
Page 122: ...114 HR650X V2 User Guide ...
Page 152: ...144 HR650X V2 User Guide ...
Page 176: ...168 HR650X V2 User Guide ...
Page 182: ...174 HR650X V2 User Guide ...
Page 186: ...178 HR650X V2 User Guide ...
Page 190: ...182 HR650X V2 User Guide ...
Page 191: ......
Page 192: ......

