


Sending Functions
6-20
Sharpness
Select the sharpness of the image outline.
The table below shows the available settings.
Use the procedure below to set the sharpness when sending scanned images.
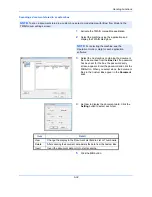
1
Press the
Send
key.
2
Place the originals on the platen.
3
Press [Color/Image Quality] and then [Sharpness].
4
Press [All] or [Text/Fine Line].
5
When [All] is selected, press [-3] to [+3] (
Blur
-
Sharpen
) to adjust the sharpness.
When [Text/Fine Line] is selected, press [0] to [3]
(
Normal - Sharpen
) to adjust the sharpness.
6
Press [OK].
7
Specify the destination, and press the
Start
key to
start sending.
Item
Detail
All
Sharpen
Emphasize the image outline.
Blur
Blur the image outline. Can weaken a Moire
effect (grids appearing as wavelike patterns
when scanning printed photos).
Text/Fine Line
Normal
Make letters and lines appear sharper.
Only text and fine lines are emphasized.
Sharpen
Sharpen
Sharpness
Blur
Cancel
OK
Add Shortcut
Status
Destination
0
1
2
3
-1
-2
-3
Sharpness
All
Text/Fine Line
100%
A4
A4
Preview
Original
Zoom
Send
:
:
:
12/12/2011 10:10
Summary of Contents for TASKalfa 2550ci
Page 1: ...OPERATION GUIDE TASKalfa TASKalfa 2550ci ...
Page 254: ...Sending Functions 6 44 ...
Page 408: ...Default Setting System Menu 9 112 ...
Page 442: ...Management 10 34 ...
Page 480: ...Troubleshooting 12 26 5 Push the fuser cover back in place and close right cover 1 ...
Page 488: ...Troubleshooting 12 34 ...
Page 491: ...Appendix 3 Key Counter DT 730 Document Table ...
Page 516: ...Appendix 28 ...
Page 528: ...Index Index 12 ...
Page 529: ......
Page 532: ...Rev 1 2012 2 2MVKMEN001 ...


