


Basic Operation
3-38
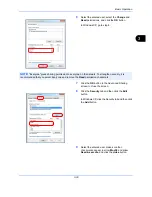
9
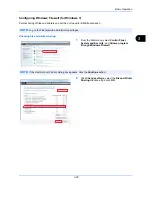
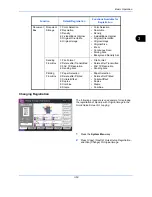
Enter "Scan to SMB" in "Name" and click
Finish
.
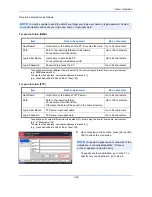
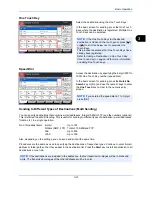
NOTE:
In Windows XP or Windows Vista, follow the procedure below to set the port.
1 From the Start menu, select
Control Panel
,
System and Security
(or
Security Center
), and then Check
Firewall Status
) (or
Windows Firewall
).
If the User Account Control dialog box appears, click the
Continue
button.
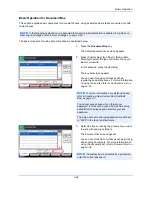
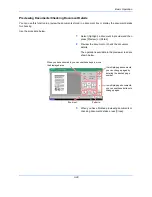
2 Click the Exceptions tab and then the
Add port...
button.
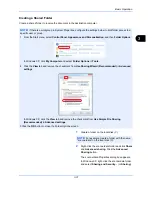
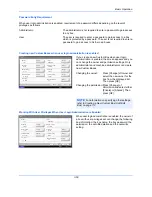
3 Specify
Add a Port
settings.
Enter any name in "Name" (example: Scan to SMB). This will be the name of the new port. Enter "139" in
"Port Number". Select
TCP
for "Protocol".
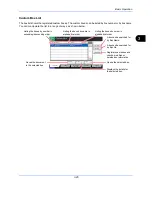
4 Click the
OK
button to close the Add a Port dialog box.
Summary of Contents for TASKalfa 2550ci
Page 1: ...OPERATION GUIDE TASKalfa TASKalfa 2550ci ...
Page 254: ...Sending Functions 6 44 ...
Page 408: ...Default Setting System Menu 9 112 ...
Page 442: ...Management 10 34 ...
Page 480: ...Troubleshooting 12 26 5 Push the fuser cover back in place and close right cover 1 ...
Page 488: ...Troubleshooting 12 34 ...
Page 491: ...Appendix 3 Key Counter DT 730 Document Table ...
Page 516: ...Appendix 28 ...
Page 528: ...Index Index 12 ...
Page 529: ......
Page 532: ...Rev 1 2012 2 2MVKMEN001 ...


