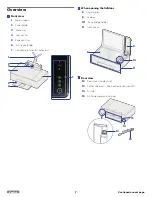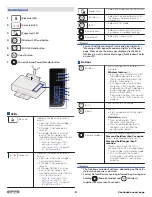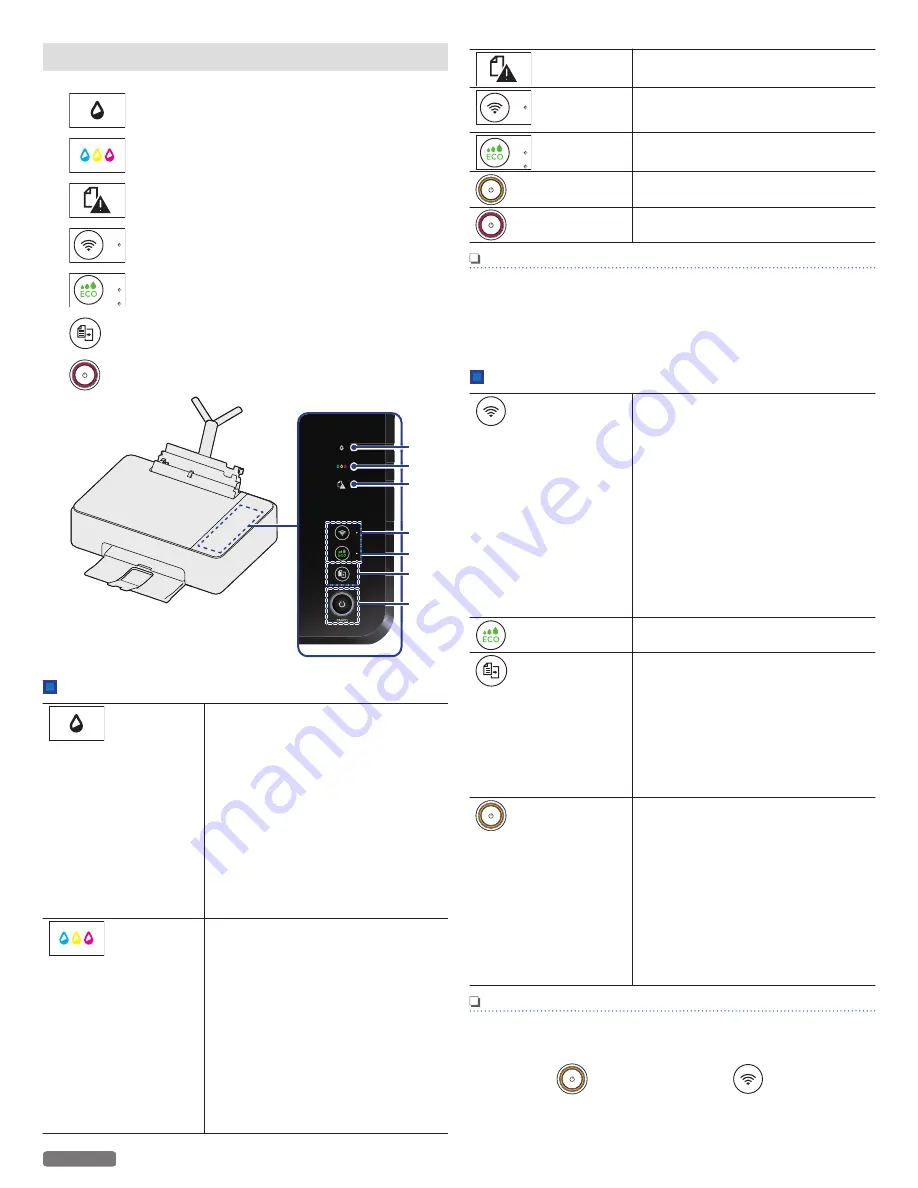
Control panel
1
(Black ink) LED
2
(Color ink) LED
3
(Paper Jam) LED
4
(Wireless) LED and button
5
(ECO) LED and button
6
(Copy) button
7
(Power) LED and Power/Standby button
1
4
5
6
7
2
3
LEDs
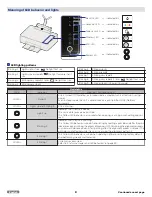
(Black ink)
—
Indicates the black ink level or if
empty.
●
Lights up: when ink cartridge is
not inserted or empty.
●
Blinking4: If not enough ink
remains.
●
Blinking6: Notifies if an error
occurs.(Ink cartridge is not
inserted or empty when the unit
starts the initial setup.)
for lighting patterns.
(Color ink)
—
Indicates the color ink level or if
empty.
●
Lights up: when ink cartridge is
not inserted or empty.
●
Blinking4: If not enough ink
remains.
●
Blinking6: Notifies if an error
occurs.(Ink cartridge is not
inserted or empty when the unit
starts to initial setup.)
for lighting patterns.
(Paper Jam)
—
Indicates a paper jam has occurred.
(Wireless)
—
Indicates the connection status of
the Wireless Network and Easy
Simple Print.
(ECO)
—
Indicates ECO mode
(Power Yellow)
—
Indicates the present unit's status.
e.g.) power is supplied, working
(Power Red)
—
Indicates an error status
Note(s)
●
You can find the meaning of status and error lights in
“Meaning of LED behavior and error lights” on the next
page. Please note the messages displayed in the Web
Interface, or in the Status Messenger (for Windows
®
only)
on your PC.
Buttons
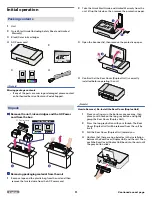
(Wireless)
—
Use to connect to the Wireless
Network.
Wireless feature:
On
●
By using ‘Easy Simple Print’ with
the mobile device, press it less
than 3 seconds to establish the
Wireless Connection.
●
By using Wireless router if your
router has a ‘WPS’ button, press
and hold it until the LED beside the
button changes to blinking to
establish the Wireless
Connection. Follow “WPS Search”
in “Wi-Fi Setup” “WPS Search” on
(ECO)
—
Use to shift to ECO mode.
(Copy)
—
Use to
●
Start a copy job with the current
settings.
Unit status:
ready
●
Press and hold less than 3
seconds: starts copying.
●
Press and hold longer than 3
seconds: starts printing the
configuration report.
(Power/Standby)
—
Press to change the power state.
Press and hold less than 3 seconds:
enters Sleep mode or wake up On.
Press and hold longer than 3
seconds:
(Make sure to wake the unit in
advance if the unit is in Sleep mode.)
●
The unit goes into Standby mode.
●
The unit cancels the current
printing jobs (including test print
and print reports), scanning or
copying.
Note(s)
●
The function carried out will vary, depending on the unit’s
status when you press a button.
●
Factory Default Restore can be performed by pressing and
holding
(Power/Standby) and
(Wireless)
together for more than 15 seconds.
8
English
Continued on next page.


