Initial operation
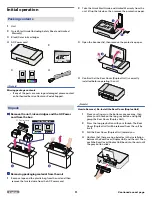
Packing contents
1
Unit
2
Quick Start Guide (Including Safety Sheet and Limited
Warranty)
3
Black/Color ink cartridges
4
AC Power cord
1
Color
Black
BLACK
COLOR
3
2
4
Note(s)
Missing package contents
●
If any of the parts are missing or damaged, please contact
an Authorized Service Center or Kodak Support.
Unpack
Remove the unit, ink cartridges and the AC Power
cord from the box.
Ink Cartridges
BLACK
COLOR
Color
Black
1
2
AC Power cord
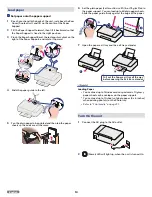
Removing packaging material from the unit
1
Remove tape and the plastic bag from the unit and then
remove the twisted wire from the AC Power cord.
2
Take the Quick Start Guide and Limited Warranty from the
unit, lift up the Ink door, then remove the protective paper.
2
1
3
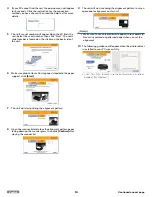
Open the Scanner lid, then remove the protective paper.
2
1
4
Confirm that the Rear Cover (Duplex Unit) is correctly
installed before operating the unit.
Note(s)
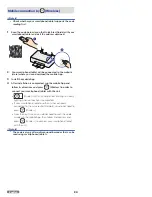
How to Remove / Re-Install the Rear Cover (Duplex Unit)
1
Place your fingers in the bottom concave area, then
place your thumb on the top gray button and lightly
grasp the Rear Cover (Duplex Unit).
2
Press the top gray button with your thumb. The Rear
Cover (Duplex Unit) will be released from the unit by
itself.
3
Pull the Rear Cover (Duplex Unit) toward you.
4
Confirm that there are no obstacles in the installation
between the Rear Cover (Duplex Unit) and the unit. Then
push the Rear Cover (Duplex Unit) back into the unit until
the gray button clicks.
11
English
Continued on next page.


