DS560/DS570 User's Guide - Rev. A04
StorCase Technology, Inc.
Configuration
27
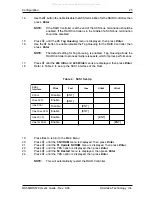
21.
Press
ê
until the YES option is displayed, then press
Enter
.
22.
Press
Enter
to open the
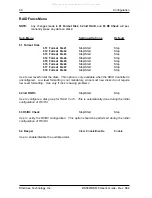
6 RAID Funcs
menu.
23.
Press
ê
until the
62 Init R5 /R3
menu is displayed, then press
Enter
.
24.
Press
ê
until the START option is displayed, then press
Enter
.
NOTE:
The RAID Controller is now configured for logical units.
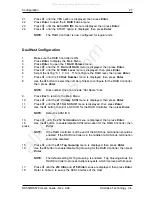
Dual Host Configuration
1.
Make sure the RAID Controller is ON.
2.
Press
Enter
to display the Main Menu.
3.
Press
Enter
to open the
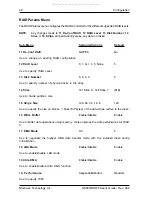
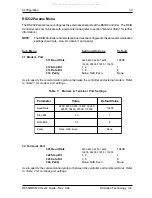
1 RAID Params
menu.
4.
Press
ê
until the
11 Re-Conf RAID
menu is displayed, then press
Enter
.
5.
Press
ê
until the
12 RAID Level
menu is displayed, then press
Enter
.
6.
Select the listing "0, 1, 3, 0+1, 5" to configure the RAID level, then press
Enter
.
7.
Press
ê
until the
13 Disk Number
menu is displayed, then press
Enter
.
8.
Use the
ê
button to select the number of disks to configure for the RAID Controller,
then press
Enter
.
NOTE:
Disk number does not include "Hot Spare" disk.
9.
Press
Esc
to return to the Main Menu.
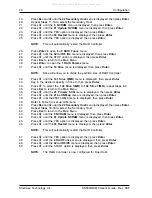
10.
Press
ê
until the
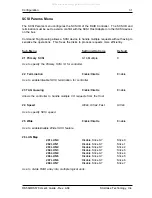
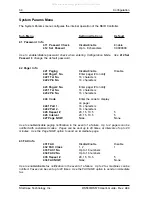
21 Primary SCSI
menu is displayed, then press
Enter
.
11.
Press
ê
until the
211 Set SCSI ID
menu is displayed, then press
Enter
.
12.
Use the
ê
button to select a SCSI ID for the RAID Controller, then press
Enter
.
NOTE:
Default is SCSI ID 0.
13.
Press
ê
until the
212 Termination
menu is displayed, then press
Enter
.
14.
Use the
ê
button to enable/disable SCSI termination for the RAID Controller, then
press
Enter
.
NOTE:
If the RAID Controller is at the end of the SCSI bus, termination should be
enabled. If the RAID Controller is in the middle of a SCSI bus, termination
should be disabled.
15.
Press
ê
until the
213 Tag Queuing
menu is displayed, then press
Enter
.
16.
Use the
ê
button to enable/disable Tag Queuing for the RAID Controller, then press
Enter
.
NOTE:
The default setting for Tag Queuing is enabled. Tag Queuing allows the
RAID Controller to process multiple requests, which improve performance.
17.
Press
ê
until the
214 Ultra
and
215 Wide
menus are displayed, then press
Enter
.
18.
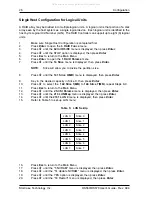
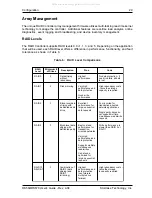
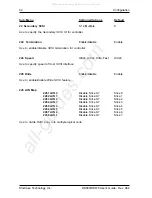
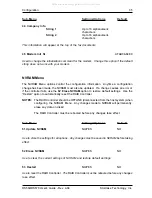
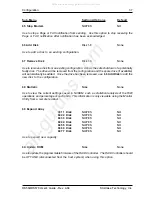
Refer to Table 4 to set-up the SCSI interface of the Host.
All manuals and user guides at all-guides.com
all-guides.com

