60
7.5.3 Creating the Fast Selection Window
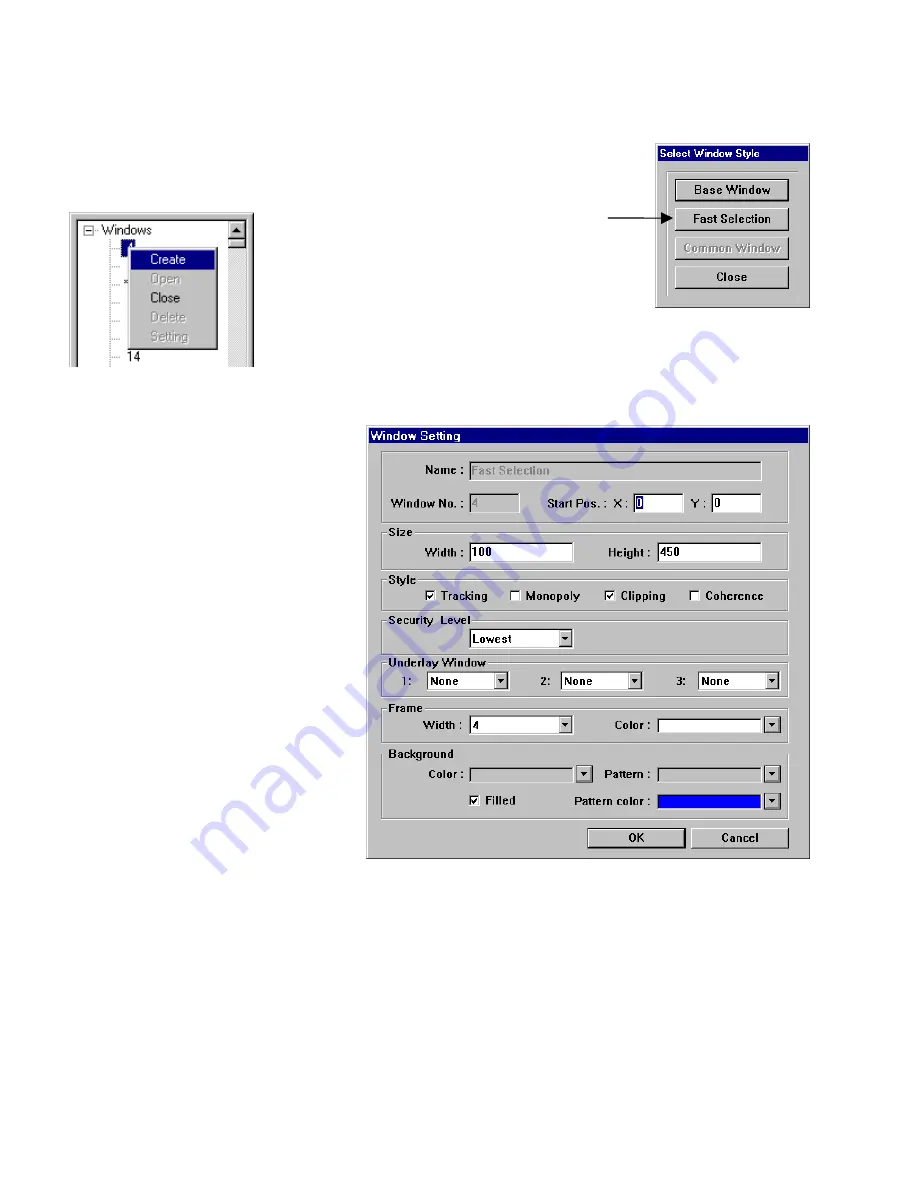
Every new project starts with a default Fast Selection Window. This window can be deleted and a new Fast Selection
window created to fit your needs. To create a new Fast Selection window first delete the existing Fast Selection window.
Select
Window
menu,
Open Window
Click the
New Window….
button, then click
Fast Selection
.
Alternatively, Right click window
4
in the Window
Treebar. Then select
Create
from the pop up menu.
Fill in the blanks of the Window Setting dialog.
Name:
This is always fixed as Fast Selection
Window No.
This is always fixed at 4.
Start Pos.:
Changes to X and Y have no effect.
The Fast Selection is always positioned at the
bottom of the screen.
Size
: Enter the size of the Fast Selection
Window. The Width and Height size are limited.
For 640 x 480 pixel displays range is:
Width:
10 to 200
Height:
10 to 480
For 320 x 240 pixel displays range is:
Width:
10 to 200
Height:
10 to 240
Change of
Style
has no effect.
Security Level
has no effect on Fast Selection
windows. These windows are always
accessible.
Underlay Windows
can be assigned as desired.
Set the
Frame
and
Background
attributes as desired.
Follow guidelines in the section on “Creating New Windows” to place buttons and parts on the Fast Selection Window.
Note:
Any objects that can be placed on a Base window can be placed on the Fast Selection window.
Summary of Contents for MMI-1500
Page 2: ...ii...


