


Long-Range Medium-Load PTZ Camera User Manual
98
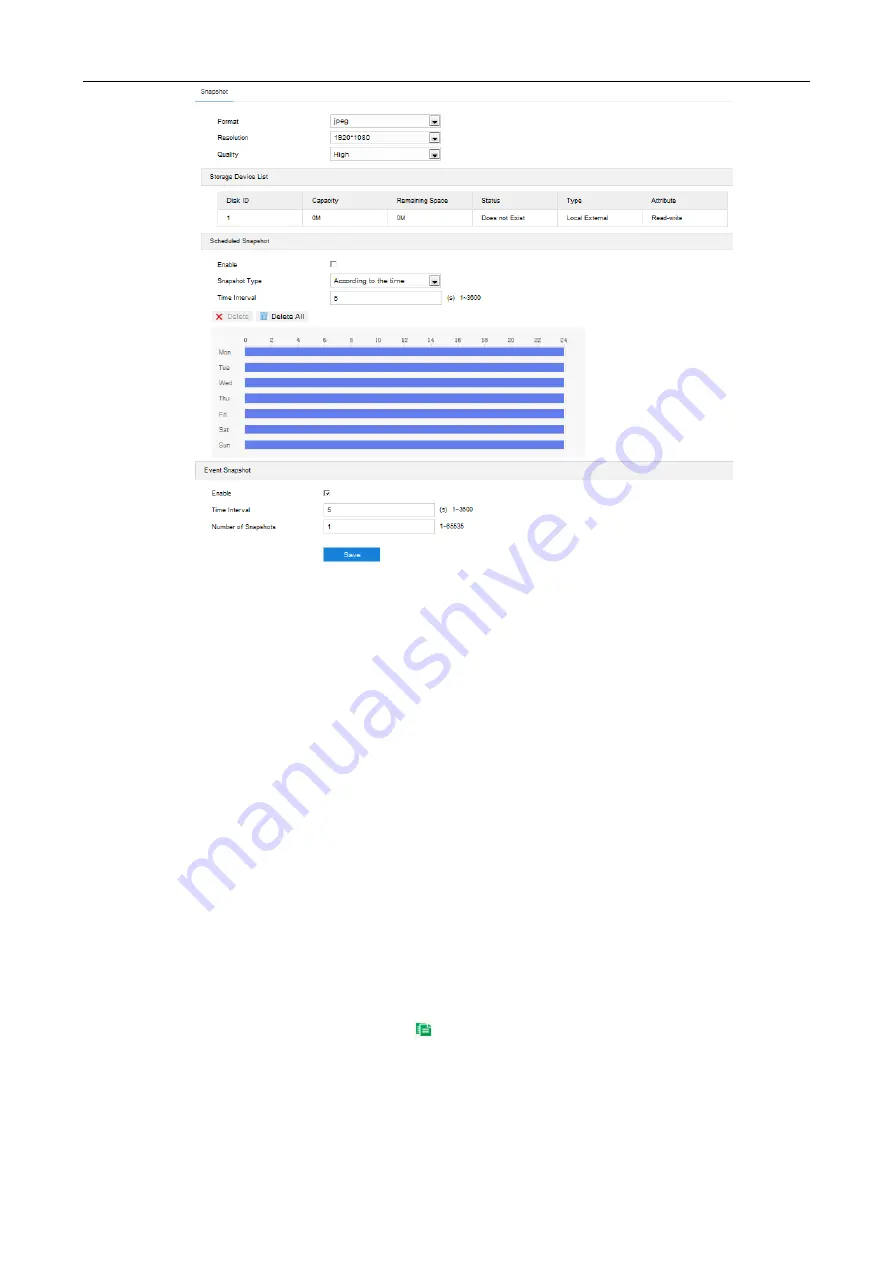
Picture 7-4 Scheduled snapshot
3) Configure scheduled snapshot:
a)
Select “Enable” enable scheduled snapshot;
b)
Snapshot Type: select “According to the time” or “According to the number”;
c) Time Interval: select the interval between snapshots;
d) Configure durations for scheduled recording. The default setting is 24 hours in bright blue bar, or you
can customize the durations;
Set duration: configure arming durations according to actual requirements.
Click the blue bar to pop up a window for editing the accurate start time and end time; click
"
Save
" to validate setting.
Click any duration and there will be small white squares on the 2 ends of it. Put the mouse on any
whit square, left-click and drag the edit the start time and end time.
Select the timeline of any day and delete the default blue bar. Left click on the mouse and drag
on the timeline from left to right to form a blue bar, above which it shows the start time and end
time.
Copy duration: click the copy icon
behind the timeline and copy the durations on the day to one
or several other days.
Delete duration: click "
Delete All
" above the timeline to delete all the durations. Select any duration
and click "
Delete
" on the popup window or above the timeline to delete the duration.


