3. Locate the power cord or cords shipped with the switch; the cords have plugs appropriate for your
geographical location. See
“AC Power Cord Specifications for a QFX Series Device” on page 154
.
WARNING:
Ensure that the power cord does not block access to device components
or drape where people can trip on it.
4. Connect each power supply to the power sources. Insert the coupler end of the power cord into the
AC power cord inlet on the AC power supply faceplate.
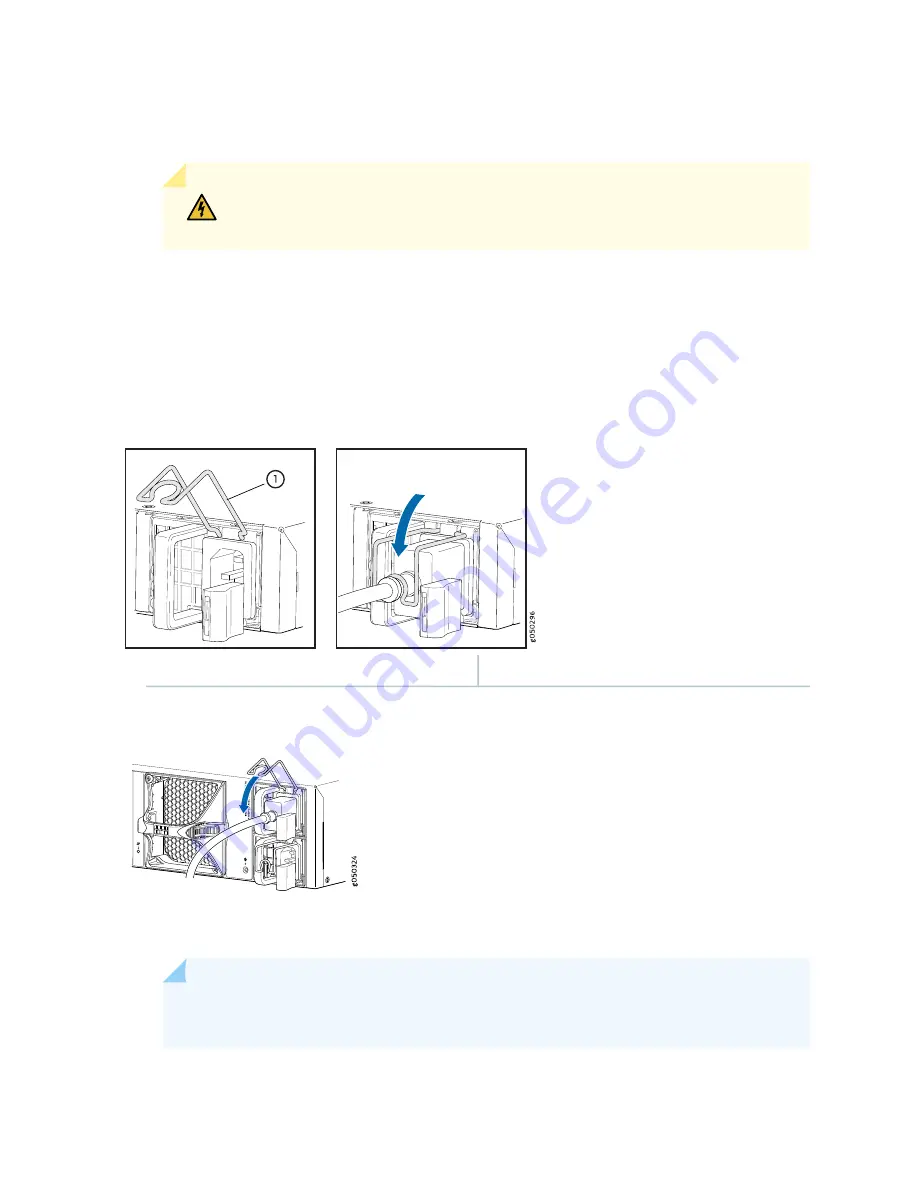
5. Push the power cord retainer onto the power cord (see
and
Figure 74: Connecting an AC Power Cord to an AC Power Supply in a 1 U QFX5100 Device
1
—
Power cord retainer
Figure 75: Connecting an AC Power Cord to an AC Power Supply in a 2 U QFX5100 Device
6. If the AC power source outlet has a power switch, set it to the OFF (O) position.
NOTE:
The switch powers on as soon as power is provided to the power supply. There is no
power switch on the device.
287
Summary of Contents for QFX3500
Page 1: ...Virtual Chassis Fabric Hardware Documentation Published 2020 11 06...
Page 225: ...Translation The emitted sound pressure is below 70 dB A per EN ISO 7779 201...
Page 229: ...205...
Page 238: ...Unterminated Fiber Optic Cable Warning 214...
Page 246: ...Restricted Access Warning 222...
Page 249: ...225...
Page 257: ...Jewelry Removal Warning 233...
Page 260: ...Operating Temperature Warning 236...
Page 271: ...DC Power Disconnection Warning 247...
Page 275: ...DC Power Wiring Sequence Warning 251...
Page 278: ...DC Power Wiring Terminations Warning 254...
Page 410: ...Figure 130 All QFX5110 VCF g050760 Figure 131 QFX5110 VCF with QFX5100 24Q Leaf Devices 386...
Page 412: ...Figure 132 QFX5100 24Q as a Leaf Device in a QFX5110 VCF 388...
Page 565: ...Table 105 System Information continued Description Field Inventory details 541...


