77
Press
!4
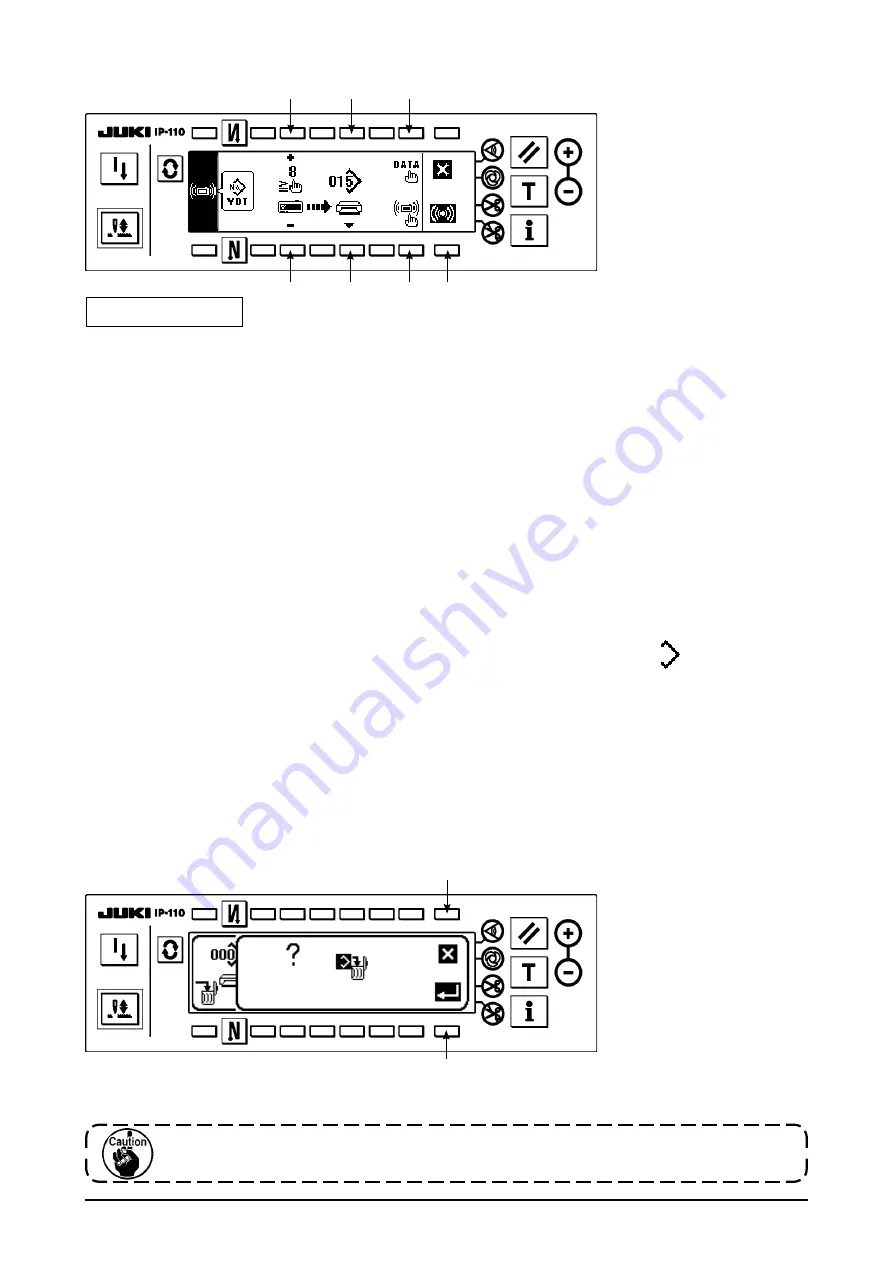
and the deletion is discontinued. Then the screen returns to the file No. input screen. Press
!5
and
the deletion is executed. Then the screen returns to the file No. input screen.
■
Deletion confirmation screen
The deleted file is not restored. Be very careful when executing the deletion.
!4
!5
■
Communication setting screen (upload)
4
5
2
1
3
6
5
Example of upload
Example) Custom pattern No. 8 is uploaded as the vector form file No. 15 of the media.
1) Open the media cover and insert the Compactflash(TM) (Optional Part No. : 40000100) from the insertion
openng.
* Panel functon does not work wth the cover opened.
2) Selecton of data
Press
1
n the communcaton settng screen to dsplay the data selecton screen (refer to p. 75).
Determne the data after selectng the parameter data.
3) Selecton of communcaton method
Press
2
n the communcaton settng screen to dsplay the communcaton method settng screen (refer
to p. 75).
Press
9
n the communcaton settng method screen and press
!0
to determne after selectng upload
from the meda.
4) Settng of the custom pattern No.
Press
3
and
4
n the communcaton settng screen (upload) to set the custom pattern No.
5) Selection of the file No. of the media
Press
5
in the communication setting screen (upload) to display the file No. of the media input screen (refer
to p. 76). Input the file No, of the media with
!1
. The inputted file No. is displayed in . After nputtng the
file No., determine it with
!2
.
6) Start of the upload
When all settng procedures have been completed, press
6
n the communcaton settng screen to start
uploadng. When the screen returns to the communcaton settng screen (upload) after dsplay of the dur-
ng communcaton screen (refer to p. 76), communcaton s completed.
[How to delete the file of the media]
Press swtch
!3
after selecting the No. you desire to delete in the file No. of the media input screen (refer to p.
76), and the screen moves to the deletion confirmation screen.


