


51
2) Press swtch
2
correspond-
ng to the pattern whch
has been regstered n the
custom pattern selecton
pop-up screen.
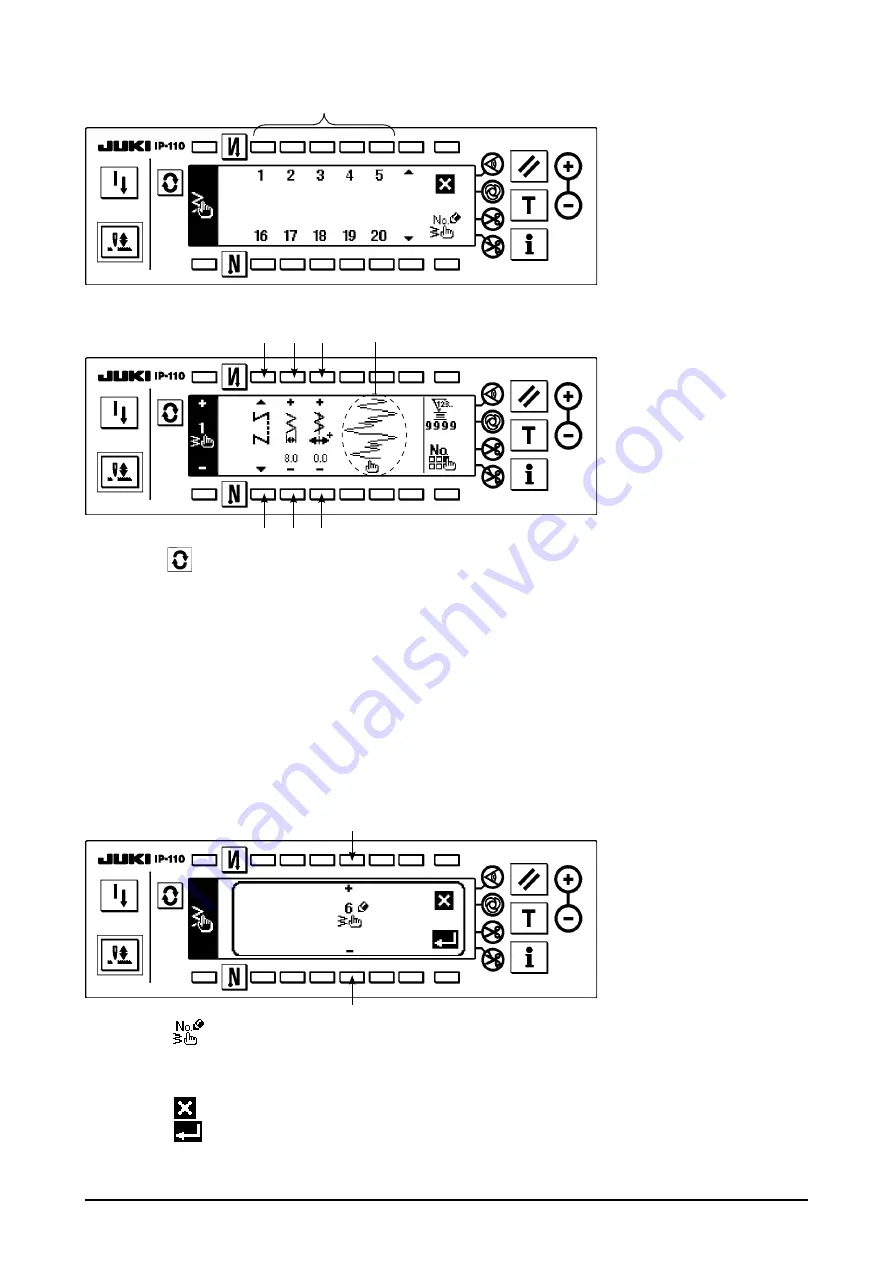
■
Custom pattern selection pop-up screen
■
Sewing shape setting screen
3) Press
to dsplay the sewng shape settng screen.
4) Zgzag wdth, poston of sttch base lne, etc. of custom pattern can be set n the sewng shape settng
screen.
3
: Select free sttchng, overlapped sttchng or programmed sttchng.
4
: Set the zgzag wdth wth “+” and “–”. (The whole can be enlarged or reduced takng the nputted left
and rght postons as reference.)
5
: Set the poston of sttch base lne wth “+” and “–”.
6
: Needle entry poston s dsplayed.
(2) New creation of the custom pattern
Custom pattern s newly created.
■
New creation pop-up screen
1) Press
n the custom pattern selecton pop-up screen to dsplay the new creaton pop-up screen.
2) Nos. whch have not been regstered at present are dsplayed n
1
. Select the No. you desre to ob-
tan wth “+” and “–”.
When
s pressed here, the screen returns to the former one wthout creatng the pattern.
3) When
s pressed, new creaton s performed.
The No. whch has been created s n the selectve state. Contnue to perform the edt of custom pat-
tern.
w
q
q
e r t
e r t
6


