Chapter 1
Getting Started
Exploring the front panel
6
SmartClass E1 Tester User’s Guide
– If the Batt LED is red, replace the batteries (see
). If you suspect that the batteries are fine, and the batteries
are fully charged, it’s possible the charger has detected a fault condition.
See
“Resolving problems” on page 108
for details.
Charging the batteries
The SmartClass Tester uses an AC adapter or four (4) AA batteries (alkaline
or rechargeable NiMH batteries). The first time you use the SmartClass Tester,
or after prolonged storage, use the AC adapter to power the unit and charge
NiMH batteries only. For details on charging and maintaining batteries, see
Chapter 8 “Maintaining the Batteries”
Exploring the front panel
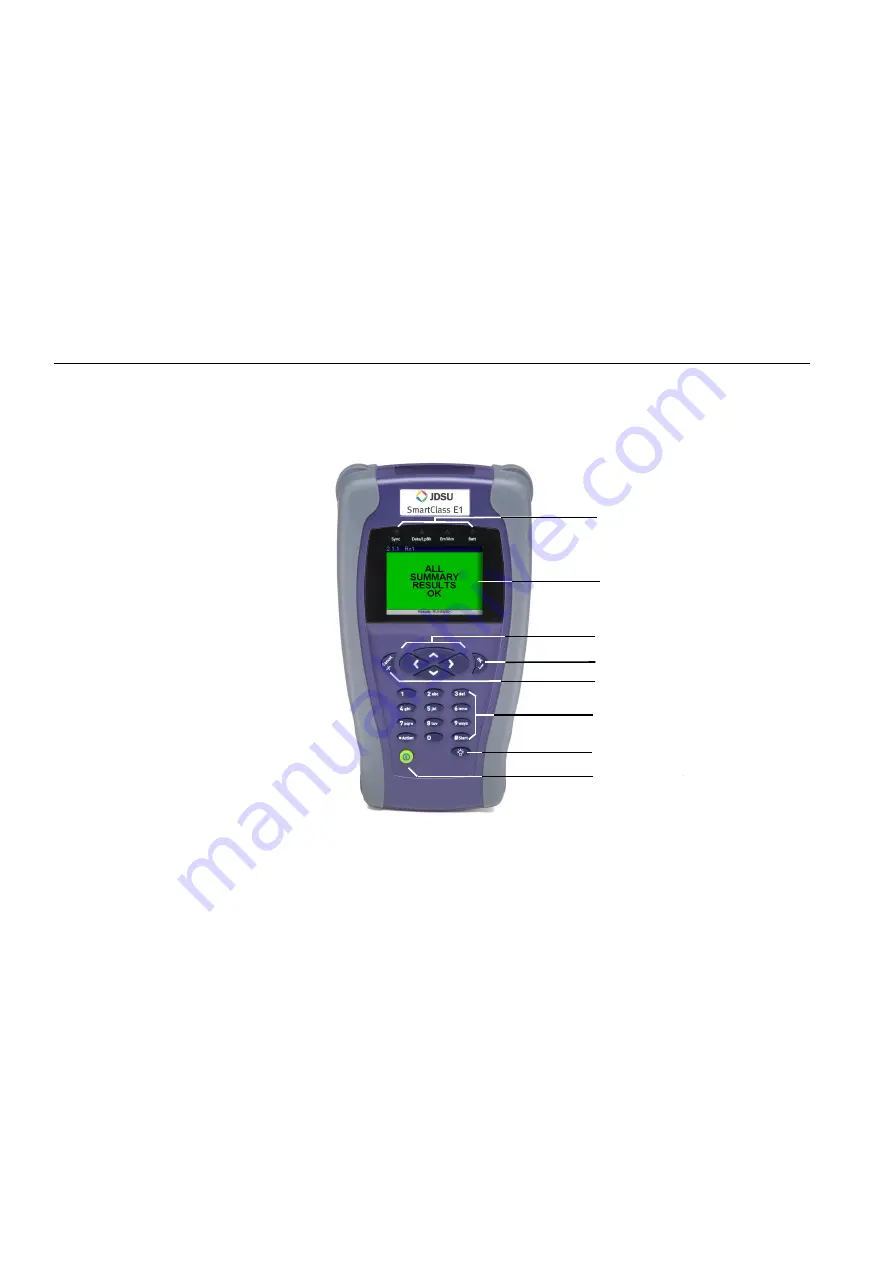
The controls and LEDs on the SmartClass front panel, shown in
, are
used to operate the unit, set up tests, and view data.
The label near the top will say “SmartClass E1/Data”, if you have the
E1/Datacomm configuration.
The following paragraphs describe each of the controls and LEDs on the front
panel.
Figure 1
SmartClass front panel
LCD
Status LEDs
Arrow keys
Keypad
(includes *Action and #Start keys)
OK key
Cancel key
Backlight key
Power key
Summary of Contents for SmartClass E1
Page 1: ...SmartClass E1 and E1 Datacom Testers User s Guide...
Page 2: ......
Page 3: ...SmartClass E1 and E1 Datacom Testers User s Guide...
Page 6: ...iv SmartClass E1 Tester User s Guide...
Page 12: ...Table of Contents x SmartClass E1 Tester User s Guide...
Page 16: ...About this Guide Conventions xiv SmartClass E1 Tester User s Guide...
Page 32: ...Chapter 1 Getting Started Using the keypad 16 SmartClass E1 Tester User s Guide...
Page 38: ...Chapter 2 Instrument Settings Restoring factory defaults 22 SmartClass E1 Tester User s Guide...
Page 66: ...Chapter 4 E1 Testing Testing MFC R2 Signaling 50 SmartClass E1 Tester User s Guide...
Page 118: ...Chapter 7 Test Results Viewing saved results 102 SmartClass E1 Tester User s Guide...
Page 143: ......


