


JCM Part No. 960-000097R_Rev. 3
© 2010, JCM American, Corporation
6 - 3
Programming, Calibration & Test Universal Bill Acceptor (UBA-1x-SS & UBA-x4-SS/SU)
Section 6
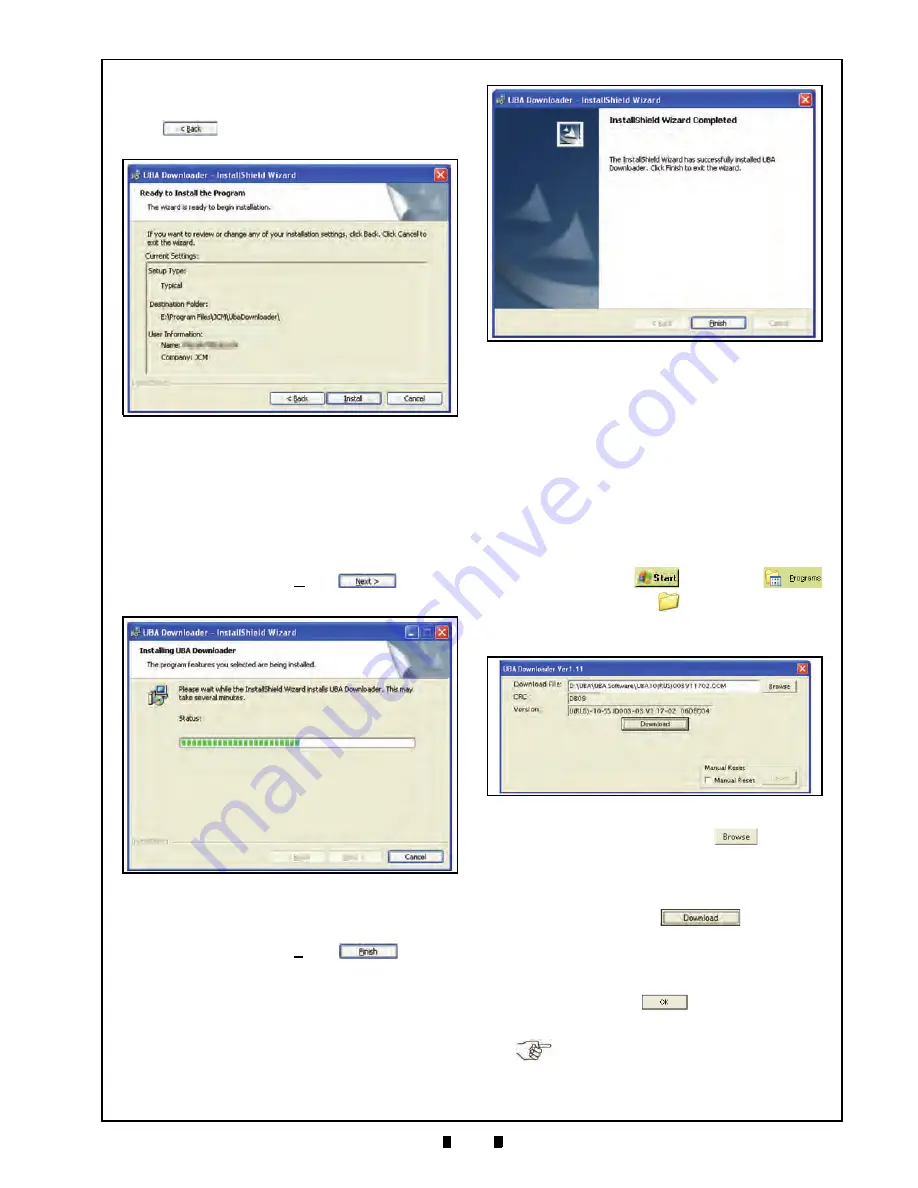
Screen Button to start the installation pro-
cedure. If not, Mouse-click on the
<Back
Screen Button, and re-enter the
information until it is correct.
8. During the installation of the UBA Down-
loader, the Figure 6-8
“Installing UBA Down-
loader”
Screen will appear containing a left-
to-right
Status:
Barograph occurring at
screen center.
9. When the install process is complete,
Mouse-click on the
Next>
Screen
Button to complete the installation.
10. The Figure 6-9 Screen will appear when the
Software installation process is complete.
Mouse-click on the
Finish
Screen
Button on the Figure 6-9 Screen to exit the
InstallShield Wizard Screen.
Programming Instructions
Once the UBA Software Program has been
installed onto the PC Computer, use the following
steps to install the information into the UBA Flash
Memory:
1. Set all UBA Front Panel DIP Switches to
OFF, and
2. Supply power to the UBA.
3. Start the UBA Downloader Application from
your PC’s
Start
Program
[JCM named]
file folder.
When the application opens, the Figure 6-10
Screen will appear
4. Mouse-click on the
Browse
Screen
Button and select the Software shown on the
PC Screen (See Figure 6-11) to be down-
loaded into the UBA flash memory Then
click the
Download
Screen
Button located at Screen Center to begin the
Software downloading procedure.
5. When the Flash ROM download has com-
pleted, Click the
button to close the
UBA Downloader file (See Figure 6-12).
Figure 6-7
Ready to Install Screen
Figure 6-8
Software Installing Screen
Figure 6-9
Installation Finished Screen
Figure 6-10
Initial Program Installation Screen
NOTE: For details involving Jumper settings,
refer to See “Jumper Configurations” on
page 2-9 of Section 2 regarding the setting
of any UBA Unit Jumpers.


