Intec Printing Solutions - Manual for ColorCut LC600 Sheet fed Label Cutter ........................................................................ Page No: 48
Graphics File Design - Creating your Artwork
The ColorCut Pro Plug-in works directly from Adobe Illustrator or CorelDRAW. It requires
the lines for cutting, perforating and creasing to be organised on a single layer. Therefore
when designing with graphics you should organize the graphic design in different layers:
- One or more layers for the main graphics (the printed artwork).
- One layer for the contour (the lines to be cut).
- PageMARKs, the marks that are used for Page Registration are automatically
placed for you on a different (3rd) layer.
Designing using layers makes life easier, because when printing you don’t want to print
the cutting lines or folding lines on your artwork. Equally, when sending cutting lines
to the cutter, you don’t want to confuse the cutter with lines that may be in your printed
design. The layers feature enables you turn layers on or off as required. But in both
cases, you need to have the registration marks available.
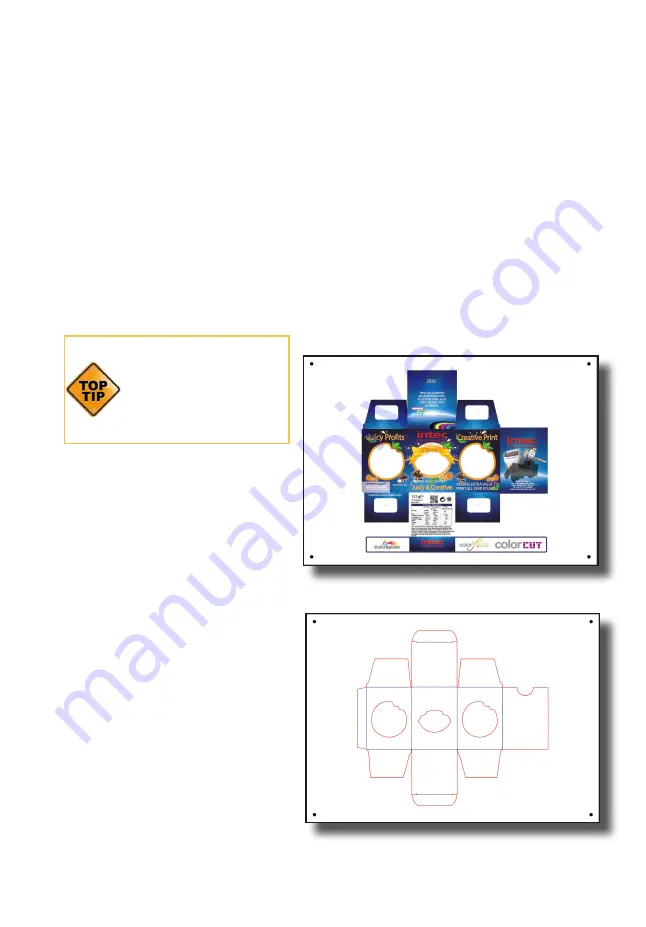
Graphics/Printing layer
Cut contour layer
The most common mistake
people make is to print all the
layers including the contour
layer (the cut lines) that make
the prints unusable in most
cases.
Similar commands are available in
Adobe Illustrator and CorelDRAW to
enable and disable the layers.
In the pictures shown on this page
there is an external frame to indicate
the border of the sheet making it
easier for you to see the page.
Note
: This is for illustration purposes
only.
Also please note: When you open
some PDF format files directly in
Adobe Illustrator or CorelDRAW, very
often you may also find an external
frame on the graphics. You will need
to delete the external frame if it exists
for the file to operate correctly with
the ColorCut Pro software.
Please now read the ColorCut Pro guide on how to design, and get the best out of your
ColorCut pro software.


