WAFER-LX User Manual
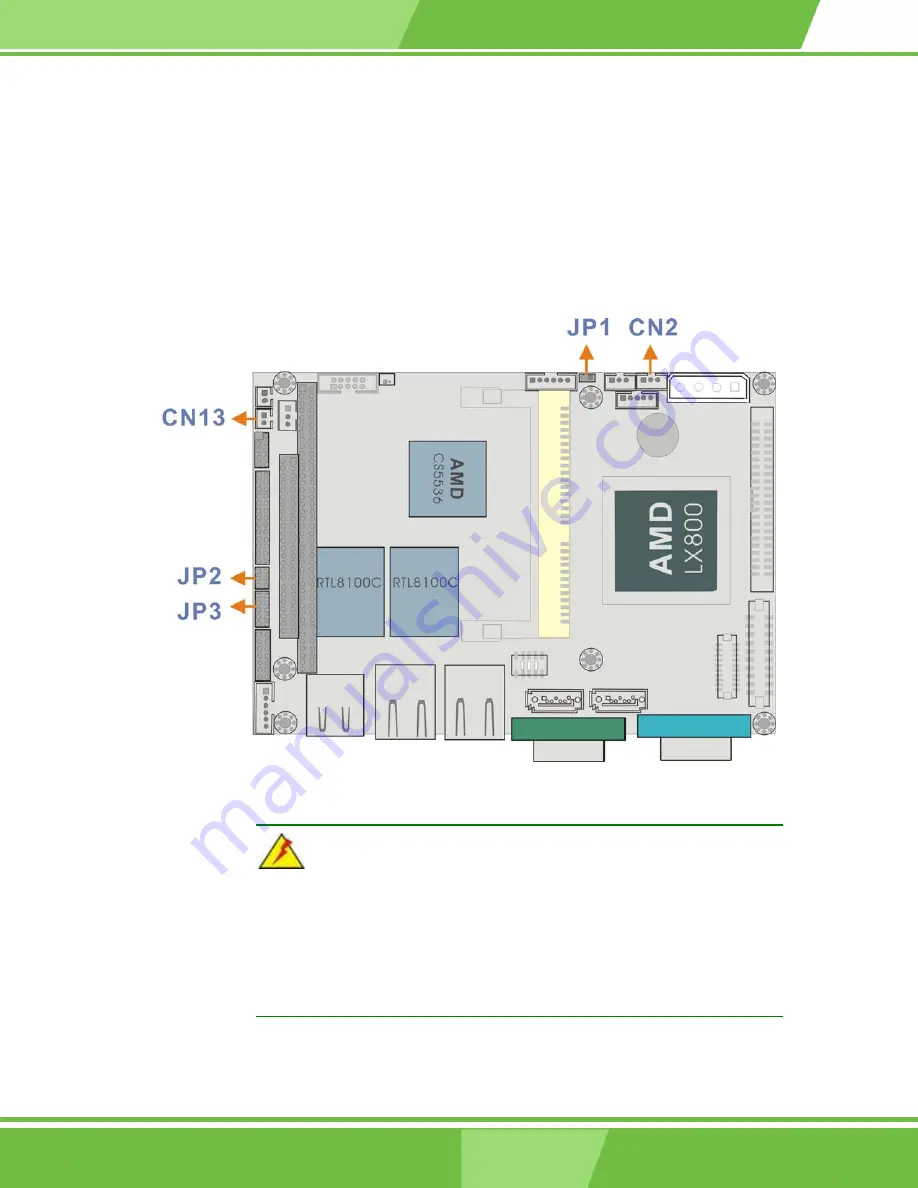
The following notes show how to connect ATX Power Supply to the embedded board.
1.
Using ATX Power Switch
Step 1.
Disconnect the AC cord of the Power Supply from the AC source to prevent
sudden electric surge to the board.
Step 2.
Properly configure the JP1 jumper. Remove the jumper cap from JP1 and
CN2.
Figure B
-
1 ATX
Power
Connection
WARNING!
The new power adapter cable for the WAFER-LX has its “Ground” pin
removed from the 3-pin ATX feature connector. If you connect the
power feature connector cable previously provided by IEI, you will
destroy the WAFER-LX board.
Step 3.
Connect an ATX power button switch (see the diagram above) to the ATX
B-2
B-2
IEI
®
Technology, Corp.
Summary of Contents for WAFER-LX
Page 1: ...WAFER LX 3 5 Profile WAFER Embedded Board User Manual RoHS Compliant ...
Page 11: ...WAFER LX Chapter 1 Introduction 1 1 1 1 ...
Page 13: ...WAFER LX Figure 1 2 WAFER LX Board Layout Soldering Side 1 3 1 3 ...
Page 22: ...WAFER LX Functional Description Chapter 2 2 1 2 1 ...
Page 54: ...WAFER LX Installation Chapter 3 3 1 3 1 ...
Page 66: ...WAFER LX Award BIOS Setup Chapter 4 4 1 4 1 ...
Page 115: ...WAFER LX Watchdog Timer Appendix A A 1 A 1 ...
Page 118: ...WAFER LX User Manual IN AL DX EXIT AP A 4 IEI Technology Corp A 4 ...
Page 119: ...WAFER LX Connecting ATX Power Supply Appendix B B 1 B 1 ...
Page 122: ...WAFER LX User Manual This page is intentionally left blank B 4 B 4 IEI Technology Corp ...
Page 123: ...WAFER LX ALi RAID for SATA Appendix C C 1 C 1 ...
Page 138: ...WAFER LX User Manual This page is intentionally left blank C 16 IEI Technology Corp C 16 ...
Page 139: ...WAFER LX Index I 1 ...


