23
10.3 Time / Date Setting
After you enter the Setup Mode, you will see the following screen with the current date and
time. To adjust the time / date setting, press
<ENT>
, then enter 15 Digits in a
YYYYMMDDhhmmssW format, and then enter
<ENT>
again to confirm.
NOTE:
For the days of the week (W), 1 : Sun, 2 : Mon, 3 : Tue, 4 : Wed, 5 : Thu, 6 : Fri, 7 : Sat.
e.g.
To input August 24, 2009, 13:30:15, Monday, enter 200908241330152.
10.4 Maximum Number of Cardholder IDs
By default, the
FINGER006
is set to store up to 10,000 cardholders and 50,000 events
and
User can’t change Maximum Number of Cardholder IDs because FINGER006 doesn’t have the
controller inside.
10.5 Registering Cardholder IDs
To add new cardholder IDs to the
FINGER006
, enter the Setup Mode (See 10.2 How to Enter
Setup Mode), press
<F3>
. Once the 1.ID registration item appears on the LCD, press
<ENT>
to
begin the ID registration process.
For detailed information on the ID registration process, please refer to “12.3.1 registration”.
NOTE:
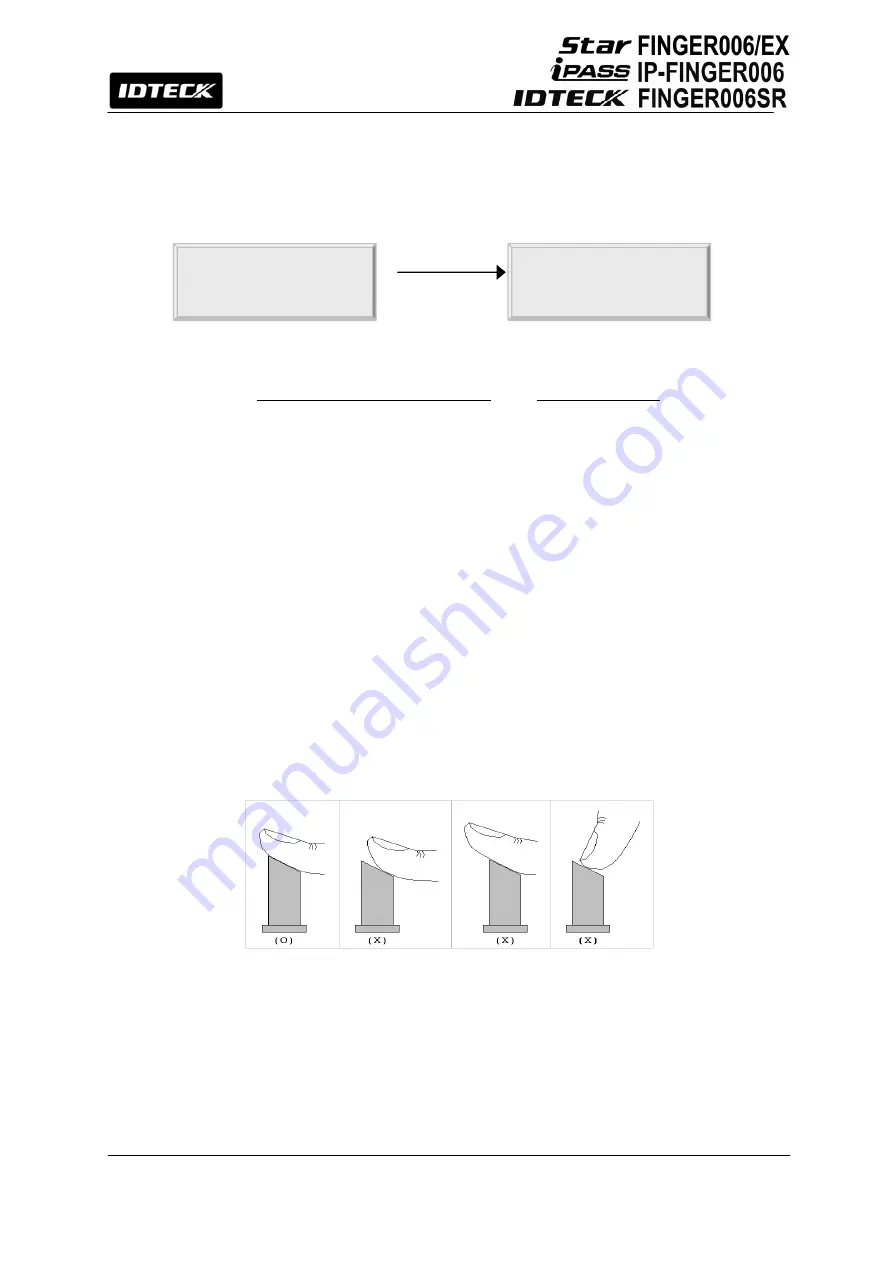
How to place your finger onto the scanner:
When you register or verify your fingerprint, please place your finger onto the scanner correctly
as illustrated below.
Figure: How to Put Your Finger on the Scanner
1. TIME SETTING
MM/DD hh:mm:ss
YYYYMMDDhhmmssW
■
<ENT>
Summary of Contents for Star FINGER006
Page 1: ...User s Manual Fingerprint Identification Proximity PIN Reader...
Page 26: ...26 12 1 SETUP MENU F1...
Page 31: ...31 12 2 SETUP MENU F2...
Page 38: ...38 12 4 SETUP MENU F4...
Page 39: ...39...
Page 49: ...49 16 Template...


