22
10. Basic Setting
10.1 Initialization of FINGER006
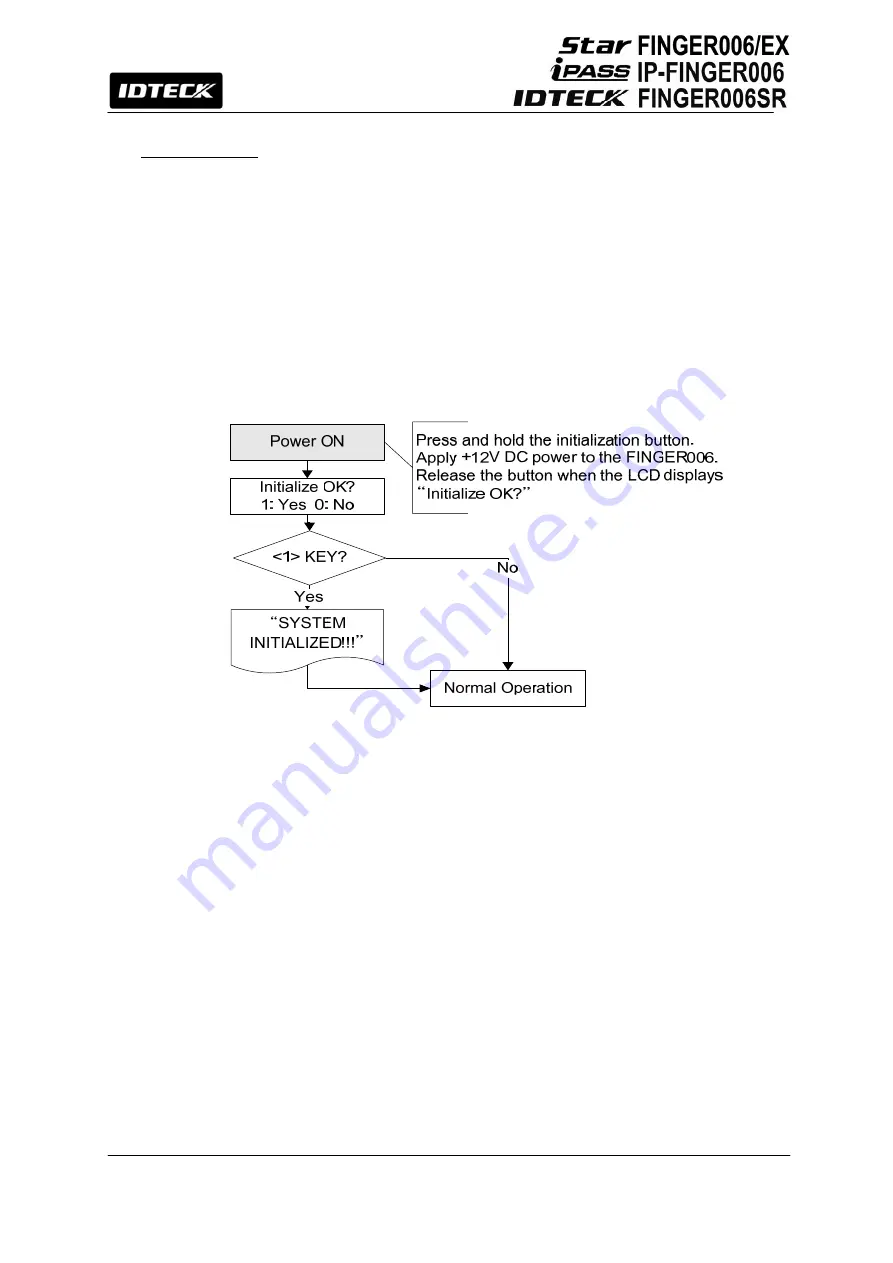
After installation and cable connections are completed, apply power (DC12V) to the
FINGER006
with the initialization button held down. (The initialization button can be found
on the back of the
FINGER006
.) Then, the LCD will first display “
Initialize OK? 1: Yes 0:
No
”. Press
<1>
key if you want to initialize the system or
<0>
to cancel the initialization
procedure. After all the initialization process is completed, the system will be operating in the
normal mode and the LCD will display “
FINGER006 [F1], MM/DD hh : mm : ss
”.
10.2 How to Enter the Setup Menu
For a setup or
FINGER006
setting adjustment, you have to enter the
SETUP MENU
, first.
To do so, press the <
0
> key 8 times for
Master ID
(Default “00000000”) and the user can
get into the SETUP MENU. There are 4 main SETUP MENUs and you first get into [SETUP
MENU F1]. You can move to other SETUP MENUs by pressing <
F1
> key for [SETUP
MENU F1], <
F2
> key for [SETUP MENU F2], <
F3
> key for [SETUP MENU F3], and <
F4
>
key for [SETUP MENU F4]. There are several
SUB MENUs
for each main SETUP MENU
and you can scroll up and down the SUB MENU by pressing <
4
> and <
6
> key in the main
SETUP MENU. You can press the <
ESC
> key to exit the SETUP MENU and return to the
normal operation. You can also change the Master ID in the [SETUP MENU F1]. The
Master ID for
FINGER006SR
is a 10-digit number (Default “0000000000”).
Summary of Contents for Star FINGER006
Page 1: ...User s Manual Fingerprint Identification Proximity PIN Reader...
Page 26: ...26 12 1 SETUP MENU F1...
Page 31: ...31 12 2 SETUP MENU F2...
Page 38: ...38 12 4 SETUP MENU F4...
Page 39: ...39...
Page 49: ...49 16 Template...


