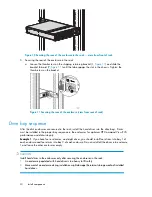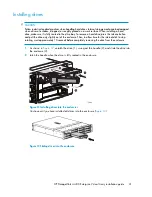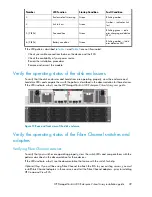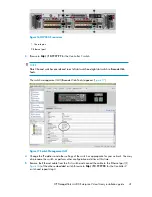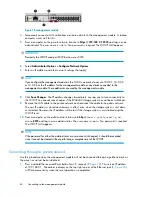
Figure 18 management module
4.
Temporarily connect a LAN cable from a private network to the management module. A laptop
computer works well for this.
5.
From a computer on the private network, browse to
https://192.168.0.1:2373
and log in as an
administrator. The user name is
admin
. No password is required. The WOCP GUI appears.
IMPORTANT:
Previously the WOCP used port 2372 but now uses 2373.
6.
Select
Administrator Options > Configure Network Options
.
7.
Enter an IP address and other network settings that apply.
NOTE:
If you configure the management module in the 10.0.0.x network, do not use 10.0.0.1, 10.0.0.2,
or 10.0.0.3 as the IP address for the management module or any device connected to the
management module. These addresses are used by the management module.
8.
Click
Save Changes
. The IP address changes immediately, causing you to lose connectivity to
the WOCP. You cannot save changes if the EVA4400 storage system has not been initialized.
9.
Remove the LAN cable to the private network and reconnect the cable to the public network.
The new IP address is stored and remains in effect, even when the storage system is shut down
or restarted. However, the IP address will be lost if the storage system is uninitialized and the
WOCP reset.
10.
From a computer on the public network, browse to
https://
newly configured ip ad-
dress
:2373
and log in as an administrator. The user name is
admin
. No password is required.
The WOCP GUI appears.
NOTE:
If the password for either the administrator or user account is changed, it should be recorded
since it cannot be cleared without performing a complete reset of the WOCP.
Connecting through a private network
Use this procedure when the management module will not be connected through a public network or
the array has not yet been initialized.
1.
Press and hold the recessed Reset button for 4–5 seconds (2
). This sets an IP address
of 192.168.0.1. The amber indicator on the top right corner of the Ethernet jack (1,
)
will flash momentarily when the reset operation is completed.
Connecting to the management module
44
Summary of Contents for StorageWorks 4400
Page 16: ...Figure 4 Installation checklist cont d About this guide 16 ...
Page 20: ...Review and confirm your plans 20 ...
Page 24: ...Remove product from packaging 24 ...
Page 36: ...Connect cables and power cords 36 ...
Page 48: ...Configuring management servers using HP SmartStart EVA Storage 48 ...
Page 50: ...Configuring application servers for Windows using HP SmartStart EVA Storage 50 ...
Page 78: ...Configuring non Windows application servers 78 ...

