1.
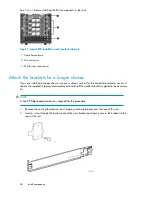
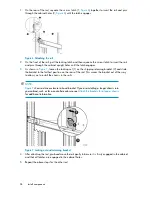
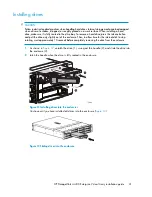
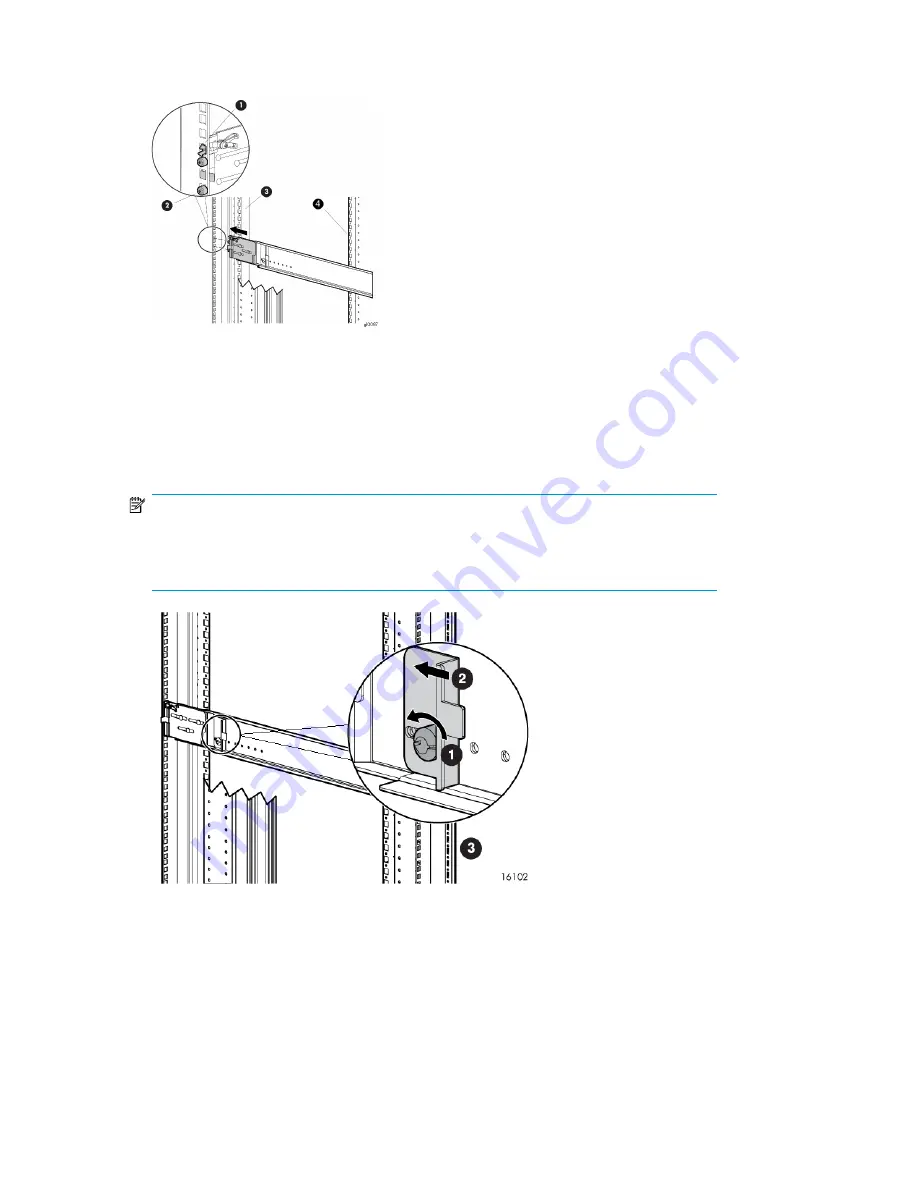
On the rear of the rail, squeeze the scissor latch (1,
) together to insert the rail and pins
through the cabinet holes (2,
) until the latch engages.
Figure 6 Attaching the rail
2.
On the front of the rail, pull the locking latch and then squeeze the scissor latch to insert the rail
and pins through the cabinet upright holes until the latch engages.
3.
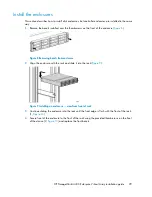
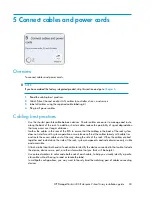
As shown in
, loosen the locking nut (1) on the shipping retaining bracket (2) and slide
the bracket to the farthest position on the rear of the rail. This moves the bracket out of the way
to allow you to install the chassis in the rails.
NOTE:
Figure 7
shows a drive enclosure rail and bracket. If you are installing a longer chassis into
your cabinet, such as for a controller enclosure, see
Attach the brackets for a longer chassis
for additional information.
Figure 7 Locking nut and retaining bracket
4.
After attaching the rail, grab and move the rail gently to be sure it is firmly engaged in the cabinet
and that all latches are engaged in the cabinet holes.
5.
Repeat the above steps for the other rail.
Install components
28
Summary of Contents for StorageWorks 4400
Page 16: ...Figure 4 Installation checklist cont d About this guide 16 ...
Page 20: ...Review and confirm your plans 20 ...
Page 24: ...Remove product from packaging 24 ...
Page 36: ...Connect cables and power cords 36 ...
Page 48: ...Configuring management servers using HP SmartStart EVA Storage 48 ...
Page 50: ...Configuring application servers for Windows using HP SmartStart EVA Storage 50 ...
Page 78: ...Configuring non Windows application servers 78 ...


